 Advanced Disk Recovery
Beware Of Fraud Calls & Emails
It has come to our notice that certain people/companies may be impersonating Systweak Software and/or other reputed companies, and are contacting users to promote their services in our name via fake emails and calls.
Please note Systweak Software does not make any unsolicited calls nor sends emails to anyone regarding errors on devices or internet browsing or any such other device issues.
We urge you to beware of any such scammers and request you to NOT call back any number provided in the email or via caller ID in case you receive any unsolicited calls or emails.
Please reach out to us at report@systweak.com in case you come across any such scammers and fraudsters impersonating Systweak Software.

Advanced Disk Recovery / Getting Started / User Interface - Advanced Disk Recovery
User Interface - Advanced Disk Recovery
The recovery tool when launched displays a screen with 5 steps in the left pane.
Step 1 Welcome – 
Divided into 2 sections, this step helps select an area & drive to scan. Once that's done by hitting Start Scan Now, scan to initiate the scan.
- Select the areas to be scanned for deleted files and folders
- Select Drive –

From here select the area to scan, like Hard Drive/ CD/DVD/Removable/ or Partitions.

Two scanning modes:
Once you click the blue  button you will get two scanning options Quick and Deep, to select from.

Using either of these options you can perform scanning and recover deleted or lost files.
- Quick Scan- identifies the deleted files from the Master File Table, where information about each file and its attributes is saved. It is faster than a Deep scan.
- Deep Scan - this scan type performs a detailed sector-wide scanning and identifies deleted files based on signatures. It is in-depth, thorough, and time-consuming.
Note: To go back to the default setting click the Default button. Also, to avoid seeing the Scanning types, checkmark the box next to Don't show this window on the next scan. You can also set these settings through the "Settings" tab.
Step 2 Scanning - 
This next step, alongside showing a scanning progress bar, displays the drive name, file system, size of the disk, and the number of deleted file(s) found.

Using the Cancel  button present at the bottom right corner you can stop the scan process.

Step 3 Scan Results - 
Once the scanning is done, Advanced Disk Recovery displays scan results in a table format. From here, select the files to retrieve and hit Recover  button. In addition to this, you can click Filter Options
  button to customize scan results and can review detected files by clicking the Preview
  button.


Full-screen  - Don’t want to use the scroll bar see file Attribute, State, and Comment. Click the Full-screen option to view detailed scan results.

To go back to normal mode, click the X button present in the top right corner.
Table of Scan Results (explanation):
All the items of the selected drive are listed under 8 columns namely File Name, Extension, Location, Size, Last Modified, Attribute, State and Comment. The items listed can be sorted column-wise by clicking on the column headings.
Against each item in the table, a check box is placed to select it. Furthermore, a small White Arrow can be seen against the detected items. When you click it, it turns to a “Black Arrow” and shows the extended folder tree. The folder tree can be further extended following the same procedure as the arrow buttons.
Step 4 Recover - 
Once the files to recover are selected, browse to the folder or location where you wish to save the recovered files.
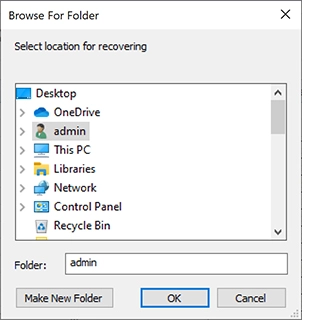
If you want, you can also Make New Folder and restore files and folders in it.
Files and folders to be retrieved should not be saved in the original location. Doing so reduces the chances of data recovery.


Step 5 Finish - 
Once the data recovery process is completed, a summary of the recovery process is displayed. The summary shows:
- Total files scanned:
- Total deleted files found:
- Total files selected for recovery:
- Totals files recovered:
- Total files remaining:

To restart the undelete process click Recover more files  button.
However, if found the file you are looking for click the “Finish”  button.
Settings Tab
The settings tab has two options, "Scan Options" and "Filter Options" in the left pane.
Scan Options
Scan options are divided into the following segments:
General
- Check file header for extensions - Selecting this option instructs Advanced Disk Recovery to examine each file closely and check the file header information for correct file extensions and conduct a more logical search. Unless this option is selected the other two choices will be greyed out.
- Check all files both deleted and existing - includes both deleted and existing files in the search.
- Add correct extension if necessary - use this option to correct the wrong file extensions based on file header information.
- Show Scan Types before the scan starts - select this option to allow Advanced Disk Recovery to show the Scan Types (Quick Scan and Deep Scan) before the scan operation. This helps choose the scan type before every recovery process.

Scan Types
- Quick Scan- identifies the deleted files from the Master File Table, where information about each file and its attributes is saved. It is faster than a Deep scan.
- Deep Scan- this scan type performs a detailed sector-wide scanning and identifies deleted files based on signatures. It is in-depth, thorough, and time-consuming.
Hit the "Save Settings"  button to apply all the changes. To restore original settings, click the Default
  button.