 Photos Recovery


Systweak Photos Recovery / How to Use Photos Recovery / Recovering Data from Existing Volume
Recovering Data from Hard Disk
Using Photos Recovery you can preview and recover any type of lost images, audio, or video from a hard disk, partition, or removable drive. The tool for user’s ease shows scan results in List and Tree view which helps in recovering data easily.
Scanning the Hard Drive:
1. Launch Photos Recovery.
2. On the home screen under the Hard Drive tab you will see all the drive letters of in which hard disk is partitioned.

While, Partitions tab lists the drive partitions and Removable Drive tab shows all the connected external media from which you can recover data.


3. Once you have selected the storage device that you wish to scan, select from the scan type - Quick Scan or Deep Scan.
By default, Photos Recovery runs Quick Scan.
Quick Scan - As the name suggests, this scan type is faster than Deep Scan and it looks for recoverable photos, videos, or audio files that were permanently deleted using Shift + Delete.
Deep Scan - this scan type is in-depth and thorough. If you have lost a photo, video, or audio file due to hard disk formatting or a corrupt drive, use this method. Deep Scan performs a systematic sector-wise scan, helping recover the maximum number of deleted photos, videos, or audio files.

5. Click Start Scan and wait for the scanning process to finish. You'll be able to see the number of deleted photos, videos, or audio files found.

6. If at a given point of time you wish to cancel scanning you can do so by clicking the Stop Scan option.


We do not recommend stopping the scan, as it will give incomplete results.
7. You'll now see the scan result with all files selected. If you don't want to recover all of them, select the photos, videos, or audio files you wish to recover and click the Recover button.

8. Select the location where you want to restore the files. Make sure that it is not the same location from which you are retrieving the files, as doing so will reduce the chances of data recovery.

Note: If you mistakenly selected the same location to restore photos, videos, or audio files, Photos Recovery will show a warning message.

9. After the location to recover photos, videos, or audio files is selected, Photos Recovery will start the recovery process.

By clicking Stop Recovery you can stop the deleted photos, videos, or audio files recovery process.
10. Once the photos, videos, or audio files recovery is done, selected photos, videos, or audio files will be saved to the location you picked. You will then see a summary of the photos, videos, or audio files recovery.
- Total Files Found
- Total Files Selected
- Total Files Recovered
- Recovered File Size
- Recovered at - Location where files are restored
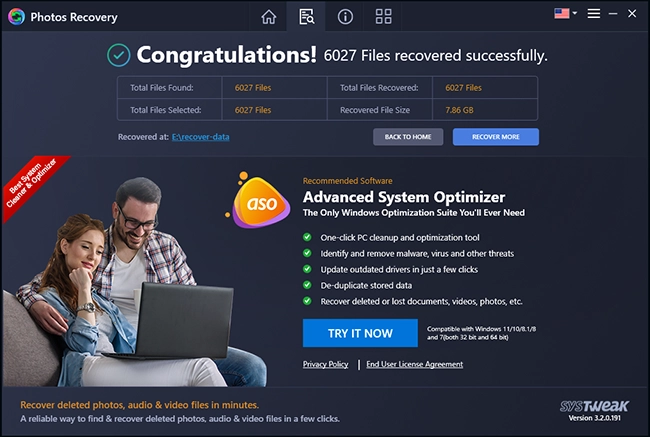
Recover More - clicking this button will take you to the scan results window from where you can select more files to recover.
Back To Home - will take you back to the Home screen.
Note: You can scan a drive locked by BitLocker.