Installing and uninstalling applications is one of the most basic operations performed on a PC. While applications can be easily uninstalled, some associated files are left behind. Hence, they should also be removed for optimized PC performance.
Let’s talk about Windows, in particular. The uninstaller utility embedded in the operating system is quite efficient. Still, it leaves residual files for some applications while removing them.
The best way to eradicate these leftover files is to either manually remove them or use a third-party uninstaller that is more effective for uninstalling programs on Windows.
Today in this post, let us understand precisely how to deal with these leftover files and the better way to uninstall an application.
Why is It Important to Remove Leftover Files?
Every application on your PC creates a user file, a few temporary files, and files you save. But once it is uninstalled, these files are no longer helpful. Therefore, before they take up unwanted storage space, slow down system performance, and clutter disk space, it’s best we delete them.
Best Ways to Remove Leftover Files and Traces after Uninstalling a Software
1. Manually Delete Files From AppData
AppData and Program Files are two folders on your computer where you can find leftover files from any uninstalled applications. The best way to remove these files is to navigate to these folders, examine the files, and remove them.
However, there are times when the AppData folder doesn’t show up on Windows. Well, if you too are unable to find it, follow these steps to open the AppData folder on your PC –
- Press Windows + R to open your Run search box.
- In the Run search bar, type %appdata% and hit enter.
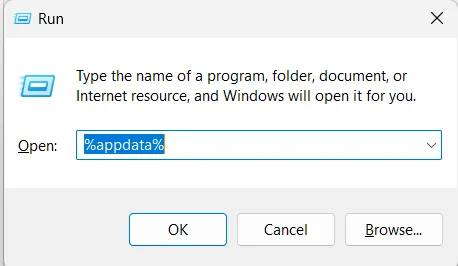
- This will take you directly to the AppData folder on your PC.
- Look for the folder corresponding to the application you removed.
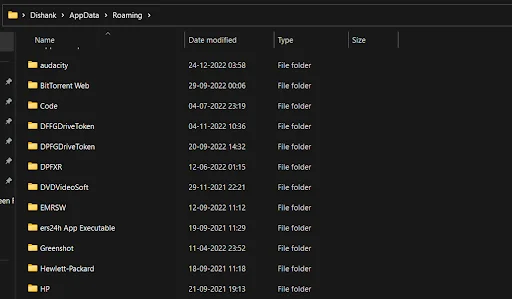
- Select the folder > open it to check if there is anything useful. If not, use Shift + Delete to remove it directly.
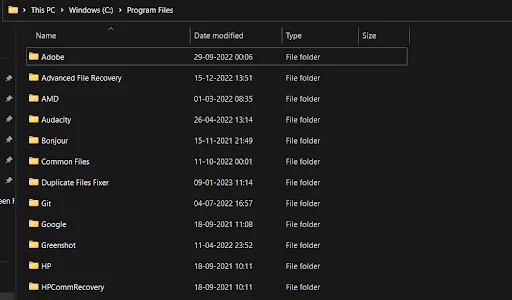
2. Remove Unnecessary Files From the Program Files Folder
After clearing the files from your AppData folder, access the program files folder. It is found on the Windows drive on your PC, usually C: However, you do not have to worry about locating the folder. All you have to do is follow the given instructions –
- Press Windows + R to open the Run window.
- Type – %program files% and hit enter.
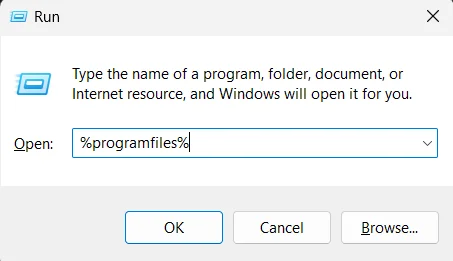
- This will take you directly to the program files folder. Find the folder corresponding to the uninstalled application.
- Screen the folder’s contents, as program files often hold media files you might have created. Once ready, delete the folder directly from File Explorer using the Shift+Delete keys.
3. Remove Leftover Temporary Files from Your PC.
Another type of file you need to take care of is temporary files. These are created when you use an application and are saved to make the entire user experience snappier. To remove these files, open the Run Search window again.
- In the Run Search Window (Windows+R), type %temp% and hit enter.
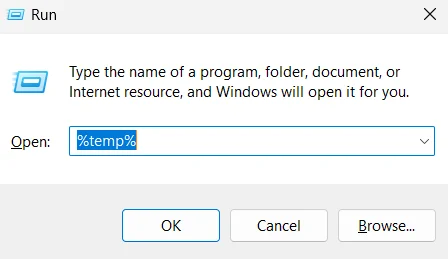
- This will open the temporary files folder.
- Don’t panic, as there’ll be hundreds and thousands of files depending on your installed applications.
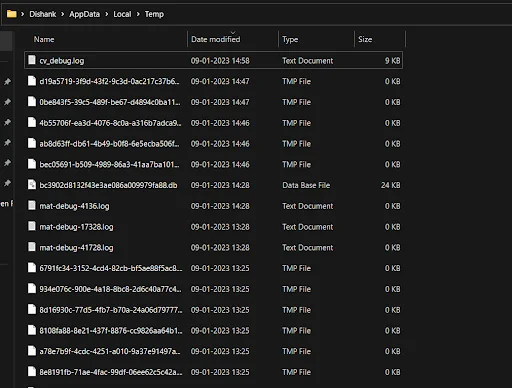
- The best part about the temporary files is that they keep creating themselves as you use an application. So it is OK to delete them as all your open applications will create one again!
- Select all with Ctrl+A and then press Shift+Delete to remove the temporary files.
Removing these files clears the traces and leftover files that an uninstalled application might have left on your computer.
Recommended Way to Uninstall Software Without Leaving Leftovers
Manually removing leftover files isn’t easy, as you need to keep switching from one folder to another. Ideally, during software uninstallation, these files should be removed. However, since that is not the case, try a third-party PC optimization solution that offers an uninstaller to save yourself from this hassle.
For instance, Advanced System Optimizer is a PC utility suite with some of the finest tools. It has a dedicated Uninstall Manager that removes software along with all associated files in a go.
You can download the application from the link below and check out the feature.

Remove Leftovers of Uninstalled Software from their Roots!
Software is uninstalled when it is either buggy or not being used often. Removing every file associated with it is always good, as it helps regain wasted storage and makes more space for other applications. However, doing it manually requires a lot of time and patience. Hence, if you want to save yourself from this trouble, try Uninstall Manager module offered by Advanced System Optimizer. It is the best way to boost PC performance and uninstall the software without leaving leftovers.
We hope this post helps you understand why it is important to remove leftovers and how it can be done. Try these ways to remove the traces and see the difference for yourself!
Good Luck!
Recommended :
High-End PC Running Slow? Here are the Things that Need to be Fixed!
Is it Safe to Use a Third-Party PC Cleaning Software on Windows


A very simple, precise and clear article. Thank you Dishank.
Dear Shaz
Thank you for you feedback.
Thanks and Regards