Do you want to learn how to recover deleted photos from a laptop or desktop that has been formatted? This post explains how you can do it using the best format photo recovery software. You can restore erased images after formatting a computer in simple steps.

Keeping photos on a laptop or PC hard drive is common. Unlike a camera memory card and USB flash drive, a hard drive have more storage space. Therefore, most individuals follow this practice. However, the chances of losing or accidentally deleting photos are still there.

Reasons for formatting PC that Causes Removal of Photos
- Selecting the wrong partition while re-installing OS. This might cause the wiping of images from the accidentally formatted partition.
- Virus attack making partitions inaccessible.
- Erroneous file system, re-partitioning, re-sizing, and other similar cases.
- Forgetting to take a backup before formatting the hard drive makes users lose essential images and documents.
When this happens, feeling helpless and looking for ways to recover photos after formatting a PC or laptop is normal. Fortunately, you’ve landed on the right post. Here, we will explain how you can restore deleted photos from your PC after formatting the hard drive.
Pre-requisite – To make a successful photo recovery from a formatted drive, ensure no data is overwritten. Doing so will help retrieve data even after formatting the hard drive. In addition to this, avoid using the hard drive and perform photos recovery immediately.
Formatted Image Recovery Software – Photos Recovery
To help recover pictures from a formatted hard drive on a laptop or PC. Several data recovery software is available. We suggest using Photos Recovery. It is one of the most popular data recovery programs that help retrieve images from a formatted laptop or PC. Using it, you can recover pictures from any storage device.
| Category | Details |
| Supported Devices | PC/Laptop, External Hard Drive, USB, SD Card, Memory Card, etc. |
| Supported File Types | Photo, Videos, and Audio Files. |
| Supported Data Loss Situations | Formatted Data Recovery, Virus Attack Recovery, Deleted File Recovery, Lost Partition Recovery, & OS Crash Recovery. |
| Supported OS | Windows 11/10/8.1/8/7. |
Systweak Photos Recovery is one of the top photograph recovery tools for the Windows platform. Compared to its competitors, the tool outperforms scanning speed, media file recovery, and usability. It is the best option for recovering images, video, and audio after formatting your laptop, PC, or storage devices.
Also Read: How to Recover Deleted Audio files
How to Recover Data After Formatting PC – Photos Recovery
One reason that makes Photos Recovery so popular is its straightforward and intuitive interface. With its help, anyone can retrieve deleted or lost media files. To recover images from your computer’s formatted hard disc, follow these steps:
Note: Instead of installing Photos Recovery on the formatted driver, we recommend installing it on a different disk.
Step 1: Download and install Systweak Photos Recovery by clicking the button below:
Step 2: Launch the media file recovery software to retrieve images from a formatted drive.
Step 3: Select the accidentally formatted hard drive > select the scanning mode.
The formatted drive photo recovery tool offers two scanning modes – Quick Scan and Deep Scan.
Quick Scan helps retrieve recently deleted audio, video, and image files. In comparison, Deep Scan is used for in-depth scanning. We suggest using Deep Scan.
Step 4: To start the process click START SCAN.

Note: To scan an SD card or attached storage device, click the Removable Drive tab.

Step 5: Wait for the formatted hard drive recovery software to finish scanning the PC for lost media files. If you are running Deep Scan it might take a while depending on the size of the storage disk and the amount of deleted data.

Note: If you perform Quick Scan and no deleted media files are found, Photos Recovery will ask permission to move to Deep Scan. We recommend clicking YES.

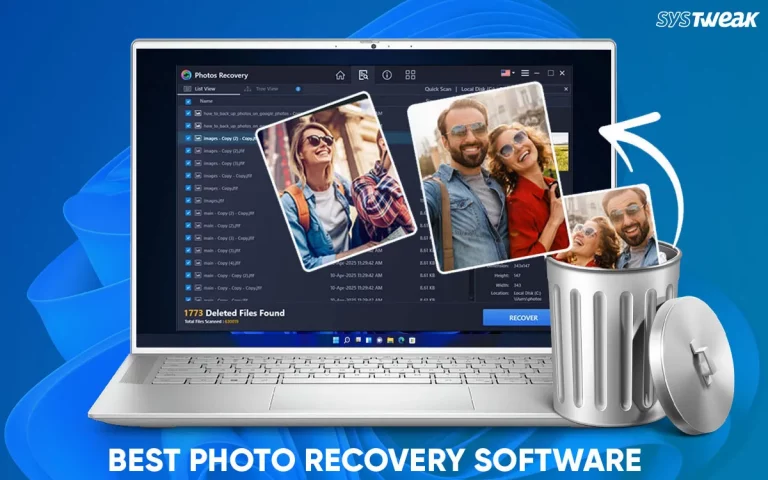
Step 6: You will now get a list of deleted photos audio and videos that you can restore. Preview the search results. Select the images that you want to recover and click “RECOVER”.

Step 7: Select a different location to save data.
Note: Saving data on the same drive overwrites data and reduces the chances of data recovery.

Step 8: Wait for the recovery process to finish.
This is how using Systweak Photos Recovery; you can get back your precious memories.
Read Also: How to Recover Photos After a Data Loss
Additional Tip: How to Protect Data on Your Laptop/PC
Each one of us in our life has experienced data loss. Therefore, to prevent data loss after a disaster, it’s good to back up your computer regularly. This will reduce the possibility of total data loss. You can back up your laptop hard drive, partition, files, and other data to cloud storage using Right Backup.
However, if you don’t want to use a tool, you can use an external hard drive. The only point here is that you can keep yourself and your data protected from unforeseen circumstances by keeping a backup of data.
Wrap Up –
You can get back lost photos by formatting the hard drive using Photos Recovery. We hope you were able to retrieve almost all the images. Please let us know how well the tool worked for you. For product-related questions, send an email to support@systweak.com.
Related: How To Recover Deleted Photos After A Malware Attack