PCs and the internet are all about multitasking. The internet has flooded an average user with insane content, and users work hard to keep up with the latest content published/streamed by their favorite creators. Sometimes, the live stream schedules get so mixed up that sacrificing one of the favorite streams to watch another is the only choice left. If you are also doing the same, you must learn how to record two streams simultaneously.
Is it Possible to Record Two Streams at the Same Time?
Most of you may be thinking, how is it possible? Well, the answer is simple: technology! Thanks to the latest screen recording tools, you can use screen-capturing technology and make the most of your available time. You can not only watch one and record the other using region-specific recordings, but you can even record your Webcam stream if you plan to show a reaction or add value to the stream.
Applications such as the Advanced Screen Recorder offer region-based recording and webcam feed recording simultaneously, enabling you to capture two streams.
How To Record Two Streams Simultaneously on Windows?
Advanced Screen Recorder is an easy way to record two streams. It is an all-in-one recording software with full-screen recording, a selected region, a window, and webcam options. The tool helps capture screenshots, record screens, add watermarks to recorded videos, display mouse clicks, and auto-stop and auto-split videos.
It also saves video in MP4, AVI, and FLV; the paid version allows you to screen record without a time limit.
Key Features:
- Capture video in 4K and with an FPS of up to 120.
- Simultaneously record two screens.
- Auto split and auto stop recording.
- Record screen with internal or external audio.
- Trim recorded video.
- Add text while recording.
Step 1: Download and install the screen recording program on your Windows PC.

Step 2: If you have the key, register the product. However, you can use the trial version to try Advanced Screen Recorder.
Remember, the FREE version gives you 2 chances to record video without a time limit and watermark. After that, you can record the screen with a time limit of 10 minutes and a watermark.

Step 3: Next, select recording options from the screen. Suppose you want to record the complete screen pick. Use the “Full Screen” option. Similarly, to record a specific region, go with Select Region. However, to record two screens properly, we suggest using Full Screen.

Step 4: Before you click the Record button, click the three stacked lines > Settings > Record to make any changes to the settings. Change the output format, set the quality, frame rate, etc. Close the window.

Step 5: To add a watermark, click the Watermark option from the main interface > select the type of Watermark you want.

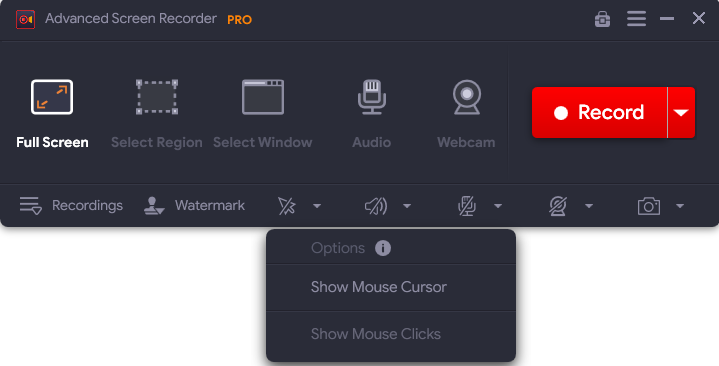
Step 6: Next, you can set the Mouse Pointer status while recording by clicking the Arrow icon Next to the Watermark > choose whether to display the mouse cursor and click.
Step 7: To record audio, click the Microphone icon > select the audio source. To record the audio from the internal device, choose Default Recording Device.

Step 8: Now, to start recording two streams simultaneously – the webcam and the video on the screen hit the Record button.
Step 9: You will now see a new pop-up window here; ensure the Webcam option is enabled and the webcam is selected. (As shown in the screenshot below:)

Step 10: Hit the Record button; Advanced Screen Recorder will start recording two streams.
Step 11: In the lower right corner, you will see a window with basic controls such as Pause, Stop, Time Duration, and Screenshot options.
Step 12: Click the red square on the mini tray or press the F9 key to stop the recording.
![]()
Step 13: To view the saved recording, click the Recordings option.

Step 14: Locate the recording and enjoy watching offline Amazon Prime videos.
Knowing all the steps, you can now quickly start working on your content curation, as it is super easy to record two streams simultaneously using Advanced Screen Recorder. The best part is you can even record audio from both sources. The settings are customizable to ensure none of the streams get mixed. The application works on all major and minor websites so that you can record the streams from anywhere.
Download the app today.
Easiest Way For Simultaneous Screen Recording
Using Advanced Screen Recorder, you can record two screens simultaneously: your webcam and the video you are playing. The tool also lets you record separate audio and solves the problem caused by hardware acceleration. This screen recording tool is a must-have for anyone who wants to record anything on a Windows PC, including gameplay.
We hope you liked the information we shared. Suppose you have questions regarding the product, email support@tweaking.in. For any queries or suggestions, see the comments section below.
Recommended-
How to Record Zoom Meeting – Windows 11,10, 8.1,8,7
How To Record Video from Webcam on Windows 11,10
How To Record Skype Calls Free
How to Record Your Computer Screen in Windows 11, 10