
Did your Epson printer stop working in the middle of an important project? When printing a document, if the printer stops working, the responsibility of fixing the printer comes into your hands. First, you should check that the printer is not offline. After that, you should go for another solution.
This blog discusses how to fix the problem and make your printer work again.
Reasons for Epson printer will not print from computer
- Not properly connected to the electrical supply.
- Not set as a default printer.
- Low ink levels.
- Jammed paper.
- Ink cartridge issue.
- No paper is installed.
- Network connection issue
- Outdated printer driver.
Epson Printing Not Printing? Try these Easy Fixes –
The simple solution is to take the matter into your own hands and start following the steps for Epson printer troubleshooting.
Fix 1: Detach and Restart the Printer
Sometimes a simple restart helps fix the most crucial issue. Power off the printer and detach it from the power socket. Wait for 30 seconds > Replug and power on the printer. Now try to use it to see if it works. If not, move to the next fix.
Fix 2: Check the Wire and Cable Connection
After restarting the printer, the other thing you must do is check the physical connection of the cable and wire. This might seem like a novice move, but most of the time, it causes the issue. Therefore, don’t skip this step.
Check all cables and connections with a printer. See if the power button is on, if the supply is affected, connect it to another plug. Check the cables and ports if there is any damage, replace them, and plug in all the cables after disconnecting the power supply.
After plugging in the cables, turn on the power. The Epson printer problem should be fixed. If not, do not worry. We’ve other fixes.
Also Read: How to Fix the Epson Scan 2 Not Showing Transparency Error
Fix 3: Check Default Printer
Sometimes, a printer might get removed from the default due to computer issues. It can also occur when your device is connected to multiple printers simultaneously. To set the Epson printer as the default again, go to the Start Menu> Settings> Device> printers & scanners.

Select your printer from this list and put it under the default printer’s list. You can also unmark the ‘Let Windows manage my default printer option if your printer can not print anything.
Fix 4: Update Device Drivers
Many times when a device fails to function normally, it is due to outdated device drivers. The device drivers are the software responsible for communicating between the device and the operating system. Since the software can get outdated or corrupted, the commands sent to the device will be affected. This results in malfunctioning devices such as the Epson printer not printing anything. Here we will give you an easy method to update the printer driver to get your printer working again.
We will use Advanced Driver Updater to update the Epson printer driver in this method. It is an easy-to-use driver updating tool for Windows PC. You can rely on it for safe and trustworthy driver downloads. It has a huge driver database that updates the drivers with its help.
Step 1: Start with downloading Advanced Driver Updater.

Step 2: Run the downloaded setup file to complete the installation. Grant necessary permissions to make changes to the system.
Step 3: Launch the driver update and click the Start Scan Now button.

Step 4: The scanning process will thoroughly examine the states of all the device drivers on the computer. It will take a few moments, and a result will appear on the screen.

Step 5: You need to locate the Epson printer driver in this list and click the Update driver button in front of it.
Note: You can also update all the outdated drivers in the list by purchasing the full version of Advanced Driver Updater.
Step 6: Once the latest driver for the Epson printer is downloaded and installed, you must restart the computer. This will help apply the changes.
You can download the printer driver from the below mentioned steps.
Download Epson Printer From the Official Website
Another way to install the printer driver is to visit the manufacturer’s official website. They often release the latest device drivers for the users. Follow these steps to download the driver for the Epson printer-
Step 1: Go to the official website of the Epson printer. Visit the Printer’s support page.
Step 2: Here, look for your product series.
Step 3: Once you reach the correct printer model page, you can find the Driver downloads available.

Step 4: Click on the Operating system and the corresponding driver for your Epson Printer.
Step 5: Download the driver file. Double-click on it and follow the on-screen instructions to update the driver. However, if it is a Zip file, unzip it and then the exe to update the driver.
However, if this process is confusing, go with the automatic method to update the driver using – Advanced Driver Updater, as explained above.
Also Read: Epson Scan Preview Not Showing – How to Fix
Fix 5 – Uninstall and Reinstall the Printer
If updating the driver didn’t work, try uninstalling and reinstalling the printer.
- Press Windows + I to open Windows settings.
- Click Devices.

- Select Printers & scanners from the left pane.

- Look for the printer you are using under Printer & scanners > select it and Remove device.

Once the printer is removed, reinstall it by again going to Devices > Printer & scanner and click the + icon to Add the printer. Follow the on-screen steps to complete the process.
Fix 6 – Clear and Reset Print Spooler
Sometimes spooler files and services are also responsible for the printer not working issue. To fix it, clear and reset the print spooler.
What is a print spooler?
It is a file and process that manages the printing process and helps in the execution of the print command.
1. Press Windows + R and type services.msc in the Run window.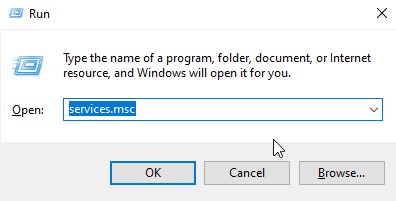
2. Under the Services window, look for Print Spooler in the list of services.
3. Double-click on it and select Stop.

4. Next, press Windows + S, and in the search field, copy and paste – %WINDIR%\system32\spool\printers. Select %WINDIR%\system32\spool\PRINTERS and delete all files and folders.
5. Now again, open the Services window by pressing Windows + R and typing services.msc > Ok.
6. Look for Print Spooler service > double-click on it and select Automatic in the Startup Type box > click ok.
Now try to use the printer. This should work. If not, check the printer status. If it is online and still not working, contact the authorized service center for help if you still face issues.
Solved – Epson printer stopped working
So, next time you or someone you know faces the Epson printer not working issues, you will know what to do. Most problems are solved by updating the printer driver. And the best possible way to do so is by using a driver updater tool. Advanced Driver Updater is a driver updating software that helps fix issues with the camera not working, display, Bluetooth driver problems, and many more. Get it now for your Windows PC and fix the outdated driver issues with its help.
We hope this article will help you learn Epson printer troubleshooting methods for Windows PC. We would like to know your views on this post. Please share them in the comments section.
We love to hear from you!
Related Topics-


My printer was fine yesterday, come to use it today and it wont print and says error. Have restarted my computer and printer, reconnected the wifi, ink is full, has paper in it. I even ran troubleshoot on my computer but came up with nothing. What would cause this?
Hello Kira,
The problem you are facing might be caused due to outdated or missing driver. To fix it, we suggest updating the driver. You can use Advanced Driver Updater to update outdated drivers.
Thanks and Regards
Preeti Seth
Yesterday I got an update message for my Epson Printer XP-410 from OneNote apparently. I allowed the download, now my printer will not work.
Dear Linda,
It seems the latest update is incompatible with your device and system. Therefore as a work around we suggest you to roll back the update and then try to use the printer. It should work.
May I ask a question here? I just installed my new Epson printer. All the ink is installed, the wifi is set up and working,. But it will not print. I did receive notice that new firmware is ready to be installed. Could this be the problem? I’m so bummer. I don’t have clue as to what else to do. Thank you for any help
Hello Marlene
To troubleshoot the problem you are facing if you have not tried upgrading the drivers of your Epson printer, we recommend you do so. Also, if there’s a pending firmware update, please do install it and restart the PC to apply the change. Now try to use the device it should work. To keep drivers updated you can use Advanced Driver Updater and can benefit from the Schedule feature.
Regards
Hello Preeti,
I had made numerous calls to Epson to NO AVAIL. They have the worst customer service. I am concerned I bought the machine 2 years ago today..the issue is that it automatically updated and after that update the scanner failed and then I get blank pages when I try to print. I have full ink levels and such. They state the ink heads are clogged..if that is the case which I truly doubt. All f this occurred after that update. Where can I take it that I don’t have to pay for Epson to look at it and if it’s the printer heads that are clogged to get them unclogged. Your advice is appreciated.
I use my printer (Expression 530C connected by wifi) seldom, lets say two times a month…. When I try to use it, the printer doesn’t respond, it says “not connected”. restarting router, PC and printer never solve the issue. The only way to start printing is removing and reinstalling the printers drivers.
I think there could be a problem with windows updates, but I think this behaviour makes the printer unusefull at all.
Hello Santi,
Regarding your problem, we suggest you first check the cable and connection. Also, ensure the printer is connected to your device’s Wi-Fi network. Clear print queues and try using the printer if all this is in place.
IF this doesn’t help, clear and reset printer spooler services and files.
1. Press Windows + R and type services.msc in the Run window.
2. Under the Services window, look for Print Spooler in the list of services.
3. Double-click on it and select Stop.
4. Next, press Windows + S, and in the search field, copy and paste – %WINDIR%\system32\spool\printers. Select %WINDIR%\system32\spool\PRINTERS and delete all files and folders.
5. Now again, open the Services window by pressing Windows + R and typing services.msc > Ok.
6. Look for Print Spooler service > double-click on it and select Automatic in the Startup Type box > click ok.
Now try to use the printer. This should work. If not, check the printer status. If it is online and still not working, contact the authorized service center for help if you still face issues.
Thanks and Regards
Hello Norma,
As you encountered the problem after the printer driver was automatically updated, we suggest you roll back the update.
Sometimes when there are bugs in the update, or it is incompatible with the PC, you face such issues.
To roll back the driver, follow these steps:
1. Press Windows + X and select Device Manager.
2. Under the Device Manager window, double-click Print queues.
3. Select your printer > right-click > select Properties.
4. Click the Driver tab and click the Roll Back Driver button.
5. Confirm the action by pressing Yes.
6. This will restore the previously installed and working driver.
7. Restart the PC to apply changes.
Now try to use the printer. It should be working fine.
Thanks and Regards
Hello Preeti,
I have a Epson 3100 model, I just use the USB cable which I attach to my laptop to print. Yesterday it needed black ink so I replaced it, and now it won’t print?! I have done all the checks with the plugs cable ect and taken the cartridges out and made sure they are in position correctly. No luck, it’s only about 18 months old if that.
Can you help please.
Patricia
Hello Patricia,
To fix, the issue firstly try printing the test page.
1. Turn off your printer, unplug from the power source and disconnect USB cables as well. After a few moments, reconnect your printer and plug it back in. Then, turn your printer back on.
2. Print a “Quality Diagnostic Report” or a “Print Test Page”.
3. You can usually find this option on your printer’s display screen.
If this does not help run printer troubleshooter.
1. Right-click Windows Start menu > select Settings.
2. Click Update & Security > Troubleshoot.
3. Additional troubleshooters > click Printer > Run the troubleshooter.
4. Select your printer from the list provided > click Next to proceed.
5. Windows will now search through your printer configuration and any relevant Windows settings to search for conflicts.
If any printer problems are detected, Windows will ask you for permission to apply the relevant fix to get your printer working.
Lastly, update printer driver if you haven’t already and restart the PC to apply changes.
Thanks and Regards