
My desktop running Windows 11 no longer gets into sleep mode. The keyboard and mouse shut down, but the desktop is idle with the CPU fan cycling. The only way to turn it on is to use the Power button and restart the PC. Is there any fix for the Windows 11 won’t sleep issue?
Luckily, there’s a fix for this problem, and this post explains all the workable ways to troubleshoot the issue.
Must Read: How to Free Up Space in Windows 11,10
What is Sleep Mode in Windows 11?
To help save energy for your electronic devices, Sleep mode (standby mode) is a great feature built into all versions of Windows operating systems. The mode shuts down the hard disk and screen. However, the RAM keeps refreshing, so you don’t need to wait for the machine to reboot. It makes resuming work from where you left off accessible.
Fix – Windows 11 PC Won’t Go to Sleep
Before getting into details, let’s understand the difference between sleep mode and hibernation. Sleep mode saves power while hibernation mode saves data. Now that we know what sleep mode is and how it differs from hibernation mode, it’s time to learn how to troubleshoot Windows 11 sleep mode issue.
Writer’s Tip
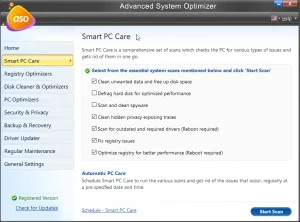
Often junk files and cluttered data are also responsible for Windows 11 not going into sleep mode. The best way to clean this unwanted data is to use a PC cleaner application that accurately detects and wipes these files without hassle. One such tool that you can give a try is Advanced System Optimizer.
This PC Optimization tool provides 20+ tweaking modules that help clean malware, update drivers, clean duplicates, protect digital footprints, optimize disk, remove invalid registry entries, and more. To get it, click the button below:

Method 1 – Ensure Sleep Mode Is Enabled
When your Windows 11 PC fails to enter sleep mode, check whether the Sleep mode is enabled or not. To do so, go to the Power Options menu & review your PC‘s hibernation settings.
- Press Windows + I to open the Settings
- Select System > choose Power & battery from the right pane.
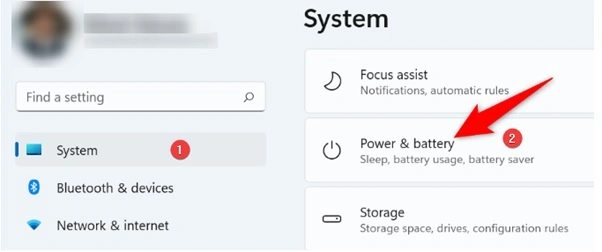
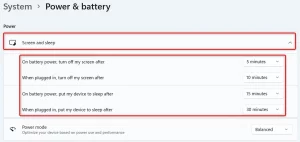
- Double-click the Screen and sleep option.
- To put the PC into sleep mode, set a timer for each option you see in the menu.
Must Read: How To Clean Junk Files In Windows 11 & 10?
Method 2 – Restore Power Plan’s Default Settings
Windows 11 allows creating and changing settings for various power plans. This helps alter incorrectly specified options in power plans as they may cause Windows 11 not to go into sleep mode.
To get around this problem, restore power plan settings to default.
- Press Windows + R > type Control and press the Enter key.
- Select Hardware and Sound > Power Options.
- Choose Change plan settings.
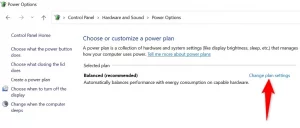
- Select Restore default settings for this plan.
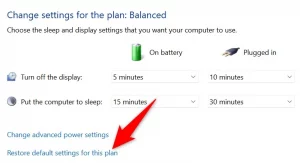
- Confirm the action by clicking Yes.
Method 3 – Edit Network Adapter Properties
- Press Windows + X and select Device Manager.
- Double click Network adapters to expand it.
- Right-click on the network adapter with the yellow exclamation mark, or if you think it is creating a problem > select Properties.
- Click the Power Management tab.
- Check the box next to Allow the computer to turn off this device to save power.

- Click OK.
Method 4 – Disable Hybrid Mode
Windows 11 Hybrid mode brings hibernation & sleep mode together. Therefore, disabling hybrid mode is suggested when you encounter issues with sleep mode not working.
Later, you can activate hybrid mode if you want.
- Open the Run window by pressing the Windows + R keys.
- Type Control Panel and press Enter key.
- Go to Hardware and Sound > Power Options.
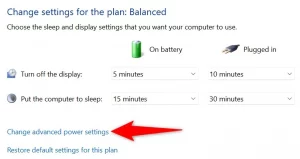
- Select Change plan settings next to your current power plan.
- Choose Change advanced power settings.
- Under Power Options, double-click the Sleep menu.
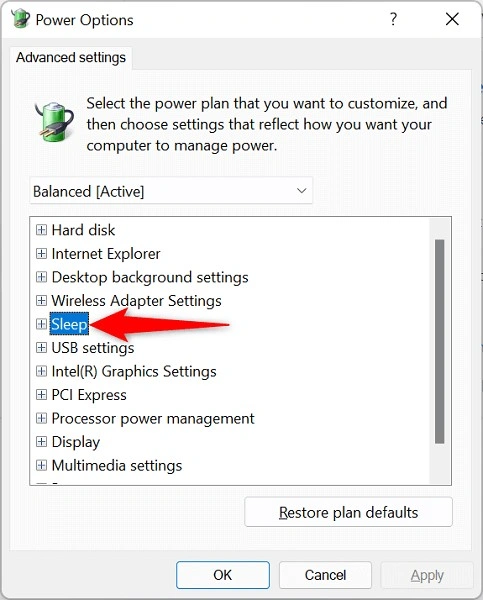
- Select Off for both On battery and Plugged in options in Allow hybrid sleep.

- Click Apply > OK.
Method 5 – Disable Screen Saver
Disable the screensaver when you face difficulty putting Windows 11 into sleep mode. If this doesn’t help, you can reactivate it when you want.
- Open Settings by pressing Windows + I.
- Choose Personalization > select Lock screen > screen saver at the bottom of the screen.

- Select (None) from the drop-down menu.
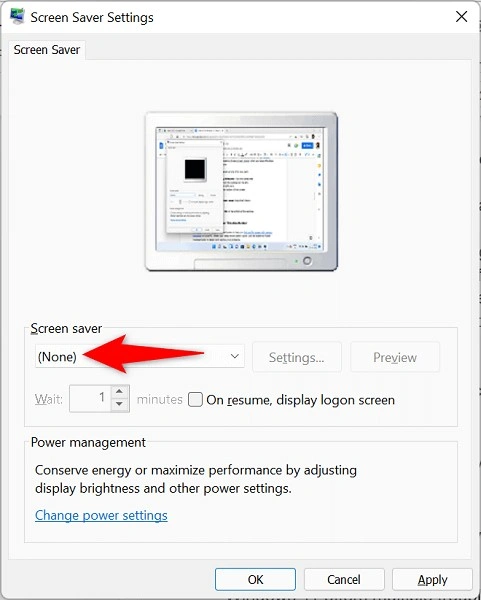
- Click Apply > OK.
Method 6 – Use Power Troubleshooter
To fix different Windows-related issues, Windows 11 offers multiple troubleshooters. Hence, to fix the sleep mode not working, use the Power troubleshooter to detect and resolve your problems.
- Press Windows + I to access Windows Settings.
- Select System from the sidebar> Troubleshoot > Other troubleshooters.

- Click Run next to Power on the troubleshooter screen.
- Wait for the troubleshooter to detect and fix the problem.
Method 7 – Disable Devices to Wake Up Your Windows 11
If your Windows 11 isn’t going into sleep mode, it seems one of the connected devices is waking the system up from sleep. Usually, these devices are mice, keyboards, and trackpads.
To check this, follow these steps:
- Press Windows + X > select Device Manager.
- Double click Mice and other pointing devices > right-click your mouse > Properties.
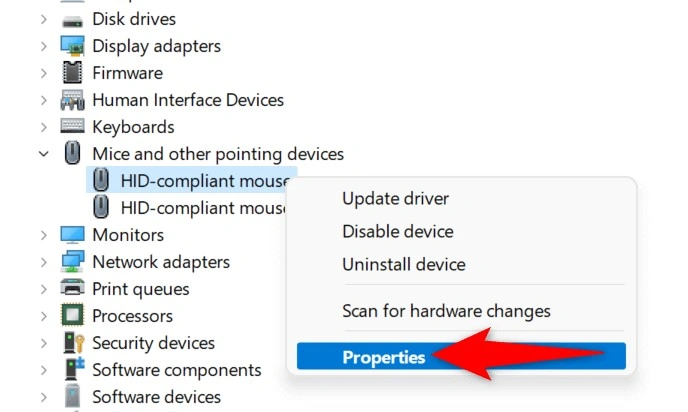
- Click the Power Management tab > uncheck the Allow this device to wake the computer option.
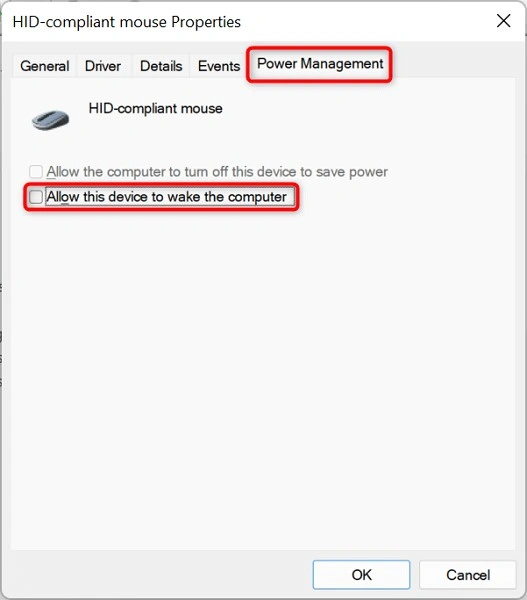
- Select OK.
- Repeat the same steps to disable the keyboard and trackpad settings.
Must Read: How To Speed Up Your Windows 10 Performance
Method 8 – Check your PC for Viruses and Malware
If your Windows 11 PC still doesn’t go to sleep, try scanning the PC for infection. You can use Windows 11’s built-in antivirus tool.
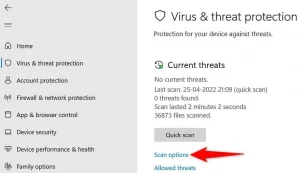
- In the Windows search bar, type Windows Security.
- Choose Virus & threat protection on the window that opens.
- Select Scan options.
- Choose Full scan and select Scan now.
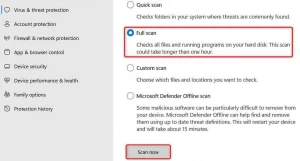
- Let the tool identify and delete malware and virus infections.
Wrap Up
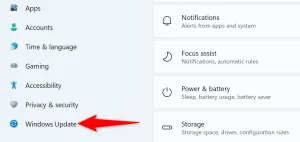
That’s all. With the help of these methods, you can fix Windows 11 sleep mode issue and get it working again. If this doesn’t help, update your Windows 11 PC. To do so, press Windows + I and open settings. Click Windows Update.
Check for updates and download and install available updates.

Restart your PC to apply changes.
This will surely help fix Windows 11’s won’t sleep issue. In the comments section below, let us know which method works best for you.
Must Read: How to Deep Clean a PC the Right Way?


