Using multiple monitors on a PC can help enhance productivity, especially when involved with video editing, gaming, or coding. To integrate these monitors into a single system, the best idea is to use a docking station.
With multiple device support and many ports, a docking station is a game changer for a user who doesn’t want any hassle creating a synced system.
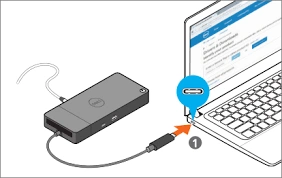
J5create is one such docking station that takes up a single type C connector on your device and converts it into a hub of ports. While the functionality of the tool surpasses every other alternative, there are some issues that users have faced while interacting with the J5create docking station.
The biggest of these errors is that the dock cannot detect a monitor. This post is for you if you are also facing a similar problem. Here we will enlist some of the most effective ways to fix the J5create docking station not recognizing the connected device.
Without further ado, let’s get started!
Why My J5create Docking Station is Not Detecting My Monitor?
One of the most prominent questions that users have in their minds related to the problem is why it is happening. Some believe the issue lies with the device, while others try to replace the monitor for fault.
The issue may be related to hardware. However, many users have shared that the issue exists due to multiple software and usage factors. These factors include –
- Using a monitor that is not supported by the port
- Outdated docking station drivers being used on PC
- Faulty cables or loose port connection.
- Internal issue within the PCB of the docking station
- Error in the docking station configuration
Other than these problems, there are other device-specific issues you may encounter while using it. All these errors appear plausible, considering it is just another third-party device used to enhance your productivity.
If any of the mentioned errors may be true for your scenario, check out the next section, which holds solutions to each.
J5create Docking Station – 3 Convenient to Fix Monitor Not Detected Error
Fix #1 – Run Preliminary Checks Hardware Errors
Identifying an error with any external device can be easy, provided you know things to check. The first thing that comes to mind of every user when the docking station does not detect a monitor is that the issue lies either with the display or with the J5create.
So, the first thing you should do is eliminate this common perception. How? Well, there are defined ways you can check the device for hardware errors. These include –
Step 1- Firstly, connect the docking station on your PC and verify if the PC is detecting it or not.
Step 2- If not, try connecting the J5create docking station to another device and then connect your external monitor to it. Wait for a minute or two to understand if your device recognizes the station and the connected monitor.

Step 3- If the above check fails to light up the monitor, try connecting the external monitor to a PC with a direct port. This way, you can verify that the display connected is in working condition and is not at fault.
Step 4- Next, verify if the connector cable you are using is working fine or not. Try using the exact cable with a different monitor or use a different cable with the same monitor to understand the correlation accordingly.
Step 5 -Try using another port available on the docking station to connect the monitor. This will clarify whether the issue lies in a single port of the device or not.
Other than these, you can also check for physical damage or connectivity issues with your device. If any of these appear faulty, you should call the respective customer support and get things sorted, as handling hardware issues alone might not be a good idea.
Read Also: How to Download and Update Audio Driver for a Dell PC (All Versions)
Fix #2 – Re-Install the Docking Station
Sometimes when you are in a hurry, you remove the connected devices and the docking station without ensuring safe removal. What it does is it messes up the configuration and sync of the device. This is another reason why sometimes the docking station or the devices connected via the docking station go undetected.
In such situations, the ideal thing to do is to reinstall the device on your PC. Here’s how you do it –
Step 1 – Press Windows + R to open the run search.
Step 2 – Use the command devmgmt.msc to open the device manager.
 Step 3 – In the Device Manager, find your connected docking station. You may find it in the USB controller devices or connected devices.
Step 4 – Find the device, right-click on it, and find the option to uninstall it.

Step 5 – Follow the steps after clicking on the uninstall device to go through the process.
Step 6 – After uninstallation, remove the device and leave it unconnected for 15-20 minutes. This way, all the power from the device is cleared.
Step 7 – Reconnect the device, and it will automatically install itself on your device.
Check if the J5create is detecting the external monitor now or not. If still no luck, move on to the next step.
Fix #3 – Update PC Drivers that Support the Process
With a PC, J5create docking station, and an external monitor being involved in the process, there are multiple device drivers that you need to check for updates. If you do not regularly update drivers on Windows, it might take hours to successfully find and update outdated drivers for all the components.
In such a case using Device Manager to install driver updates manually is not a good idea. The ideal way to handle these driver updates is to delegate tasks to an efficient tool like Advanced Driver Updater. Here’s how it works –
Step 1 – Download and Install the Advanced Driver Updater from the link below.

Step 2 – Click Start Scan Now to find outdated device drivers in the driver updater tool.

Step 3 – This scan will take a few minutes in examining the status of all your existing drivers.
Step 4 – After the scan, you will see results related to the number of outdated ones so that you can do the needful.

Step 5 – Click on update now, and the tool will find, fetch, and install the driver updates automatically.
The Advanced Driver Updater makes it easy to identify all the outdated drivers on the system. More importantly, it saves you the hassle of manually downloading these updates. All in all, getting a driver updater is surely worth it!
With the help of this step, you will be able to identify and resolve driver issues with both the connected docking station and the monitor you are trying to connect via the docking station.
J5create Docking Station Not Detecting Monitor – NOT ANYMORE!
Buying a J5create docking station is the need of the hour, considering laptops have drastically shifted to lesser ports and are now only offering a Type C connection. If you cannot use it to its full capacity, like it is unable to detect your monitor or anything else, you can try these fixes.
With the help of the fixes above, you will successfully resolve the issue. If you have any queries related to the solutions shared in this post, feel free to leave a comment below.
That’ll be all for this post. Thanks for reading! Good luck.
Next Read:
Fix – Dell Docking Station Not Working
How To Fix Printer’s “Driver is Unavailable,” Error
Fixed – USB Drive Not Showing Up – Windows 11/10