Call of Duty is a popular shooting game that is played by millions across the globe. However, some gamers have complained about a certain common issue with the game that prevents them from updating it. This has not become a common issue where players complain that Call of Duty is not updating. In this guide, we will discuss the reasons and fixes for the Call of Duty won’t update error on Windows PC.
Why Does The Call of Duty Won’t Update Issue Occur?
Many gamers on tech forums have reported that the Call of Duty is not updating error occurs mainly when a large update or patch has been released by the game developers. This type of update keeps downloading repeatedly and does not allow the user to play the game. Here are a few other reasons why this error occurs.
- The Activision server helps users download updates. If there are issues with this server, then the update downloading process may fail from time to time.
- Some users have stated that issues with the Battle.net client may hamper the download process.
- Updates require empty storage space on your hard disk. If the free space is not sufficient, then you might face the error.
- Outdated, missing, or corrupted graphics card drivers may cause this error on your PC.
- Antivirus and Firewall apps may block Call of Duty from downloading the required updates.
15 Ways to Fix Call Of Duty(COD) Not Updating
Fix 1 – Verify The Server Status Of Activision
Before we jump into troubleshooting the issue, let us check the status of the Activision Server to confirm there is no issue from the developer’s end. Here is what you need to do.
Step 1 : Navigate to the Activision Server page or click this link.
Step 2 : Now, using the dropdown on the right side, select your game.
Step 3 : The server status will be displayed on the left side.

If the server status is Online, then follow the next fix. Otherwise, you will have to wait for Activision to resolve the server issue.
Fix 2 – Verify If Battle.net Has Errors
For gamers who use the Battle.net client to update Call of Duty, you must check the server status of Battle.net. If the server is facing an outage or there is a maintenance issue, then the Call of Duty not updating issue will occur. The official Blizzard customer service can be reached via their X (Twitter) handle by clicking this link.
Fix 3 – Reboot The PC & Router
Sometimes, a simple restart can fix many minor issues. This is true in the case of computers and routers. While rebooting erases the current memory of the PC, it also removes the cache and other temporary files from the router, giving both devices a fresh, clean start. Here are the steps to reboot your PC and router.

Restart Your PC
Step 1: Press the Windows key and click on the Power icon in the bottom-right corner.
Step 2: Choose Restart from the menu.![]()
Step 3: Your PC will now shut down and reboot automatically.
Restart Your Router
Step 1: Turn off the power switch where the router or modem is plugged in.
Step 2: Disconnect the power cable and the Ethernet cable from the back of the router for a complete discharge.
Step 3: Wait for 60 seconds before reattaching the cables.
Step 4: Turn on the power switch of the socket where the device is plugged in.
Fix 4 – Verify Your Network Connection Issues
It is quite possible that your PC might not be getting adequate bandwidth due to the shared internet connection between the devices in your house. Here are a few pointers to help you if this is the case.
Step 1: Use a wired connection if possible, as it is more stable than wireless connections.
Step 2: Disconnect all the devices connected to your network and try updating Call of Duty.
Step 3: Contact your ISP to upgrade your internet connection.
Step 4: Try changing the router/modem, especially if the device is a few years old.
Read Also : ISP Tracking – Is It a Thing? Can Your ISP Spy on You
Fix 5 – Check If You Have Sufficient Storage Space
One of the reasons Call of Duty is not updating is the lack of storage space on your hard disk. You need to check the free space of your computer by opening the Windows File Explorer (Win + E) and then clicking on This PC in the left panel. This will display the drives and the free space available on your hard disk.

If you lack the required space, then you can scan through the files and folders of your PC manually and either delete the unwanted and redundant files or shift the necessary files to an external storage device. However, we suggest that you use Advanced System Optimizer, a third-party PC optimization tool, to first remove temp, junk, cache, cookies, and other unnecessary files from your hard drive with a few mouse clicks. You can also use this tool to sort all the files on your PC based on size and date. This way, by deleting a few large files, you can gain enough space to complete the COD updates.
Fix 6 – Repair Game Files
Gamers playing Call of Duty may use Battle.net or Steam. These console apps provide an option to repair and fix game files installed on the PC. Corrupted or missing files may cause issues like the Call of Duty won’t update error on Windows. Here is what you need to do.
Repair Files On Battle.Net
Step 1: Launch the Battle.Net launcher and click on the Games tab.
Step 2: Choose Call of Duty and select the Gear Icon near the Play button.

Step 3: Select the Scan and Repair option and choose Begin Scan.
Step 4: Wait for the process to complete and restart the PC.
Repair Files On Steam
Step 1: Open the Steam app and open the Library.
Step 2: Locate your game and right-click on it to view the context menu.
Step 3: Choose Properties.
Step 4: Now, click on the Installed Files tab in the left panel.
Step 5: In the right section, click the Verify Integrity of Game Files button.

Step 6: Wait for the process to complete and reboot your computer.
Fix 7 – Delete beta or corrupted leftover files
Sometimes, leftover files can cause havoc that most users are unaware of. All temporary and junk files must be removed, but this is not always the case. These leftover files can interfere with the normal functioning of the game. Here are the steps to clear these files.
For Battle Net Users
Step 1: Exit and close the Battle Net launcher.
Step 2: Press Win + R to launch the RUN box, type %ProgramData%, followed by the Enter key.
Step 3: A new folder will open where you have to look for the Battle.net folder and the Battle.net_components folder.
Step 4: Delete these folders and reboot your PC.
Step 5: Try to launch the game again and check if the update issue has been resolved.
Note : Removing these folders will not be a problem, as they will get recreated when you launch the game after a restart.
For Steam Users
Step 1: Launch the Steam app and click on Library.
Step 2: Make a right-click on Call of Duty and select Properties from the context menu.
Step 3: Click on Installed Files in the left panel and then click on the Browse button on the right side.
Step 4: A folder will open where you have to look for files and folders like “Temp”, “Patch”, or “Beta”.
Step 5: Copy and paste these files on your desktop and delete them from the main folder.
Step 6: Restart your PC and check if the game is working fine. If you receive a new error, then you can copy those files from your desktop and paste them back into the main folder.
Fix 8 – Change DNS Settings
Some gaming experts have observed that the default DNS settings provided by the ISP may not be suitable for certain gaming servers across the world. Hence, they recommend that you use the Google Public DNS, which is suitable for gaming and improves connectivity, stability, and speed. Here are the steps.
Step 1: Press Win + R to open the RUN dialog box.
Step 2: Type “ncpa.cpl” and click on the OK button.
Step 3: Locate your current active network connection and right-click on it.
Step 4: Choose Properties from the context menu.
Step 5: A new box will open where you have to locate Internet Protocol Version 4 (TCP/IPv4) and double-click on it.

Step 6: Choose Use the following DNS server addresses and enter the following numbers.
Preferred DNS server: 8.8.8.8
Alternate DNS server: 8.8.4.4

Step 7: Click on OK and reboot your PC for the changes to take effect.
Fix 9 – Update Drivers On Your PC
Drivers play an important role in communicating between the hardware and software. If you are facing issues like Call of Duty won’t update, then you need to update the drivers. There are two ways to update drivers – by using the built-in Device Manager or a third-party driver updater software.
Method 1 – Update Drivers Using Device Manager
The Device Manager is a built-in tool provided by Microsoft to all Windows users. It is used to update outdated drivers. Here are the steps.
Step 1: Press Win + X to open the Windows Power menu.
Step 2: Click on Device Manager, and a new box will open.
Step 3: Locate the drivers that have a yellow triangle exclamation mark next to them.
Step 4: Right-click on these drivers and choose Update from the context menu.
Step 5: Follow the steps that appear on the screen to update the driver.
Method 2 – Update Drivers Using Advanced Driver Updater
Advanced Driver Updater is a third-party driver updater software that can identify outdated, missing, and corrupted drivers. Here is what you need to do.
Step 1: Download & Install Advanced Driver Updater using the link provided below.

Step 2: Launch the app and click on the Start Scan Now button.

Step 3: A list of driver anomalies will appear on your screen. Click on the Update button next to each driver that needs to be updated, one by one.

Step 4: After all drivers have been updated, reboot your PC.
Fix 10 – Update Your Windows OS
Microsoft provides free updates to all genuine Windows users that include bug fixes, software updates, new features, security patches, and more. Many minor issues can be resolved by simply updating the Windows OS. Here are the steps –
Step 1: Press Win + I to open the Windows Settings.
Step 2: Click on the Windows Update tab in the left panel.
Step 3: Next, click on the Check for Updates button, and Windows will download & install updates for you.

Step 4: After the updates have been completed, press the Check For Updates button again. Keep repeating this process until Windows does not find any more updates.
Step 5: Restart the PC.
Fix 11 – Disable Antivirus
Step 1: Press the Win key and type Windows Security.
Step 2: Click on the relevant result under Best Match.
Step 3: Next, click on Virus & Threat Protection.

Step 4: Click on Manage Settings.
Step 5: Slide the toggle button under Real-Time Protection towards the left to disable it.
Fix 12 – Disable Proxy Server And VPN
Some experts have stated that the use of a Proxy server or VPN can interfere with certain apps on Windows. In this case, we can try disabling these services temporarily and then check if the game update goes through.
Disable Proxy Server
Step 1: Press Win + I to launch the Settings box.
Step 2: Choose Network & Internet, and then click on the Proxy tab from the left panel.

Step 3: On the right side, locate the Manual proxy setup section.

Step 4: Slide the toggle button under Use a proxy server option to the left to disable this option.
Disable Virtual Private Network
A Virtual Private Network helps users mask their IP address. It allows gamers to connect to any server across the globe. However, a VPN can also hinder game updates. There are different VPN apps, and you need to consult the manual or guide received along with your VPN app to disable the VPN. If you cannot do so, then we suggest you uninstall the app.
Read Also : Proxy Server Keeps Turning on in Windows: How to Disable it
Fix 13 – Disable the Windows Firewall
Step 1: Press Win + I to open Settings.
Step 2: Navigate to Privacy & Security > Windows Security > Firewall & network protection.

Step 3: Click on all network profiles (Domain, Private, or Public) one by one.

Step 4: Under Microsoft Defender Firewall, toggle the switch to Off.

Note : After you have completed your task with Hamachi, you can turn on the Firewall using the same steps described above.
Fix 14 – Reinstall The Game
Some experts also state that if nothing works, then you could try uninstalling the game and reinstalling it. This will remove your game saves, settings, and other files that are stored on your hard disk. However, it will also fix the update problem and allow gamers to finally play the game.
Fix 15 – Create A New Administrator Account
The final option we have is to create a new administrator account on your Windows PC and install COD on this account. You can keep using the old account for all your other tasks, but when you want to play the game, you need to sign in to the new account. Here are the steps to create a new administrative account.
Step 1: Press Windows + I to open the Settings window.
Step 2: Click on the Accounts tab on the left panel.
Step 3: Scroll down in the right section and locate and click on Other Users.
Step 4: Now, click on Add Account.
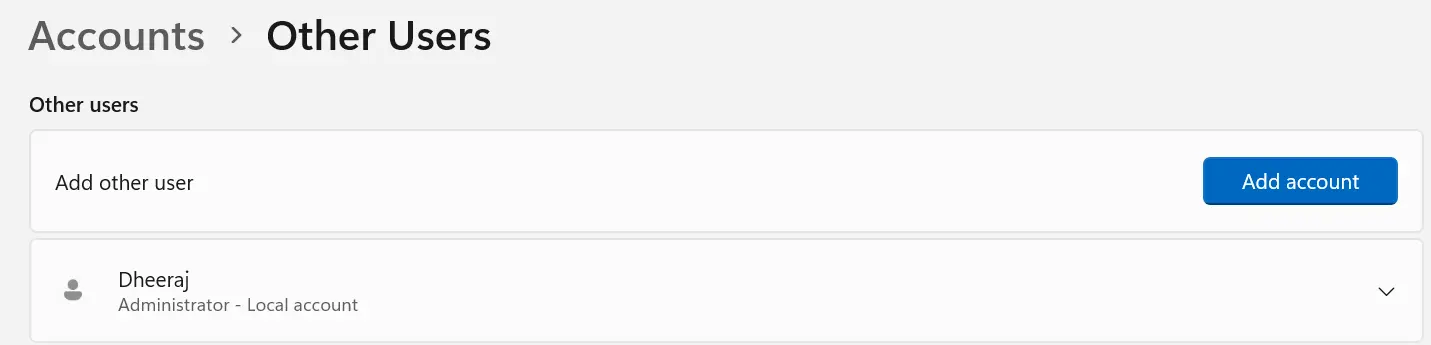
Step 5: Follow the instructions on the screen and create a new account.
Other Tips
Some gamers have stated various tips on gaming forums that might resolve the updating issue.
- Steam Users can try and change the Download Region and then try to update COD. You can alter the download region by accessing the Settings, followed by Downloads, and then clicking on Change Region.
- Gamers can also try to launch the console app in admin mode. This will provide more rights to the application and fix minor issues, like update issues. You can try this by right-clicking the launch shortcut and choosing Run As Administrator.
Conclusion
We hope that the above troubleshooting has helped you fix the problem. We would love to hear your experience and which method helped you begin the COD updates in the comments section below.
Recommended :
How to Fix Call of Duty Modern Warfare 2 Crashing on Windows
Mouse Lag for Call of Duty: Black Ops Cold War – FIXED!