
The error “Your Computer Appears to Be Correctly Configured, but the Device or Resource Is Not Responding” usually appears when DNS is faulty and unresponsive. You can encounter it while visiting any website or opening any web application.
Everything that uses the internet on your PC is affected by the error. If the DNS is not properly configured, the internet access gets blocked. Some of the core reasons behind this error are listed below –
- Incorrect DNS values and proxy settings
- Faulty internet connection
- Hardware problems with router and other devices
- Outdated network drivers
- DNS configuration errors.
While these errors may appear as common grounds for several other internet-related issues and come across as easy to handle, they are not. You need a crisp knowledge of what you are doing and a precise understanding of the steps to resolve the error.
Fixes to Resolve Computer Correctly Configured, But Device Not Responding Error
The real question arises when the error Your Computer Appears to Be Correctly Configured, but the Device or Resource Is Not Responding appears on your PC is how to get rid of it?
We have shared some working fixes around the error. Check out the step-by-step guide below!
Fix 1 – Try Testing Your Network
Step 1 – Go to the system settings using the Win+I section on your keyboard.
Step 2 – In the settings, open the Troubleshoot option and enter Other Troubleshooters.
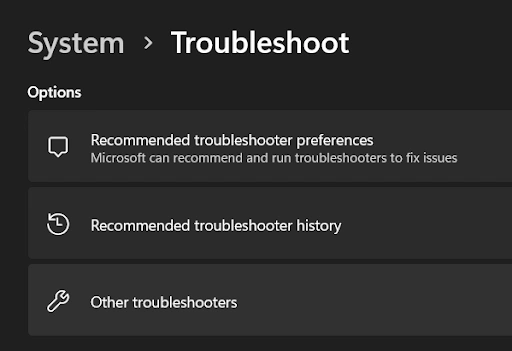
Step 3 – From the available list, choose Network & Internet and click on Run.

Step 4 – The testing Window opens up. Try the troubleshooting options one by one by following the on-screen instructions.
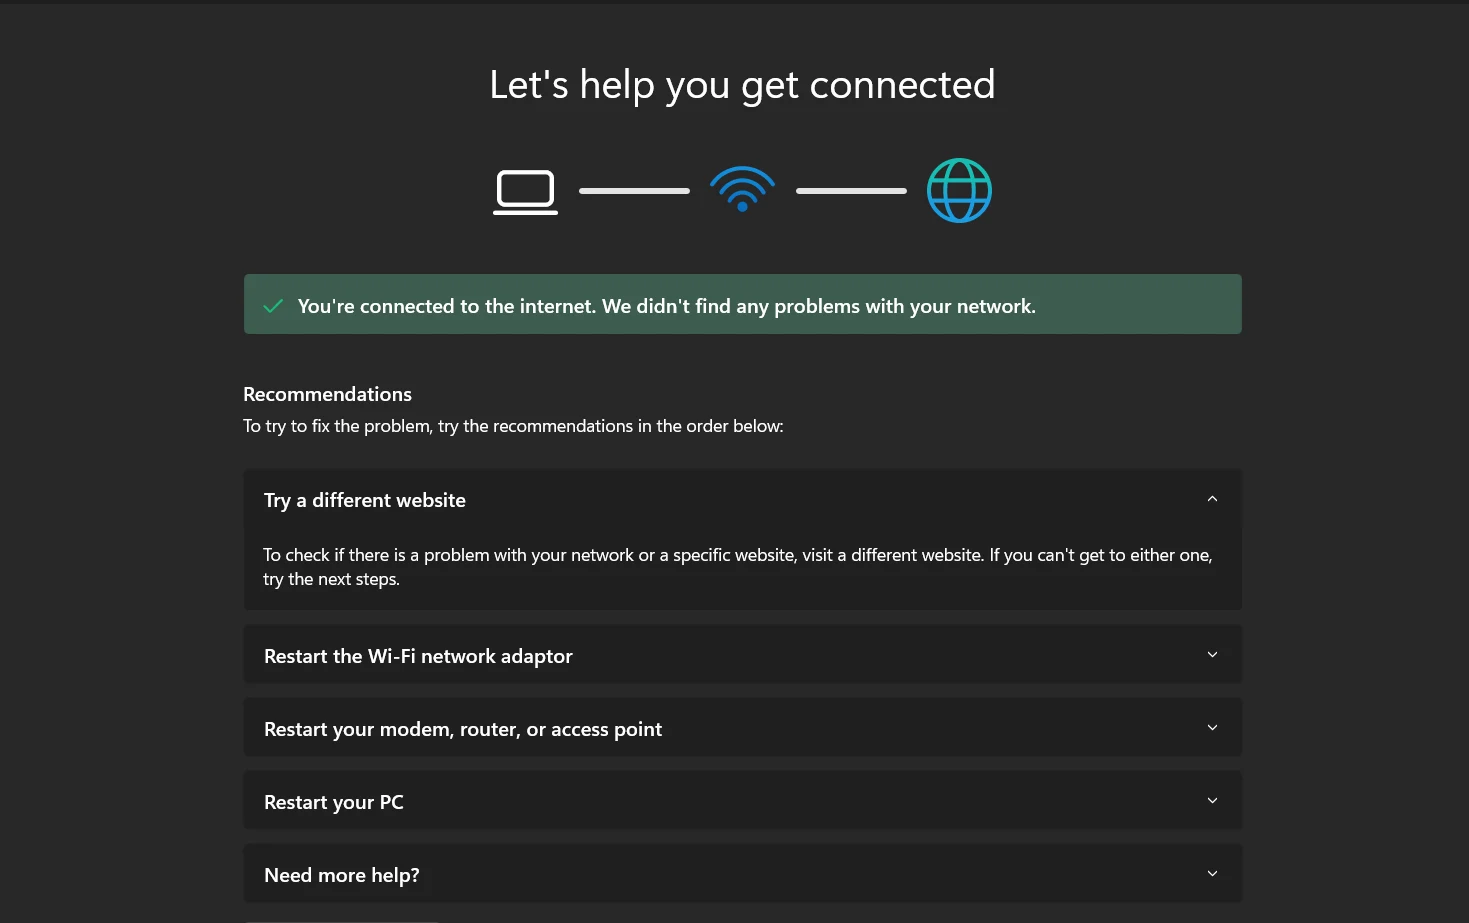
Step 5 – After checking the issues, apply all the fixes and restart your computer.
Note : This is a general troubleshooting method for Windows 11 users. If you are using Windows 10, you may find the Network and Internet troubleshooter.
Fix 2 – Update Network Drivers on PC
If fixing the basic errors did not resolve the issue, try updating your PC’s network drivers. These drivers are responsible for a seamless connection. Hence, if they are outdated, you may not be able to get things done, and eventually, errors like Your Computer Appears to Be Correctly Configured. Still, the Device or Resource Is Not Responding will keep appearing.
To resolve this issue, you have two options –
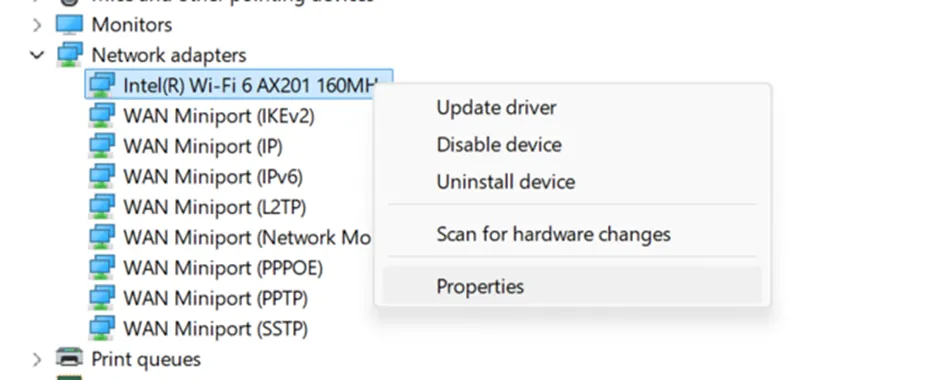
Take the longer route and update the driver manually. Go to the Device Manager on your Windows PC, find the network driver, and right-click on it to find the Update Driver option.
Or in Automatic Way –
Download the Advanced Driver Updater, install it on your PC, run a scan from the home screen, and use the Update All button after the scan is over to finish the updates.

The choice is completely yours. If you have never used the Device Manager, we recommend the Advanced Driver Updater, as it is safe and foolproof to get the job done.
Fix 3 – Change Your DNS Server Address
Step 1 – Press Win+R to bring up the Run search.
Step 2 – In the Run search, use the command ncpa.cpl

Step 3 – The above command will open the list of network adapters you are using on your PC.
Step 4 – Right-click on the current adapter and open its properties.
Step 5 – In the properties, go to the Internet Protocol Version 4 (IPv4) and select it to open its properties.

Step 6 – In the properties, you may find both IP and DNS addresses.
Step 7 – In the DNS section, choose the manual option, i.e., Use the following DNS address
Step 8 – Manually enter the value of the DNS server you want to access. You can use 8.8.8.8 in the preferred and 8.8.4.4 in the alternate DNS address, respectively.

Once you have made the changes, save them all and try using the internet again. Only this time, the error will not appear.
Fix 4 – Flush DNS Cache
If the issue persists, there are chances that it lies in the faulty DNS cache. This cache is often responsible for multiple errors; these often register the same error despite being resolved. The best way to handle this is by flushing the DNS cache.
Here’s how you do it –
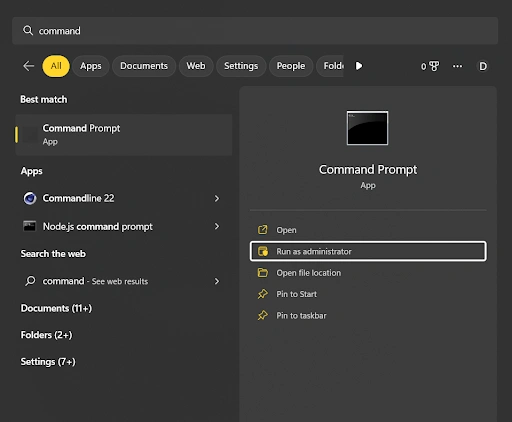
Step 1 – Go to the Start Menu and search for Command Prompt.
Step 2 – On finding the Command Prompt, open it using the run as administrator button for privileged access.
Step 3 – After opening the command prompt, use the following commands one after the other (press enter after each command).
netsh int ip reset
netsh advfirewall reset
netsh winsock reset
ipconfig /flushdns
ipconfig /release
ipconfig /renew
Once you have performed all the commands successfully, restart your PC for the flushed cache to be removed completely.
Other than these methods, you can try basic things such as –
- Check your router and reset its connection
- Try switching from Wi-Fi to LAN cable for better connectivity
- Reboot your internet connection
- Look for Windows Updates.
Resolving the error, your computer appears to be correctly configured, but the device or resource not responding is not that typical of a task if you know how to work things properly. Hope this guide helps you fix the issue and you have a
Next Read :
Ways to Fix The Requested URL Was Rejected Browser Error
How to Clear Chrome Net Internals DNS Error


