“You must enable system protection on this drive,” the error appears when you try to perform a system restore. Although it is a common error, encountering it when you need to restore the system complicates things, as it is impossible to circle back to a stable state. But why does this problem occur, and how can it be fixed? This troubleshooting guide explains it.

Solve “You Must Enable System Protection on this Drive” Error in Windows
While looking for a restore point on a PC, unless the “status you must enable system protection on this drive” error is encountered, most users see the Windows built-in System Restore is useless. However, this is not the case, as System Protection is a way to restore the system to the point when things are working perfectly fine.
This post will look at how to solve the “system restore you must enable system protection” error.
Ways to Resolve “You Must Enable System Protection on This Drive” Error on Windows
As mentioned above, the error “you must enable system protection on this drive” occurs when the system’s ability to create restore points is turned off. Fortunately, there are ways you can resolve the error and turn it on manually.
Here are the ways you can do this –
1. Enable System Protection Using Command Prompt
- Go to the Windows Start menu and type CMD in the search bar.

- Select the best results and click Run as administrator to run it with admin privileges.
- Type the command – net start vss and hit the Enter key.

- After this executes, enter the command – rstrui.exe /offline:C:windows=active to initiate the restore.
- Once both the commands have run, restart your PC.
After your PC restarts, the system restores utility will become active. You can also restore the system, as you will not encounter the error message now.
Must Read: How to fix Drive is not Accessible “Access is Denied” Error in Windows 11,10,8
2. Enable System Protection By Renaming Registry Files
If the above-mentioned technique does not resolve the issue, you must operate at a fundamental level. How? Well, there are two registry files corresponding to the system restore utility. You will need to rename those files. Here’s how you can do it –
- Open the Command Prompt as Administrator.
- In the command prompt, type cd %systemroot%system32config as a command. This will open the directory that holds the registry files.

- After gaining access to the directory, use the following commands one after the other –
ren SYSTEM system.001
ren SOFTWARE software.001
 Once you are done with both of these commands, the changes are done. You can now restart your PC, and the error will be resolved.
3. Enable System Protection Via Windows Settings
You can check the turn-on system protection feature on Windows using a few easy steps. These are –
- Press Windows + R to Open the Run utility.
- In the run utility, type the command – sysdm.cpl and press the Enter key.

- It will open the system properties for your PC.

- In the available tabs, go to System Protection and then click on Configure to open settings.

- Make sure that “Turn on System Protection” is selected in the configuration settings. If not, select it and save the changes.

- Apply the changes and then click on OK to save them. If you are low on internal storage, you can always choose a dedicated size for your system restore point. Use the slider for the same.
4. Restart System Protection Service
If, by chance, you found that the System Protection was already enabled, yet you are getting the “You must enable system protection on this drive” error, the service might require a restart.
Here’s how to restart the service –
- Open the Command Prompt as administrator.
- Use the command – net stop vss and then hit enter in the command prompt.
- Then again, use the command – net start vss and hit enter.

It will stop the running service and restart it based on your command.
What to Do for Data Lost Before Setting Up the Restore Points?
The above ways can help solve Windows’s “You must enable system protection on this drive” error. But what about the data that you have lost? Technically, you only look for ways to restore when you have lost something crucial.
When you realize no restore point is available, all the hopes of returning your data go down the drain. Well, fortunately, it does not have to be that way anymore! You can restore your lost data even without the restore points.
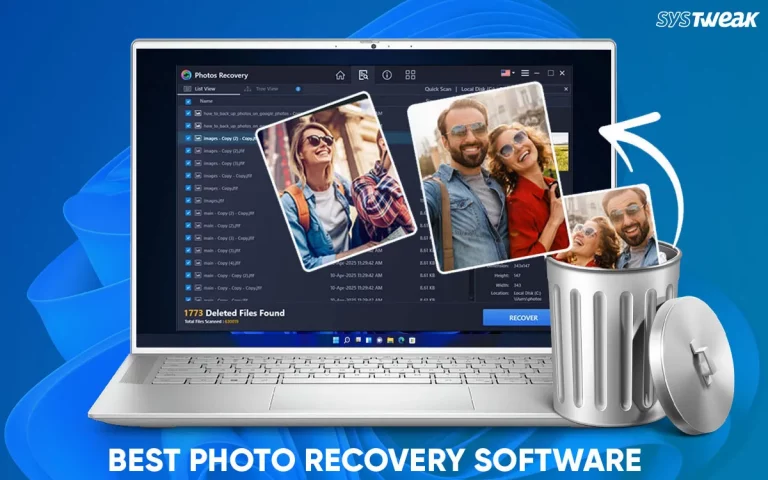
But how? With the help of Advanced Disk Recovery, it is easily possible to restore the files. Check out how the tool works and how you can use it.
- Download the installer from the link below.
- Install the application and run it on your PC.

- Select the drive you have lost your data from
- Run a Deep Scan if the data was lost quite a while ago. You can also go for a Quick scan depending on the data type and when it was deleted.
- Click on Start Scan, and the process will begin.
- Once the scanning process ends, you have a list of files you can restore on the drive.
- Look for the ones you want and restore them easily.

That’s how easy it is! There’s no need to panic if you have encountered the “you must enable system protection on this drive” error, as restoring your files with Advanced Disk Recovery is possible!
Must Read: Top Features to Look For in Data Recovery Software
Facing the “You must enable system protection on this drive” error? Not a Problem!
With that, we have reached the end of this post. As you might have guessed, fixing the “You must enable system protection on this drive” error is easy if you know the tricks. Bookmark this blog if you want to try these fixes when you get time.
As far as data loss is concerned, you need not worry about it as long as you use the Advanced Disk Recovery tool on your PC. It is easy to use and more effective than any other data recovery software!
Download it today and see it for yourself. The fixes listed above will help you out with your concern. Drop a line in the comments if you need something else covered on the same grounds. Till then, Good luck!
Next Read: You Accidentally Erased The Wrong Hard Drive! How To Recover it