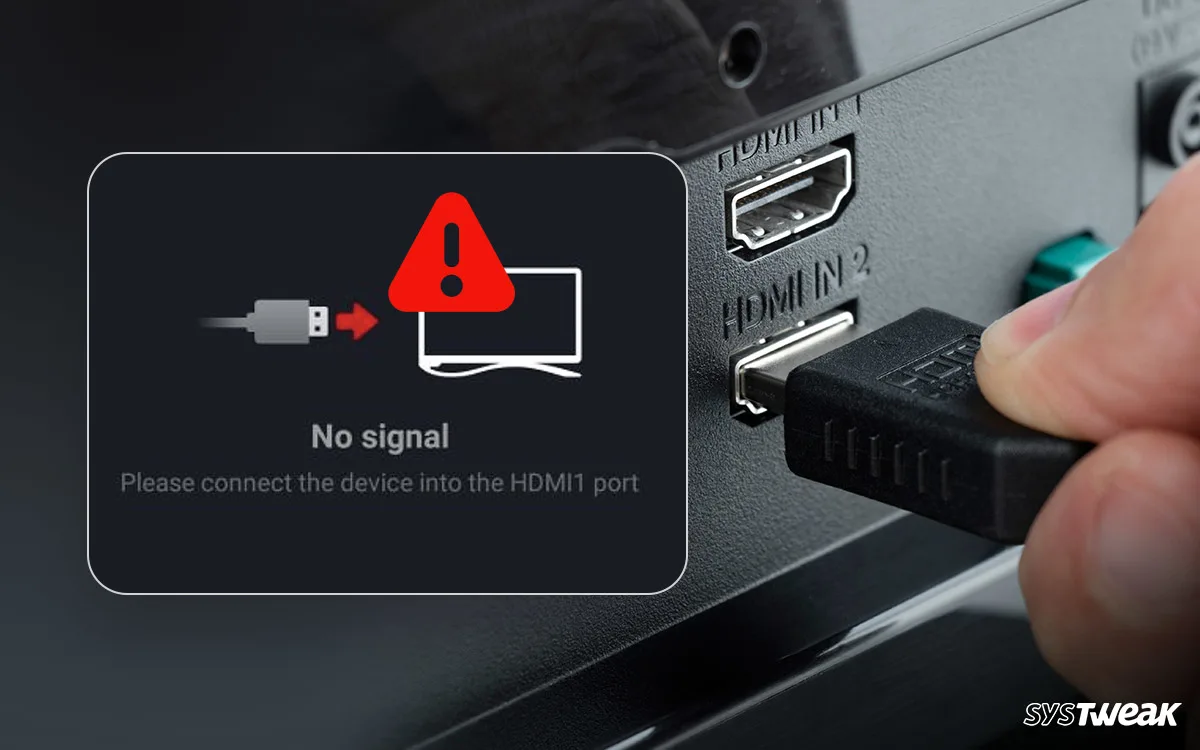
Are you encountering the most frustrating message: No HDMI Signal on your TV screen after selecting an input? If so, this post discusses the reasons and fixes to solve the problem.
No HDMI Signal is a common problem most face at some point, and solving it is simple unless it is a critical issue. Moreover, the fixes don’t involve replacing the hardware. However, when the problem becomes frequent, patience wears off, and what one looks for is a quick fix. If you, too, are facing similar problems, here are different ways to resolve the display port no signal issue.
What is no HDMI Signal Issue
The no Signal message means the TV or monitor is not receiving any input from the selected source. The problem can be fixed using different basic and technical fixes. You can follow them one by one and see which one works for you.
Reasons for TV or Monitor No Signal Issues
- Handshake is not established. This means High bandwidth Digital Content Protection (HDCP) cannot create a connection between the source device (Roku, game console, Blu-ray player, etc) and the output device you are using for display.
- Issues with the boot sequence.
- Wrong input selected.
- Broken HDMI cable or port.
- The source device is not connected to the power.
- Misconfigured display settings.
Blu-Ray Not Playing – What to Do
Basic Fixes
1. Unplug the HDMI cable from the primary device, wait for a minute, and replug it. Most of the time, this simple fix works; hence, never miss out on following it. Doing so restarts different processes and ensures a successful handshake between the devices.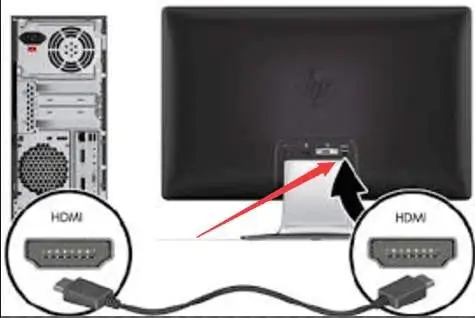
2. Change the boot sequence. For example, if you turn on the display before the HDMI source, turn off both, and then power them in descending order.
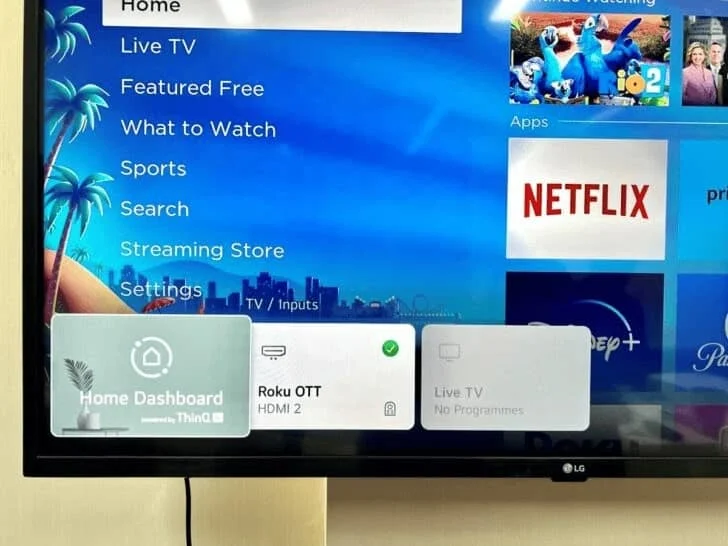
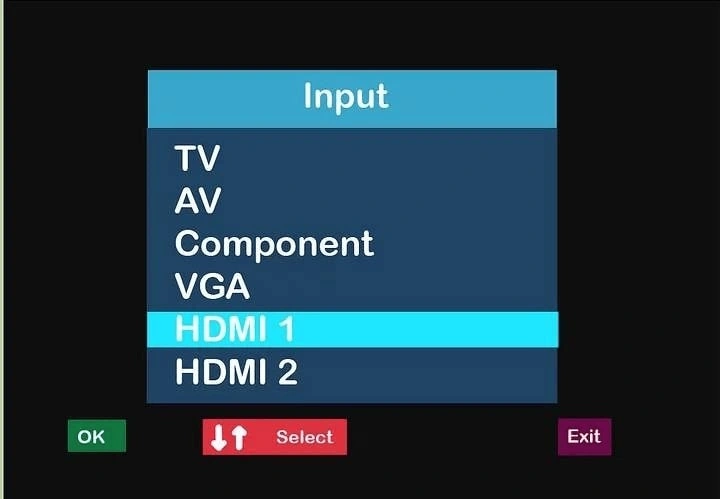
3. Check the input and ensure the right one is selected. To change the input, check your TV remote (not the one you received with Roku, Fire TV Stick, or Apple TV) > look for the Input or Source button, and switch to the correct HDMI input. This should solve the signal problem.
4. Check the HDMI cable. Most of the time, the no HDMI signal from the device docking station occurs due to a broken HDMI cable or port. To fix it, try plugging the device into an alternate HDMI port on the TV and see if it works. If it does, you know there is an issue with the port or the cable. Get it fixed to enjoy an uninterrupted experience.
5. Connect the source device to power.
6. Check resolution settings. Most smart TVs automatically adapt to resolution; however, some lack this capability, causing TV or monitor no signal issues. In such a case, we suggest setting the resolution to Aauto or selecting the best resolution for the TV.
7. Enable the HDMI connection setting.
If you connect an Android or tablet to the TV via HDMI, go to Settings > Display Entries > HDMI connection and enable HDMI connection. If it is enabled, disable and re-enable it.
If these settings are not available, move to the next method-
8. Disconnect all HDMI sources and reconnect them one by one. If multiple HDMI sources are connected, follow these steps:
- Unplug the TV/monitor from the HDMI port and detach it from the power outlet for 10 minutes.
- Attach the power cable and connect one device at a time to the HDMI port. Power on each device after connecting it and see if it works. Do this with all devices. This will help narrow down the issue.
Technical Troubleshooting
1. Update Graphics Driver
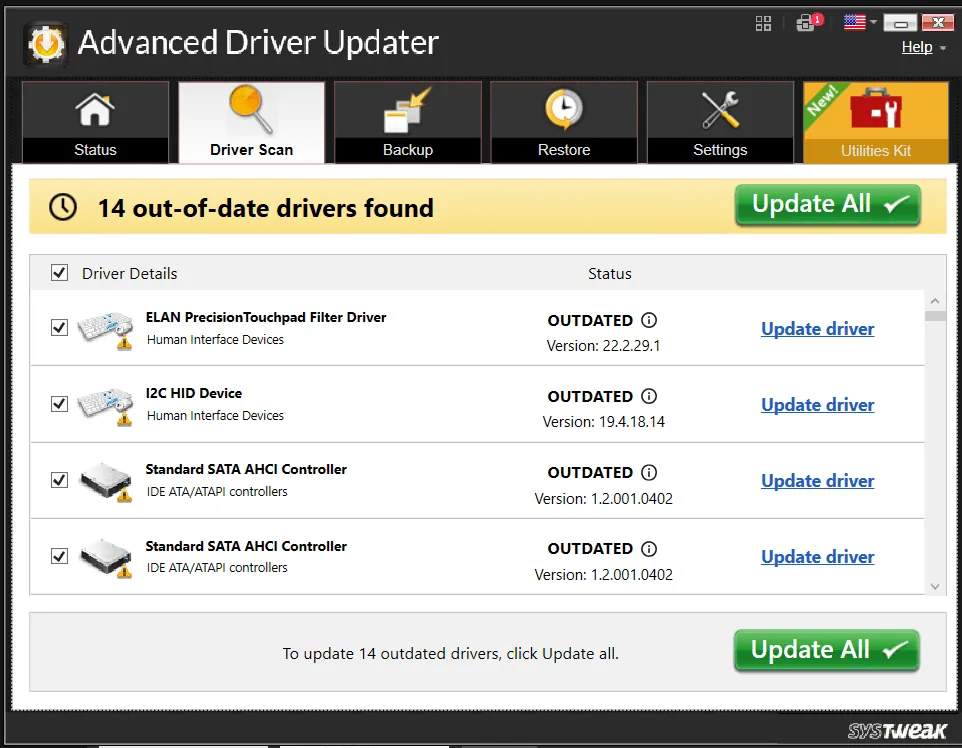
If none of the fixes has helped so far, it seems that the chipset and graphics drivers are outdated. To fix it, try updating these drivers. You can do it manually via Device Manager.
However, if you do have the required technical knowledge or you don’t want to spend time doing it manually, do it automatically with Advanced Driver Updater, one of the best driver-updating software for Windows. To use it and update the driver, you don’t need to know the device’s model number or version of the operating system your system is running. The tool automatically detects all this information and shows the most compatible drivers. Moreover, you no longer need to worry about downloading and installing incorrect drivers.
Using the free or paid product version, you can easily update drivers in just a few clicks.
Note : The paid version offers a 60-day money-back guarantee, and you get full product support.
To use Advanced Driver Updater, follow these steps:
- Download, install, and run Advanced Driver Updater.
- Click Start Scan Now to scan the PC for outdated drivers.

- Review the scan results and update the drivers. If you use the trial version, click the Update Driver link next to the driver you want to update. However, if you are a paid user, you can update all drivers by clicking the Update All button.
- Restart the PC to apply changes.
- Now, try to use the device. You should not face the No Signal issue.

In addition to this, we suggest updating the TV. To do so, follow these steps:
- Go to TV settings and click Support.
- Click on software update and let the system look for new updates.
- If an update is available, you will get the update now option. Click on it to proceed.
Note : This method is only for Smart TVs.
2. Reattach RAM, CMOS Battery
Sometimes, the No Signal problem can be caused due to hardware issues. To ensure that is not the case, remove and reattach RAM and CMOS battery on your motherboard.
Note : This is a tricky step. Hence, it should be performed by only those users who have technical knowledge or under expert guidance. Also, for safety, click a picture of the motherboard before unplugging RAM and CMOS. This will help re-attach the device properly.
- Turn off the device and detach it from all power supplies. Press the power button for 30 seconds to drain the battery.
- Unplug the RAM > clear it and reattach it. You will hear a click sound while removing RAM.
- Remove the coin-like battery CMOS from the motherboard. Keep it out for 5 minutes.
- Reattach it and connect all the cables.
- Wait for 30 seconds before powering it on. Wait for the system to configure itself. The No-signal issue should now be solved.
3. Factory Reset TV/Monitor
If nothing has worked, we suggest performing a factory reset on the TV/monitor. This should help fix the HDMI signal issue.
Wrapping up –
Facing issues like HDMI No Signal is quite annoying. However, you are not alone. Other users also face similar problems. Therefore, before you throw your device or replace it, try the fixes we have explained. They should help fix the issue. Do share your feedback in the comments.
Next Read :
Computer Turns On But No Display On Monitor – 5 Effective Ways to Fix


