
Windows 11, can run dozens of background services without interfering with Windows working. However, over time some of the services installed by third party apps continue to run even when the program is uninstalled and not required. This slows down system performance, startup and in some cases even hog RAM, spike CPU usage, and leave the OS feeling sluggish.
Most users remain oblivious until they face slow startup, program conflicts or the same services keep reappearing in Task Manager and take up most of the CPU resources.
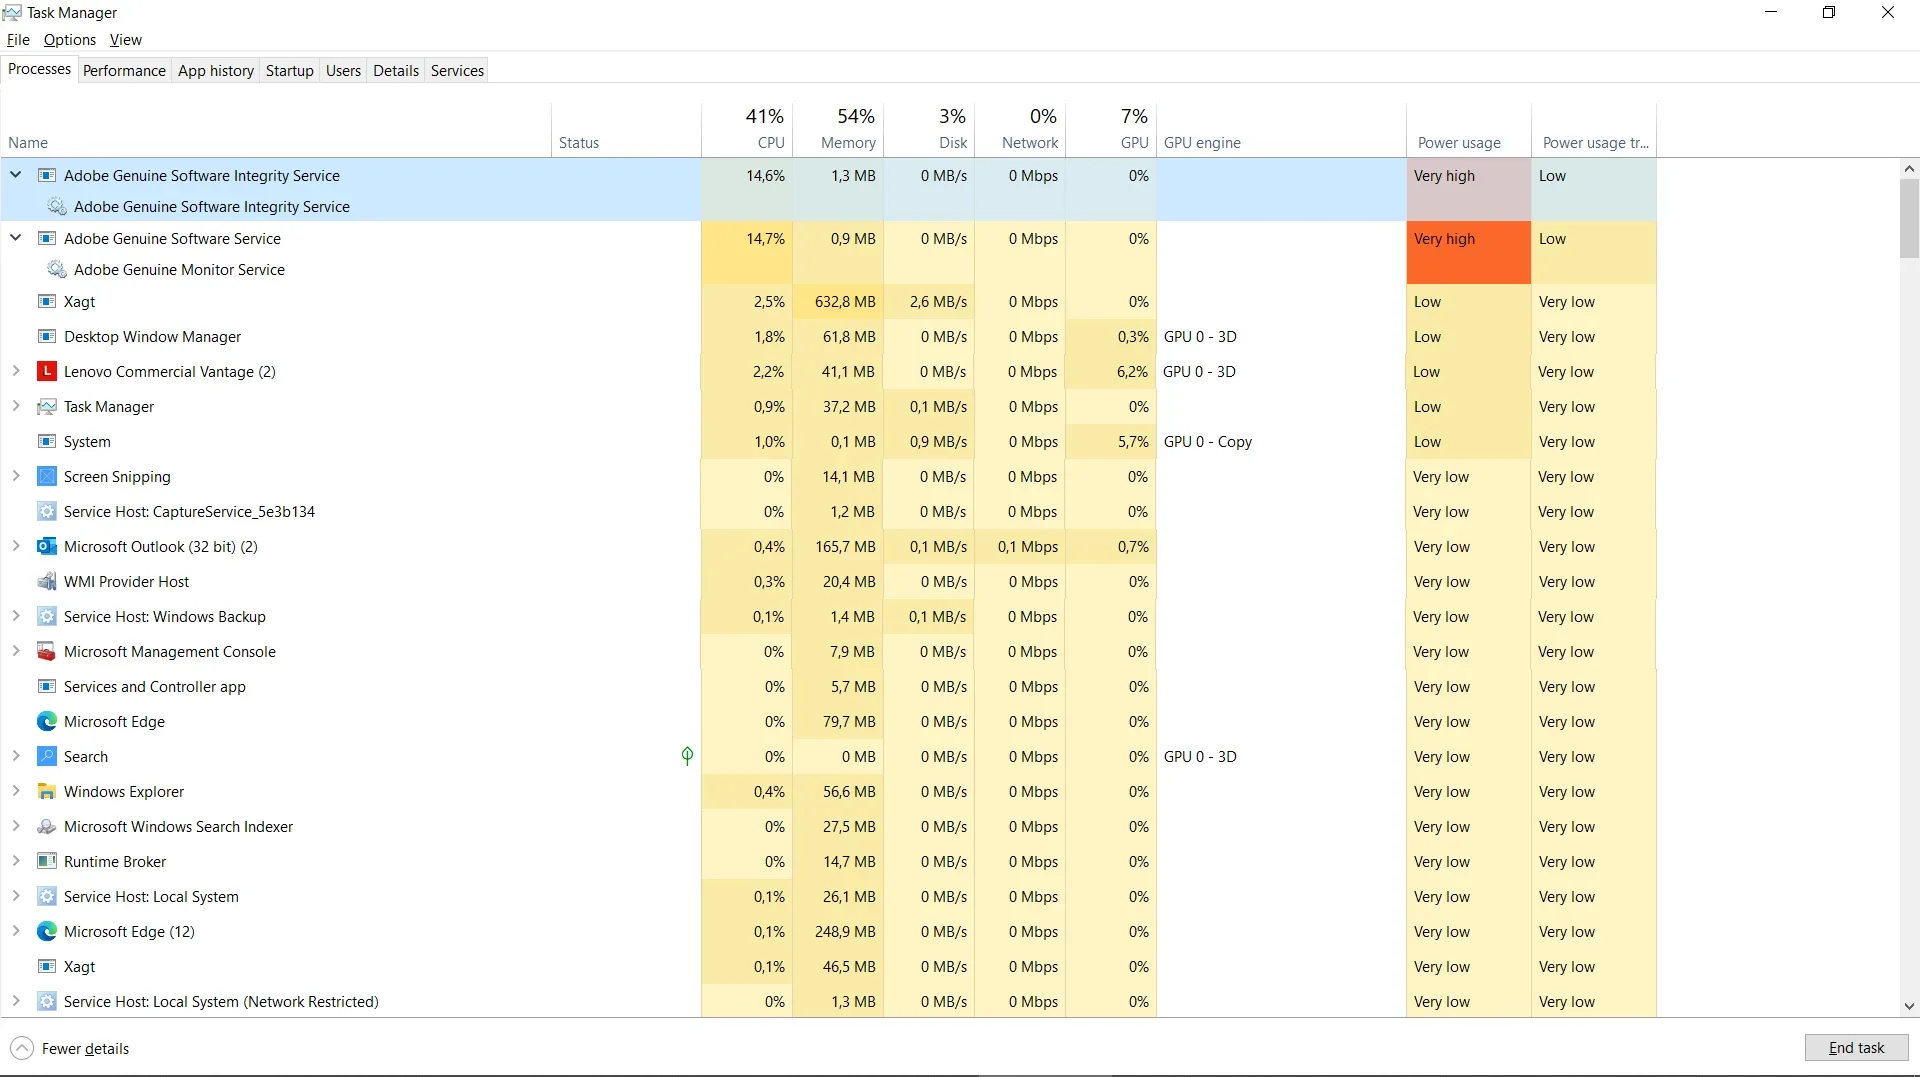
The most common example of it can be found on Adobe community itself where users switching from standalone apps to Creative Cloud had roughly ten background services running, several of which reappeared even after being disabled. Besides this services like Windows Search Indexer and the Antimalware Service Executable, Telemetry are found to spike CPU usage.
To safely remove such services without interfering with the system’s performance and functionality read the complete post below.
Before Removing Any Service Perform These Safety Checks
A service running in Windows is responsible for handling different processes. Therefore, before removing it is better that you create a System Restore point. This will help roll back changes if anything goes wrong.
1. Press Windows Key + S on keyboard to open Windows search.
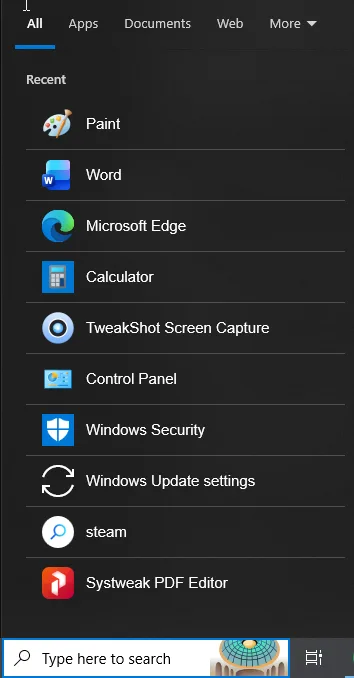
2. Type Create a restore point and select the right search result.
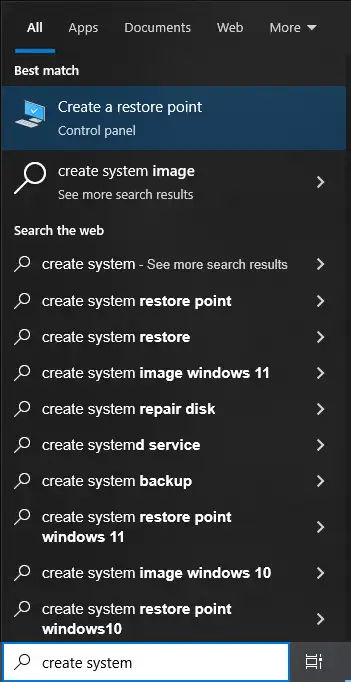
3. Click Create.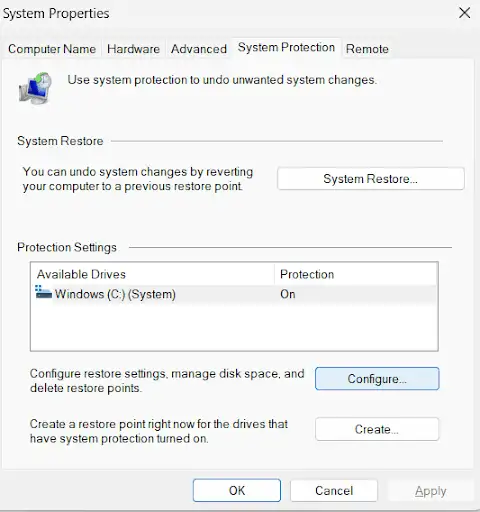
4. Give it a name for identification purposes and again click Create.
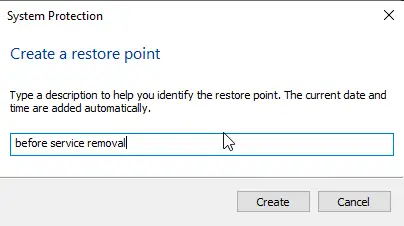
5. Wait for the process to finish.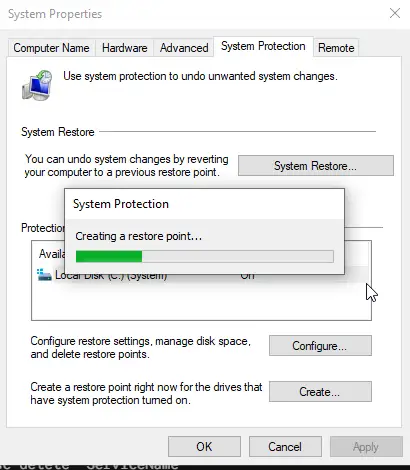
6. Once done, you will get the success message.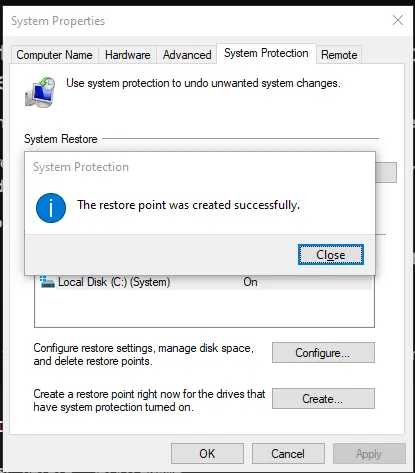
Once the restore point is created let us move to the fixes.
Ways to Remove Service in Windows 11
Method 1: Deleting Windows Service Via Command Prompt (sc delete)
1. Open elevated Command Prompt. Right click Comm
and Prompt and select Run as administrator.
2. To close the service you should know its exact name. For this press Windows + R and in the Run window type services.msc and press Enter key.
3. Double-click the service you want to remove. Copy its name.
4.Now go to Command Prompt window and here type
sc delete “ServiceName”
(Replace ServiceName with the exact name you copied).
5. Once done you will get the message [SC] DeleteService SUCCESS.
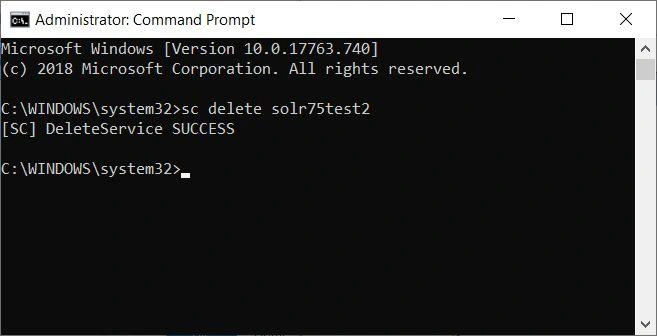
Note : If you see the service still running the Task Manager it doesn't mean the command didn’t work. It is just that a service doesn't disappear as you use the sc delete command. Windows flags the service's registry entry for removal, and once it is confirmed that no other program or app is using the service it is removed.
In cases where the service is still running, or some other process is using it, Windows moves it to marked-for-deletion state. Once the application using it closes or system reboots the service is then removed. This is why stopping the service first and then removing it is the right process.
Method 2: Fixing “Access Denied” via Windows Registry (Regedit)
You use this method when the SC delete command gives [SC] OpenService FAILED 5: Access is denied message.
This happens when Windows tries to delete a protected service and Windows blocks the removal. Therefore, before proceeding and to be safe, always backup the registry.
Steps to backup registry
1. Press Windows + R and type Regedit.
2. Go to File > Export > HKEY_LOCAL_MACHINE.
3. Give it a name and save.
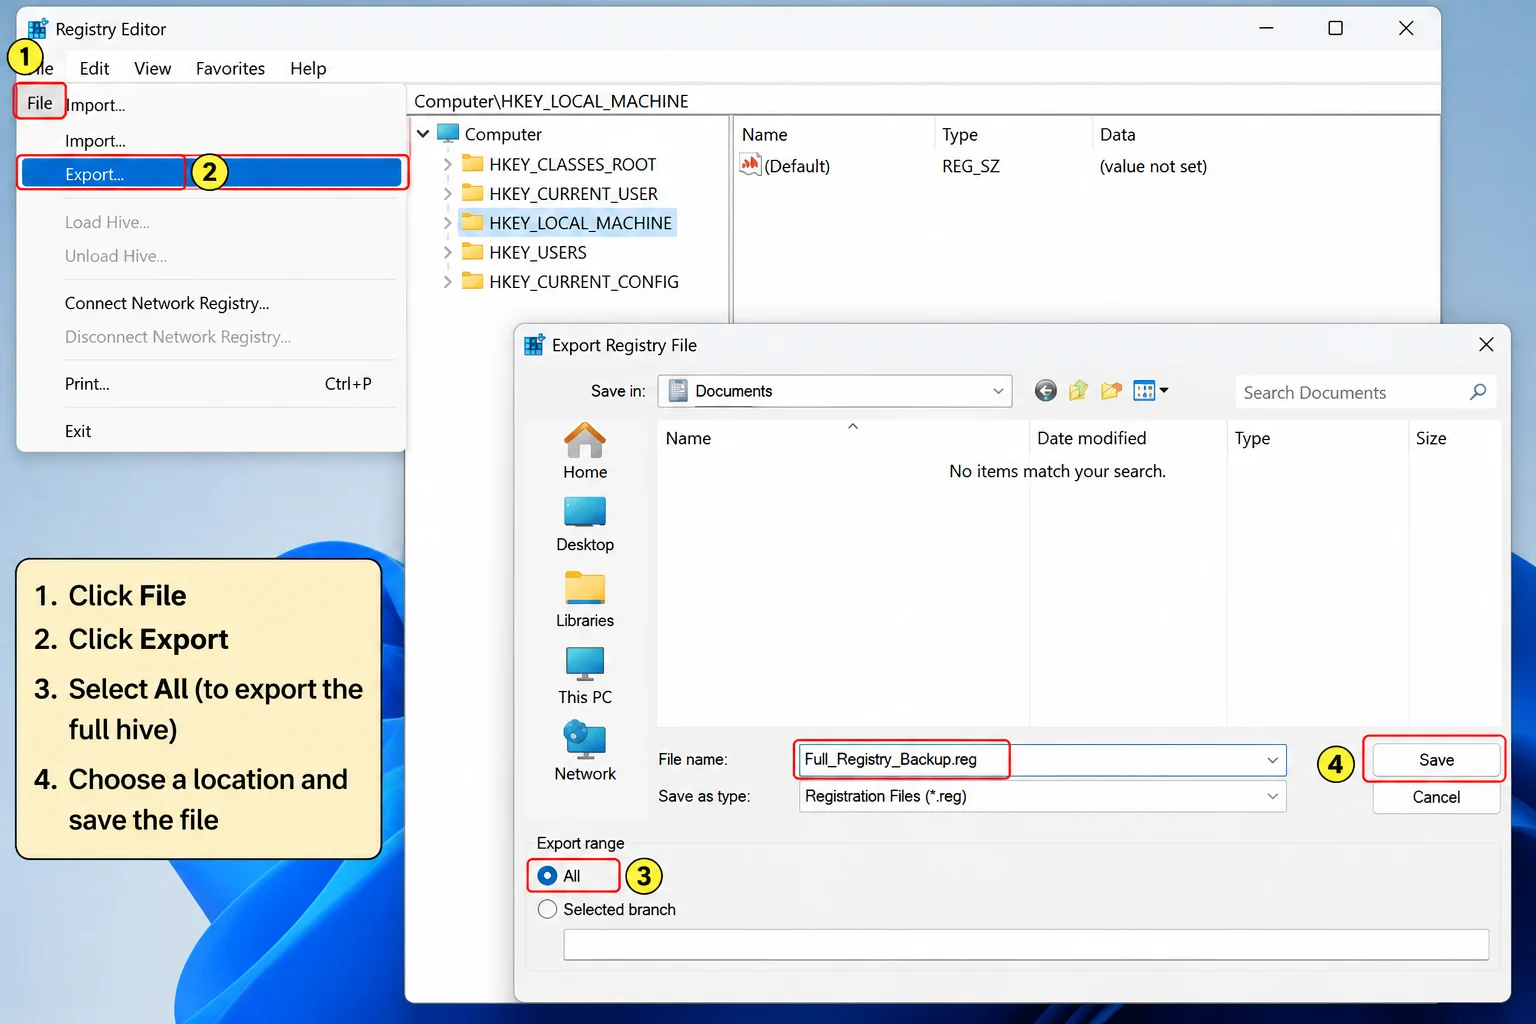
4. Once you have the registry backup again open Registry Editor. Press Windows + R, type regedit, and press Enter.
5. Go to:
HKEY_LOCAL_MACHINE\SYSTEM\CurrentControlSet\Services\ServiceName (ServiceName is the name of the service you want to remove)
6. Look for a sub-key named Security under that service. Right-click and select Delete.
7. Reboot, then run sc delete “ServiceName” again from Method 1.
How to fix Drive is not Accessible “Access is Denied” Error in Windows 11/10/8
Note : A documented real case: a leftover McAfee Validation Trust Protection Service (mfevtp) throws this exact error, and deleting its Security sub-key is the confirmed fix. If there's no Security sub-key present on the service you're working with, Access Denied has a different cause and this step won't help.
Method 3: Remove Services Via Windows PowerShell
If you have PowerShell 7 only then this method will work. Most Windows 11 users have PowerShell 5.1 therefore, you need to first check if you have PowerShell 7 or not.
1. Open Windows Terminal and click the dropdown arrow next to the tab bar. If you see a profile labeled as PowerShell you have PowerShell.
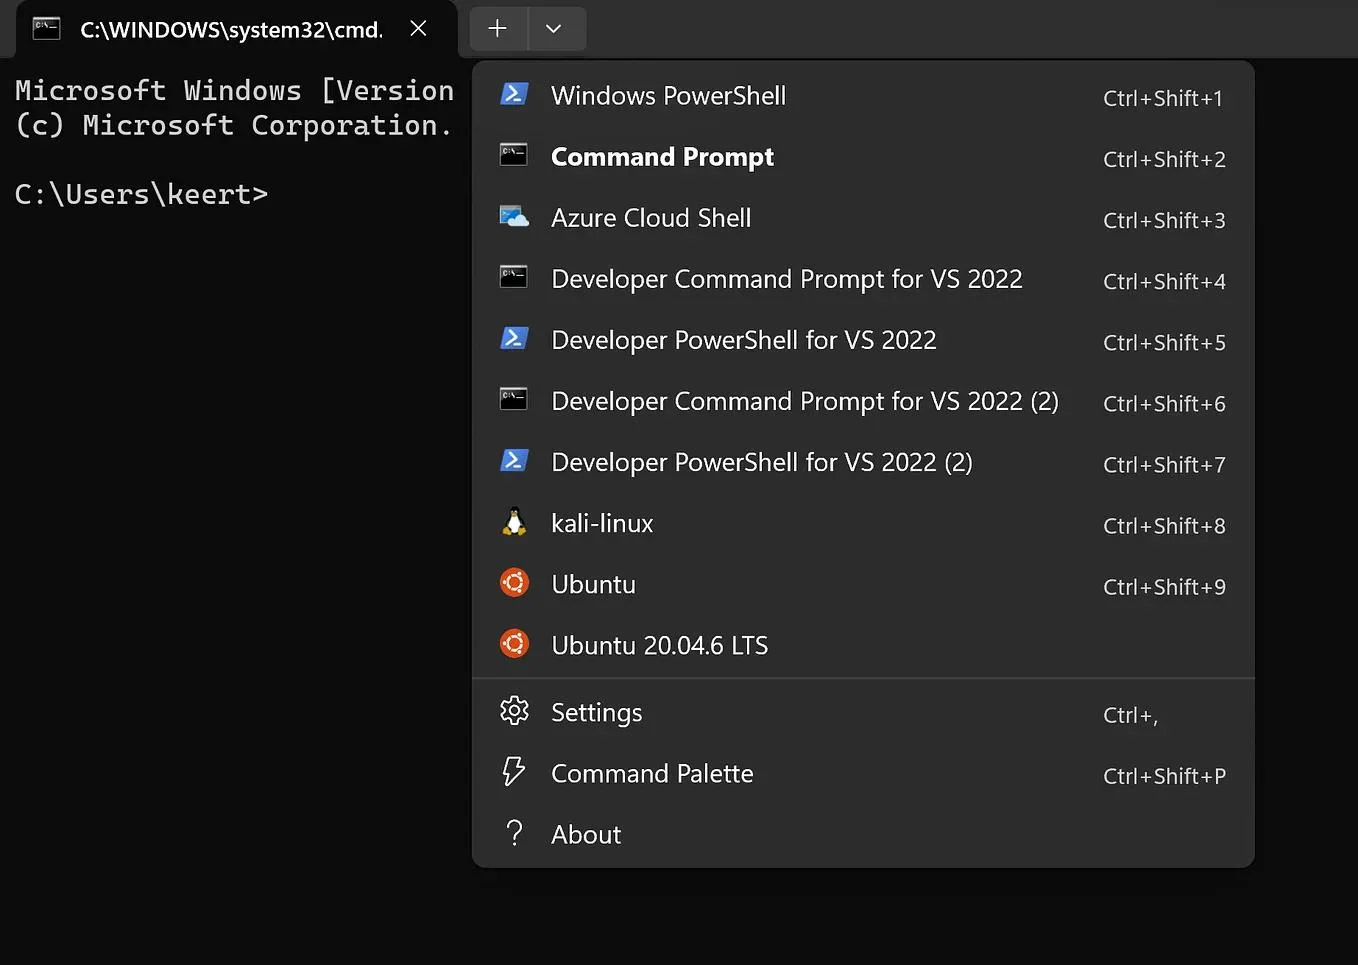
2. If it’s not listed follow the steps to install it.
Steps to install PowerShell 7
1. Open Windows Terminal.
2. Copy and paste – winget install –id Microsoft.PowerShell –source winget
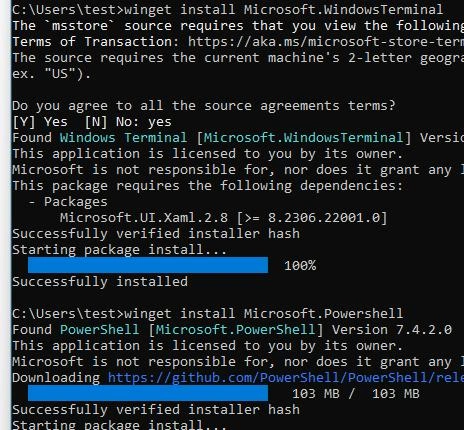
3. Let the installation finish. Close and reopen Windows Terminal. Click the dropdown arrow and you should see a new PowerShell profile.
4. Select it to open PowerShell 7 tab.
5. Confirm the service name by going to services.msc.
6. Type Remove-Service -Name “ServiceName” Replace service name with the name of the service you want to remove.
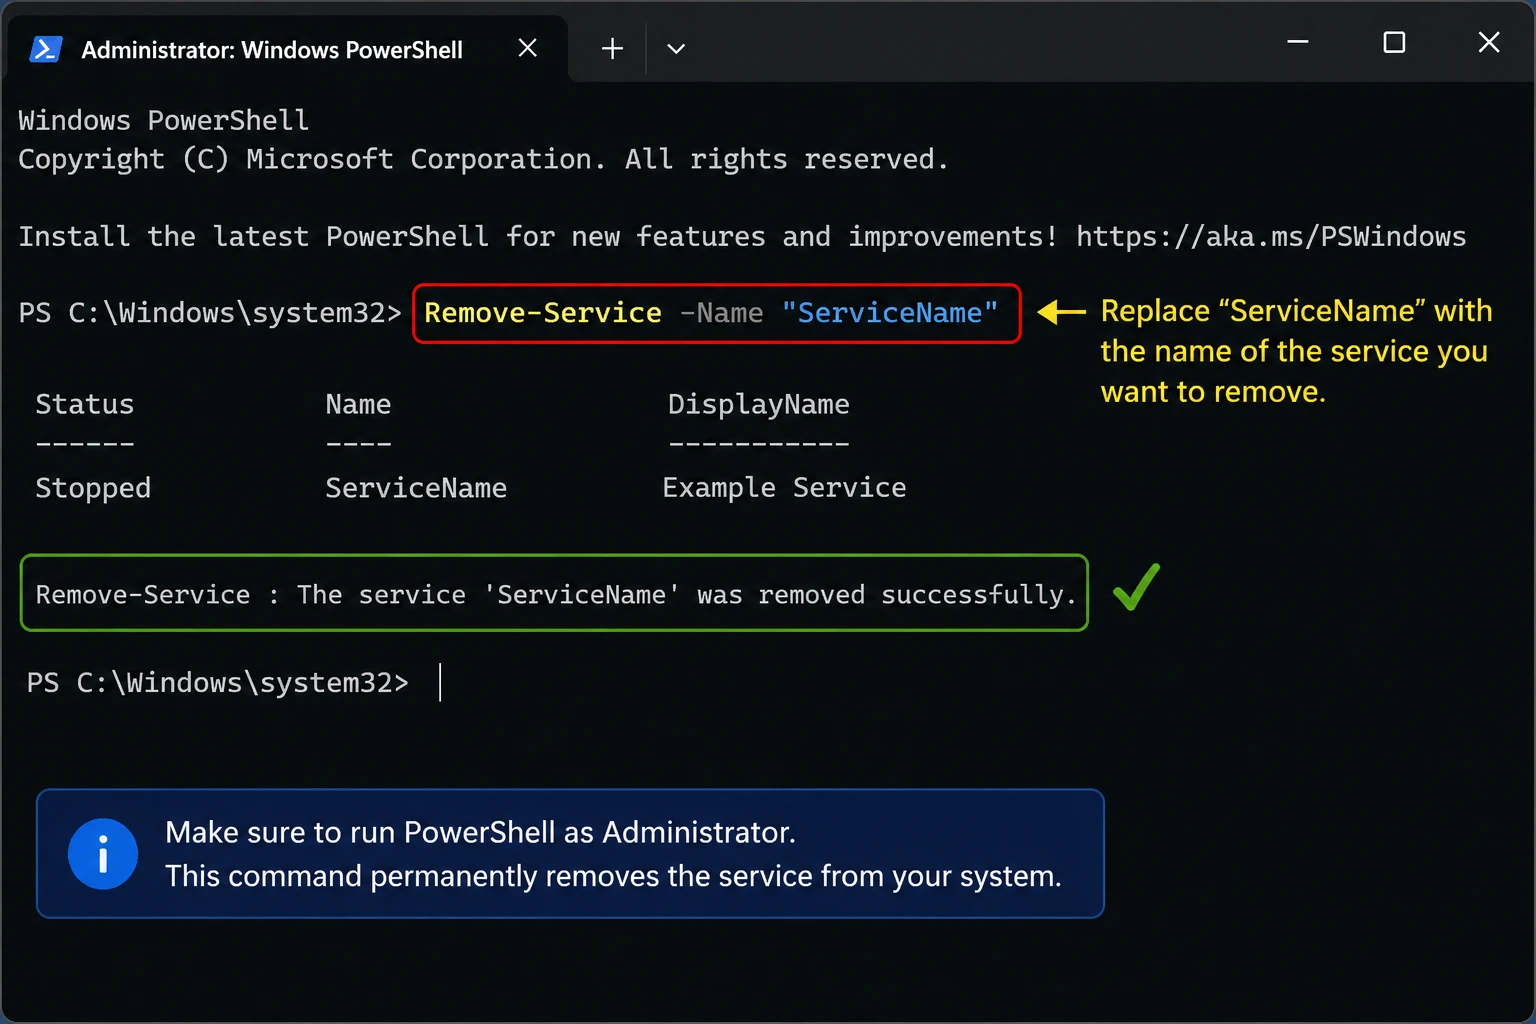
7. If there is no error message the command works. Open Services (F5) to confirm.
Note : When you run sc delete while using Windows PowerShell 5.1 it doesn’t remove the service because sc here is an alias for a built-in Set-Content.
Method 4: Cleaning Leftover Files
Deleting the service entry doesn’t mean all related tasks, program files, folders, or scheduled tasks are also removed. To remove all associated files along with the service clean junk files too. You can do it manually by following the steps below:
1. Go to the installation folder and remove leftover files manually.
2. Open Task Scheduler and remove all related tasks.
However, if you do not want to do it manually or find it technical the best way to do so is to use an PC optimization tool like Advanced System Optimizer. This system tweaking tool using its excellent System Cleaner and Smart PC Care module with Deep Scan thoroughly scans your system for leftover files and clears them. This means without going through each and every location manually you can get the job done in just a few clicks.
Cleaning Junk Files Using Advanced System Optimizer
1. Download, install and run the PC cleaning tool.

2. Click Disk Cleaner & Optimizers > System Cleaner.

3. Click Start Scan Now and wait for the scan to finish.

4. Review scan results and clean all the detected issues.
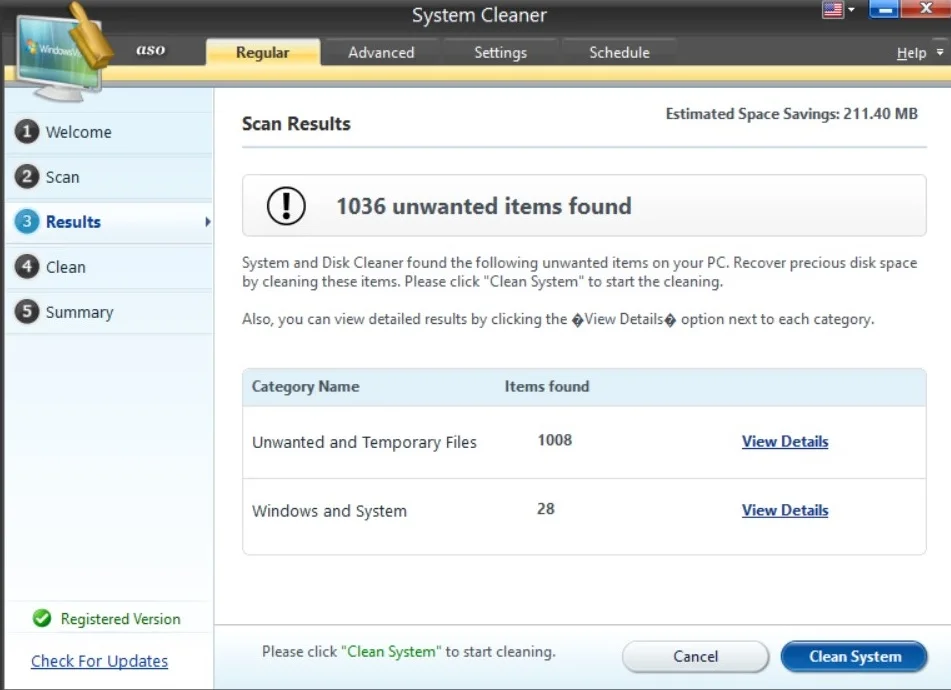
5. Next, perform Deep Scan from the Home Screen. Select Deep Scan and click Start Smart PC Care.
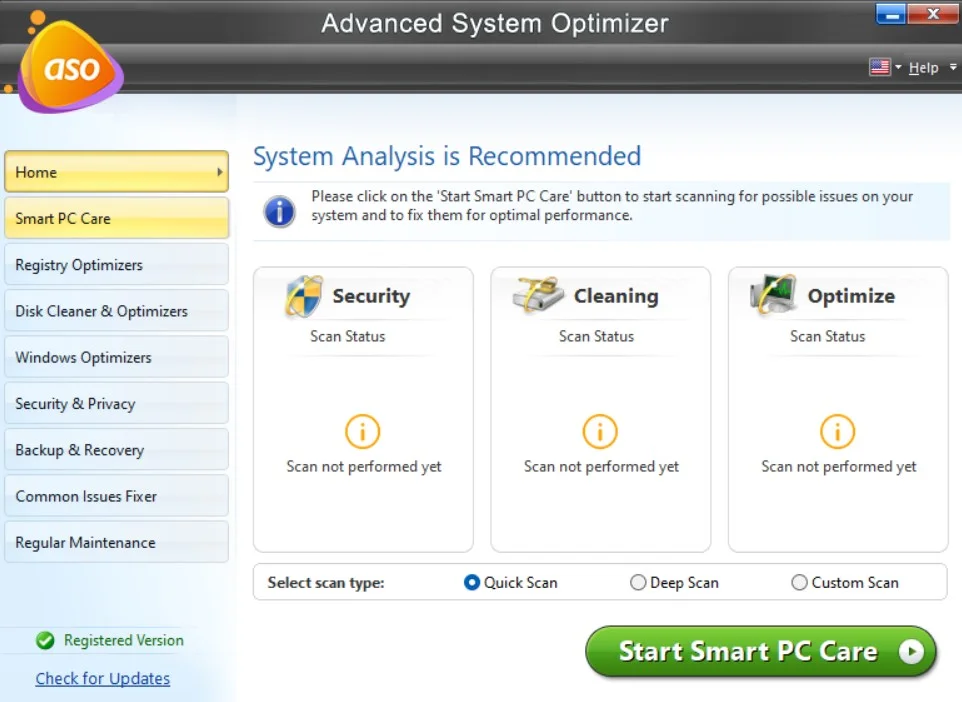
6. Let the scan finish and then click Optimize Now. This will clean invalid registry entries and all the leftover files of all uninstalled apps giving you a junk and clutter free PC.
The best thing about this PC cleaner is that as soon as you register it before performing any scan it creates a system restore point.
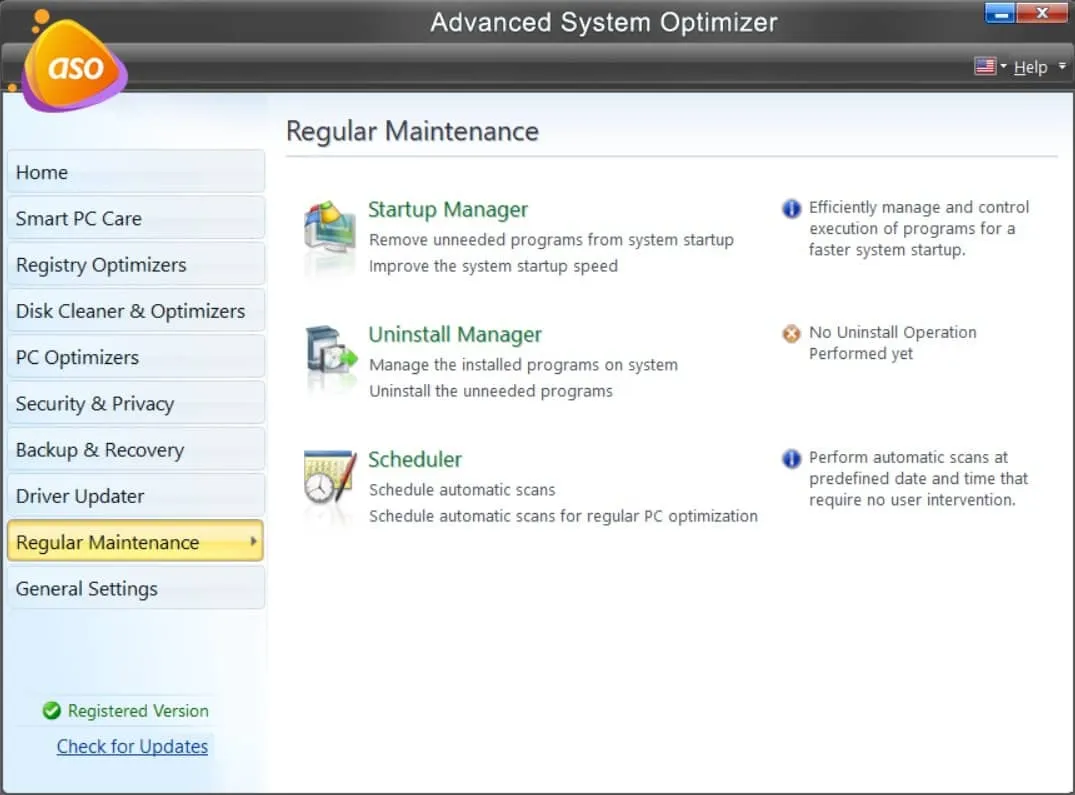
Using these simple steps you can remove a service from Windows 11. In case the service keeps coming back, go to Task Scheduler to check if there is an entry of the same application. If so, delete it and also use an Uninstaller to remove the application completely without leaving leftovers. You can use the Uninstaller module in Advanced System Optimizer for this. Click Regular Maintenance > Uninstall Manager.
What to Avoid When Deleting a Service in Windows 11
1. Don’t delete service by display name. Check the service name and then delete.
2. Never re-run [SC] again when you get DeleteService SUCCESS. The entry is already marked-for-deletion, reboot the system and it will go away.
3. Access Denied doesn’t always mean there is a permission issue. Use registry fix to sort it.
4. Check PowerShell version before running sc delete command.
5. Deleting the service without uninstalling the app completely will not help.
Wrap Up
At times a service might seem stuck even when deleted. In such cases reboot the system to refresh the cache. However, if a service keeps reappearing, ensure that the related app is completely uninstalled. There are no files, folders, or scheduled tasks running, if any is still on the system deleting service does not work. So first uninstall the app completely and then stop the service and then delete it. Also, always search for the service with its service name instead of display name. This way you will be able to remove a Windows service from Windows 11 that you can’t get rid of.