Do you need to update your Lenovo t440s, t470s, t480s, t460s, or t490s drivers?
This article will show you how to update Lenovo t440s, t470s, t480s, t460s, and t490s drivers. The tactics presented are beneficial for an expert & a beginner.
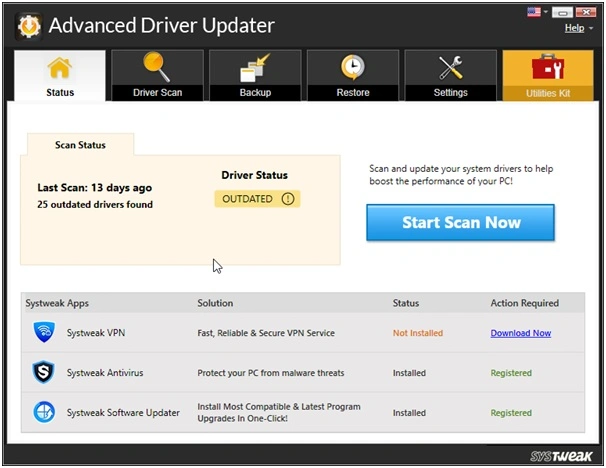
Advanced Driver Updater is a reliable and trusted software to detect and update Lenovo drivers. After examining your PC for problematic, corrupt, and outdated drivers, this amazing application displays the latest driver updates. The best feature of this driver updater is that it takes a backup of old drivers & is completely risk-free to use.

Also Read:- How To Download Lenovo x201 x230, x240, x250, x260, x270 Drivers for Windows
In the sections below, you’ll find the instructions to update your Windows PC’s Lenovo t440s, t470s, t480s, t460s, and t490s drivers.
Top Ways To Update Lenovo t440s, t470s, t480s, t460s, t490s Drivers.
Method 1:- Updating Lenovo Drivers from the Official Website
1. Go to Lenovo’s official website.
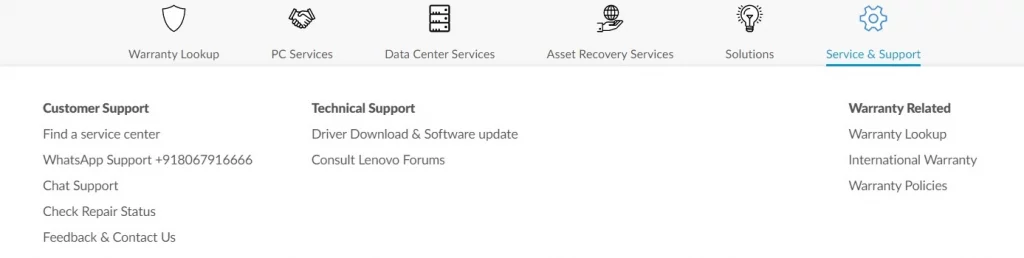
2. Choose Service & Solution

3. Service & Support > Driver Download & Software Update from the drop-down menu.
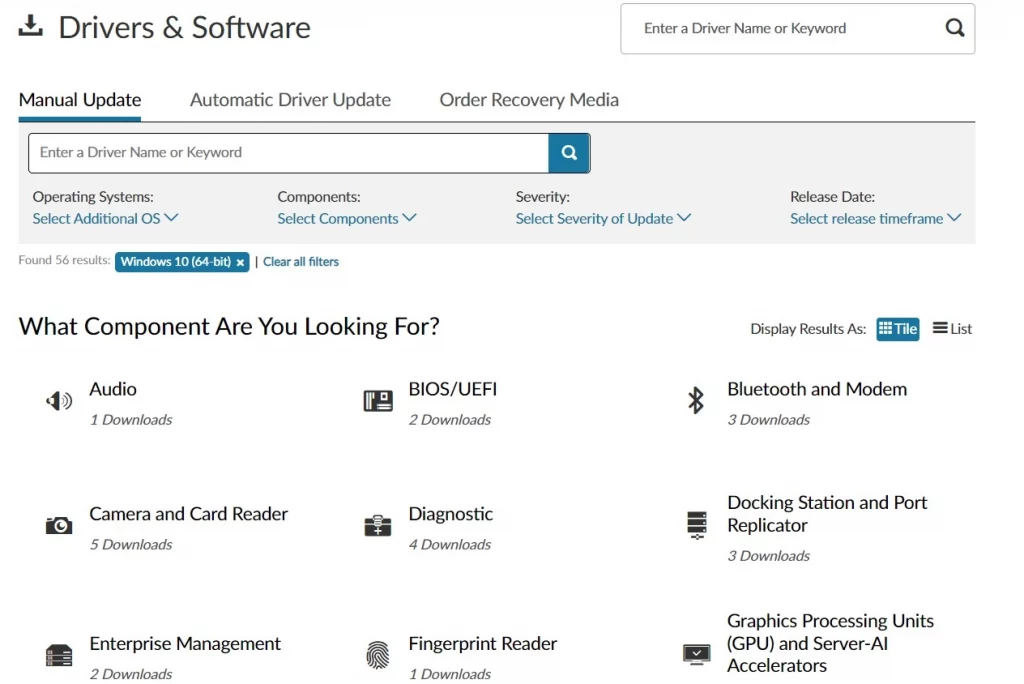
4. In the search box, type the serial number of the device to find the driver update.

5. Click Manual Update and select the category.
6. Next, click the down arrow to download the setup file.
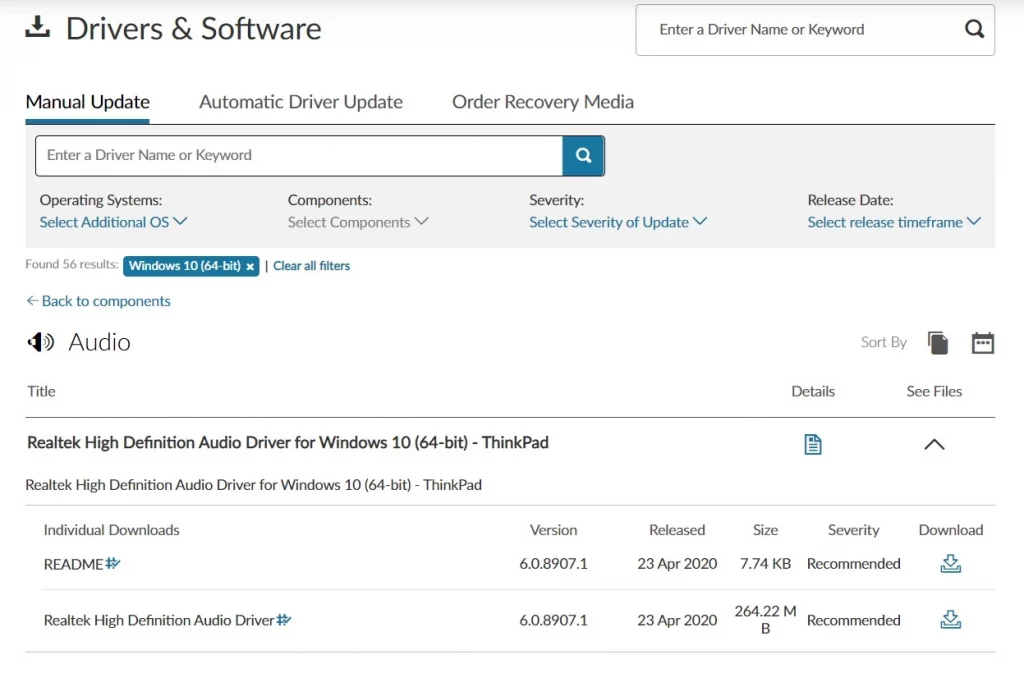
7. Allow the setup file to be downloaded. Double-click the driver to install it.
8. Restart the computer to implement the modifications.
Note : Repeat the same process for the remaining drivers (t470s, t480s, t460s, and t490s).
Read More: How To Download & Update Lenovo T420 Drivers for Windows 11, 10
Method 2: Use Advanced Driver Updater to Update Your Drivers
To update drivers without providing serial numbers, model numbers, etc, use Advanced Driver Updater. The software automatically recognizes device details and shows the latest driver updates. You can use either the free or the paid version of the software to update drivers.
A 60-day money-back guarantee is included with the paid version of Advanced Driver Updater.
Follow these steps to use Advanced Driver Updater:
1. Get Advanced Driver Updater and install it.
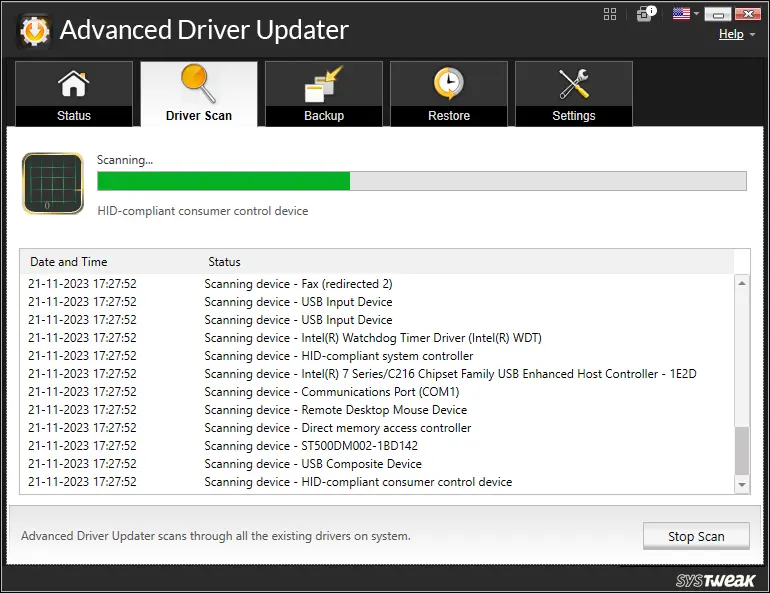
2. Run the best driver updater & click Start Scan Now to perform a scan for problematic drivers.
3. The driver updating software will now look for outdated drivers.
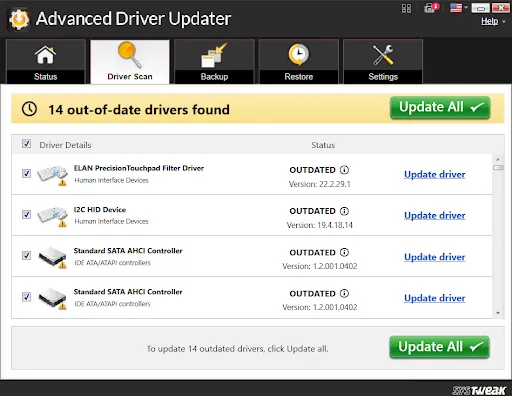
4. Review the scan results and as a free user click Update driver to update one driver. However, if you are using the registered version go with the Update All button and update all outdated driver.
After the drivers are updated restart your computer.
Wrap Up:
For the proper functioning of a device, drivers are essential. However, not everyone knows how to detect and update problematic drivers. Hence, to update the drives without any issue, we have discusses the two most common ways for updating drivers. You can use any to avoid facing issue caused due to outdated drivers. However, if you are short on time, the easiest way to update drivers is to use Advanced Driver Updater. We hope you find the information useful and were able to update the drivers to resolve the issue you were facing on your Lenovo laptop.
Recommended-


