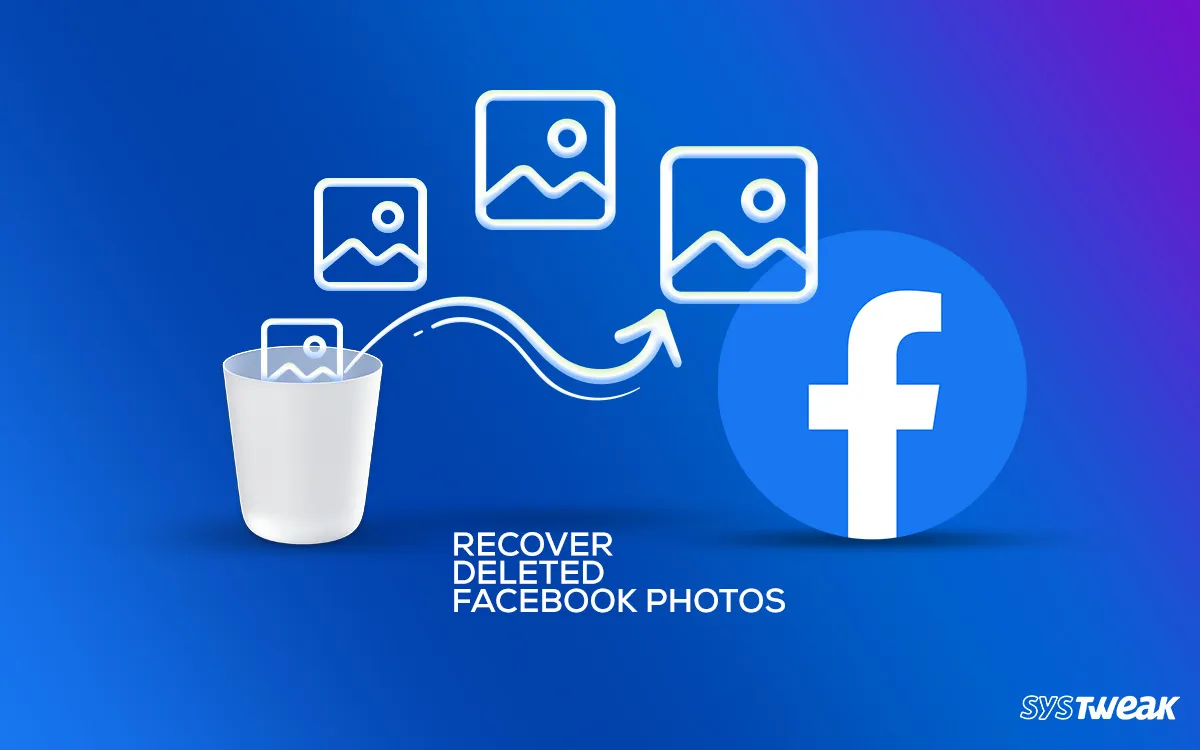
When you accidentally press the Delete button on Windows and Mac, you know you can recover deleted images from Recycle Bin/Bin. But can the same thing be done when using Facebook?
The answer is no because Facebook doesn’t have a Trash or Recycle Bin. So, does it mean there is no way to recover deleted Facebook photos? Well, what if we say we know specific methods and a tool using which you can recover deleted photos?
Over the years, Facebook has established a reputation and market presence as a social media platform. Due to this, people trust it and use it to upload and share pictures. However, when a photo or video is deleted from here, it is gone forever (or that’s how it appears).
So, without further delay, let’s get started and learn how to retrieve deleted photos from Facebook.
How to Recover Deleted Photos on Facebook from Years Ago
Facebook’s excellent archive feature allows you to save a copy of all posts, pictures, videos, and information and restore deleted images from Facebook. Other photo recovery apps also help retrieve deleted photos.
Now that we’ve disclosed the secret to recovering lost Facebook pictures let’s learn how to do it step-by-step.
Method 1 – Recovering Deleted Photos on Facebook via Facebook Archives
Time Required: 05 minutes
The social media platform Facebook keeps photos, videos, and posts long after you have deleted them. Let’s figure out the ways to get them back using Facebook Archives.
Step 1: Go to Facebook.com and sign in to your Facebook account.

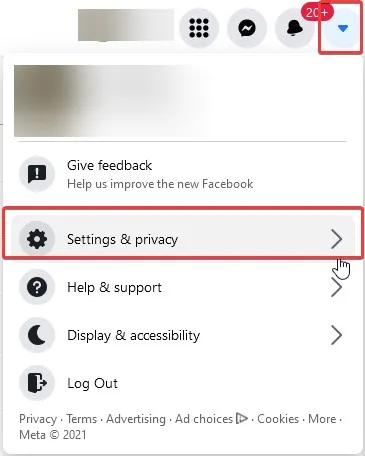
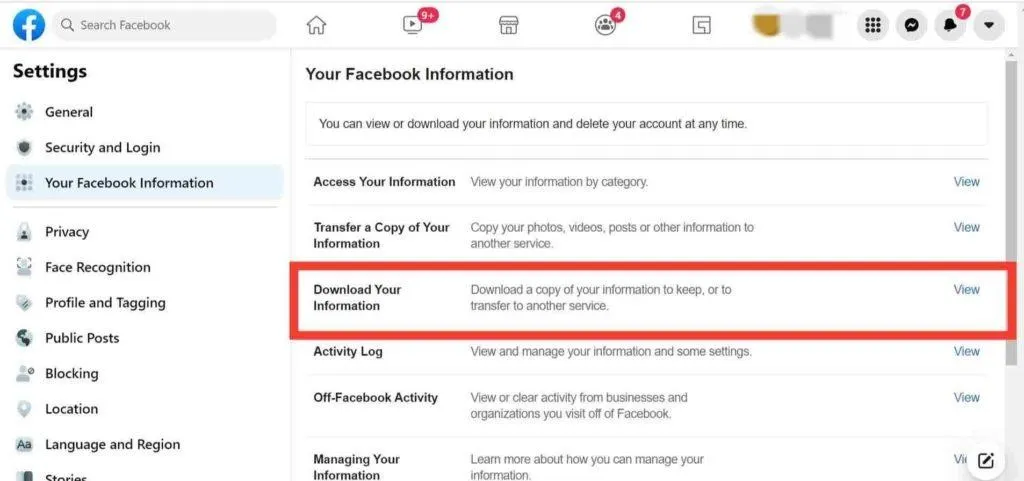
Step 2: Go to your accounts settings page by clicking the down arrow and selecting the Settings & Privacy option > Settings > Your Facebook information >Download your information.
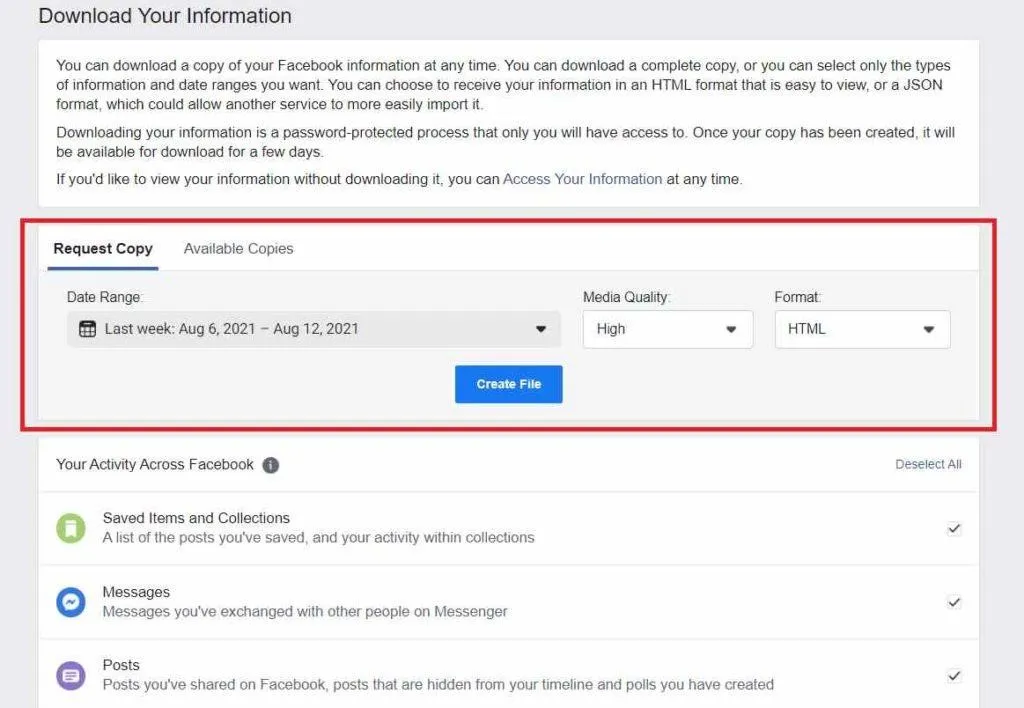
Step 3: Go to the information page to view Facebook account data. Select the Date Range, Format, and media quality for download.
After this, click Create File to download the data from your Facebook account.
Step 4: Click the Download button to get the file & find the deleted Facebook images.
Using these simple steps, you can retrieve lost photos, posts, and other data. However, if you deleted your Facebook account or didn’t remember the details, and the images are deleted from the Facebook Archive, then? Try other methods given below.
Method 2 – Restoring Data from the Recycle Bin
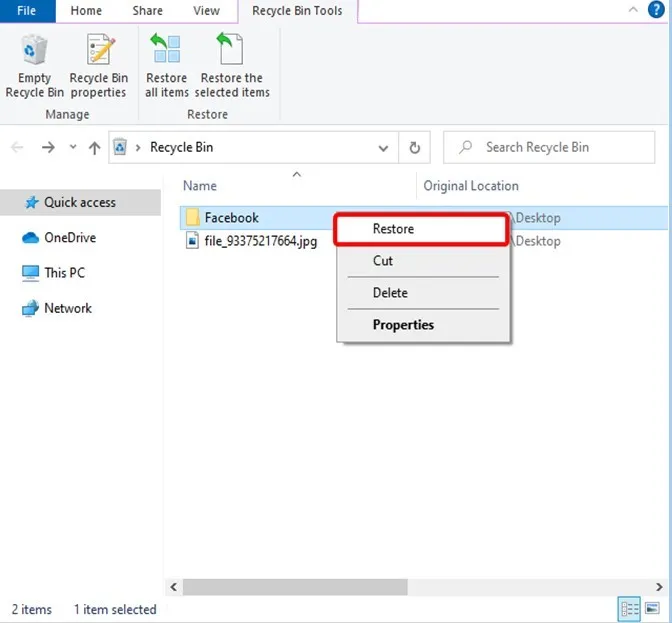
When a file saved on a PC is mistakenly deleted, the first thing you should do is check the Recycle Bin. So, let’s learn how to restore deleted Facebook folders from the Recycle Bin. This step will work when the Recycle Bin is emptied.
1. On your Desktop, look for the Recycle Bin icon.
2. Double click to open it.
3. Here, check for the deleted Facebook images and folder. When located, select them > right-click > Restore.
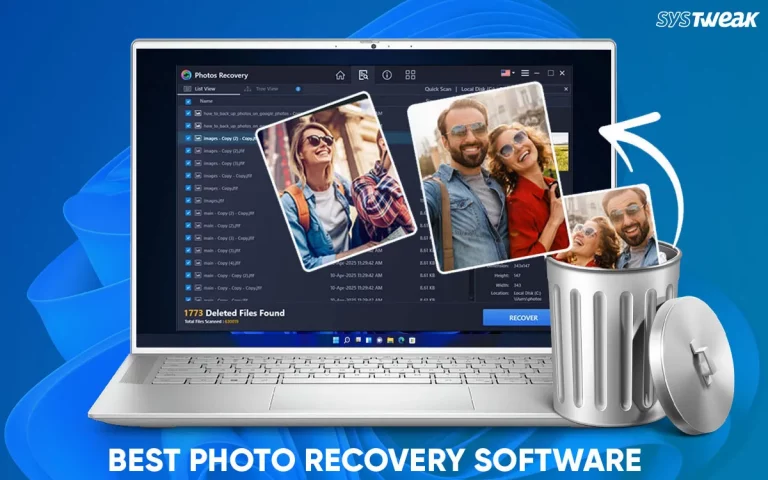
If the Recycle Bin is wiped or the folder is not in the Recycle Bin, we suggest you try Photos Recovery. It is a powerful tool that helps restore permanently deleted images saved on a PC. The recovery tool also helps retrieve permanently deleted images and video files. You can use it to recover media files from an encrypted drive (BitLocker), formatted hard drive, and more.
Method 3 – Use a Backup to Recover Deleted Photos from Facebook
If you use your smartphone or PC to upload pictures, you may find a backup created for recovery purposes. You can use this backup to restore the images that you deleted after uploading. Facebook allows you to save a copy of the images to your device. If you have made any edits to a picture before uploading, using the Facebook uploads manager, you get the same copy of the image saved on your PC/Smartphone.
Eventually, your backup will help you regain your deleted photos.
Always keep a backup of your important data. You can use Google Drive or any cloud storage like Right Backup.
Method 4 – Recover Deleted Facebook Photos Using a Tool
To keep data protected and avoid facing unforeseen data loss situations, keeping data backup is suggested. However, what can you do due to a shortage of space or human error if the data is deleted from external or internal hard drives or USB Flash drives? This is when the Photos Recovery tool comes into play. With the help of this tool, you can recover permanently deleted photos & videos. This application offers different scanning modes and is easy to use.
Steps to restore deleted Facebook photos from your PC or USB drive:
Step 1: Download & install the Photos Recovery tool

Step 2: Run the application & select the drive where Facebook folder was saved.
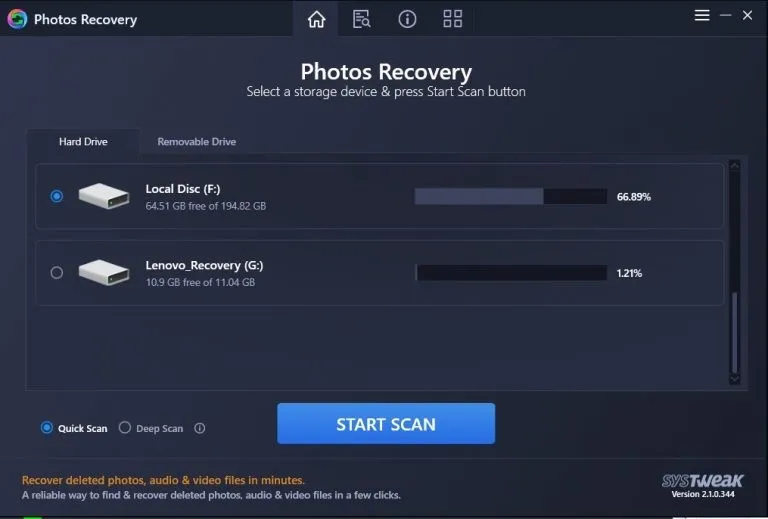
Step 3: For in-depth scanning, we suggest running the Deep Scan.
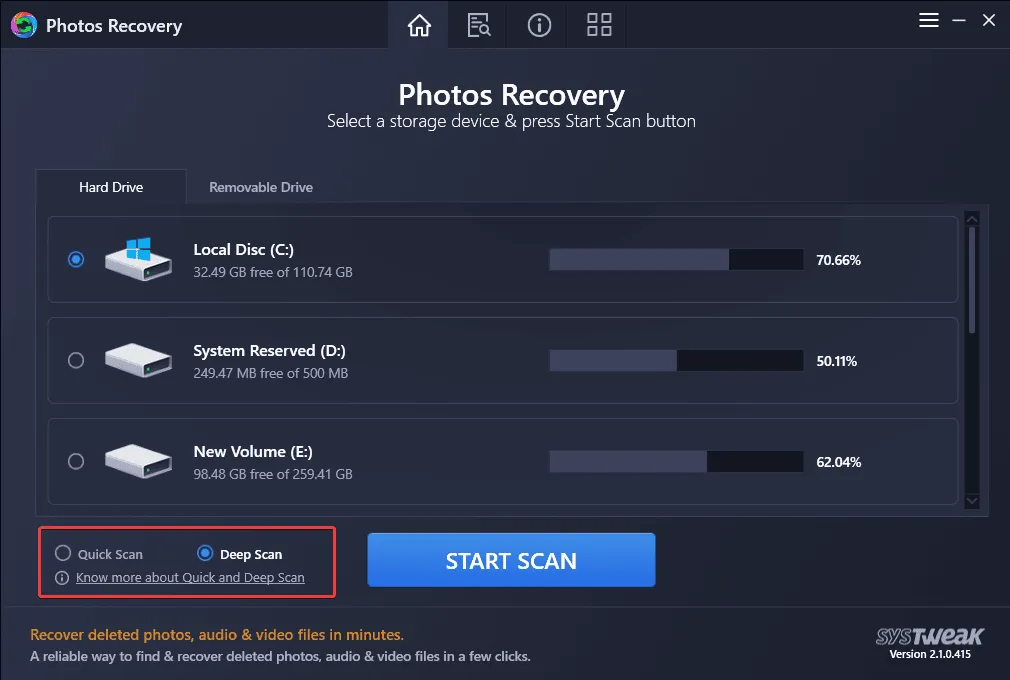
Step 4: Depending on the disk size Deep Scan will take so wait for the process to finish.
Step 5: Preview scan results > select the images you want to restore and click the Recover button.
Note: To avoid overwriting data, never restore data on the same location you are scanning.
Step 6: Select the drive to save data and hit the Select Folder button > Recover.
Wait for the recovery process to finish. Once done, head to the location where you saved the recovered data, and that’s it.
You can restore deleted Facebook photos and videos from your computer using these simple steps and the robust tool Photos Recovery
Wrapping Up-
In the end, there are different ways to retrieve Facebook photos. The quickest of all is undoubtedly the Facebook Archive. However, if the images are deleted from the PC, you can use a recovery tool like Photos Recovery, which is compatible with Android, too. The recovery tool will help you get back all deleted photos and videos.