
While trying to install the Windows update, are you encountering Windows 11 installation has failed error? If so, you are not alone; several other users have reported facing a similar problem. Luckily, the problem is fixable, and you can do it on your own by following the steps mentioned below.

However, before we learn how to troubleshoot the error, let us narrow down the reasons that cause the installation of Windows 11 to fail.
Reasons for Windows 11 Installation Failed
The error can be caused due to multiple reasons. Here we list down the most common ones that will help you understand the reason behind the blocked Windows 11 installation task.
- The external hard drive is attached to the PC.
- Outdated or corrupt device drivers.
- Either the PC is incompatible with Windows 11 or does not meet system requirements.
- Faulty Windows 11 ISO file downloaded or the Insider preview build has problems.
- Issues with disk, UEFI, secure boot, or MBR.
- Insufficient disk space.
- Interference caused by the antivirus or third-party application.
- Copying Windows installation files twice.
- Corrupt Boot Manager.
- Incorrect File extension.
Common Windows 11 Installation Problems
- Installation fails without an error code due to antivirus software.
- Windows 11 installation has failed ISO.
- The setup installation has failed.
- Cannot install Windows 11 – Error 0xc1900101.
- Installation Failed in Safe_OS Phase.
- The setup has failed to validate the product key.
- Windows Installer error.
- This PC can’t run Windows 11.
Whatever the error message or reason is, we will help fix it. Follow the fixes explained individually in the correct order to find the perfect solution for you.
Read Also: Exploring Windows 11: 5 Common Problems & Fixes
What Does the Meaning of This Error
The error means that the installation process was unable to complete successfully due to various system-related issues. This error can occur during an upgrade from Windows 10 or a fresh installation of Windows 11.
Best Ways To Fix Windows 11 Installation Failed Error
To troubleshoot the Windows 11 installation stuck, here are some basic fixes, followed by the complex ones. Before going with the technical ones, follow the quick tips below:
Basic Tips to Fix Windows 11 Upgrade and Installation Errors
Fix 1 – Disconnect all connected external hard drives.
Fix 2 – Check the copy of Windows 11 you are using. It must be genuine.
Fix 3 – Scan the PC for malware infection. For this, you can use the antivirus program you are using or can use the T9 antivirus.
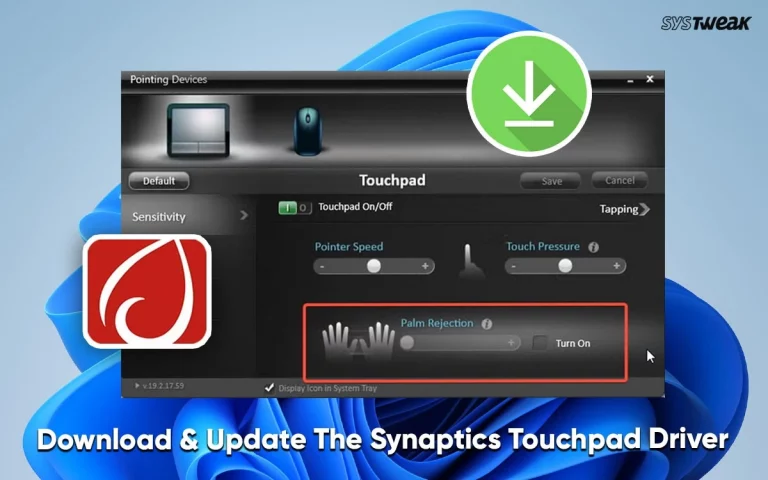
Fix 4 – Update your device drivers
After performing the above fixes one last thing you need to try before getting into technicalities is to update the hardware drivers. You can update them either manually or automatically.
Manually Update Driver –
To update drivers manually you can use Device Manager, Windows built-in utility to keep drivers updated. Press Windows + X select Device Manager and update the hardware drivers.
However, it is not easy to update drivers manually, as you will have to update each driver individually. Also, there is no guarantee that you will get the latest available update. To deal with this you can visit the manufacturer’s website, and download the driver. But for that, you need to have system and device details, which again is not easy and requires a lot of time and effort.
If you want to avoid this, then the best thing you can do is update drivers automatically.
Automatically Update Drivers –
Advanced Driver Updater is one of the best driver updating tools for Windows. Using it you can scan the system for outdated drivers and update them without any hassle. The tool shows the latest and compatible driver updates and even takes backups of drivers and allows scheduling driver scanning. To use it, follow these steps:
Features, User Reviews, Pros & Cons, And More about the tool
1. Download, install, and run Advanced Driver Updater.

2. To scan the PC click Start Scan Now and wait for the process to finish.

3. Click on Update driver next to the driver you want to update. However, if you want to update all drivers at once you can do it by switching to the paid version which comes with a 60-day money-back guarantee and technical support. You can contact the support team for technical support at support@systweak.com.

4. Restart the PC and try to install Windows 11. The error should be fixed. If it persists we’ve other fixes, try them.
After performing these basic steps, restart steps restart your computer and try reinstalling Windows 11. Suppose this helps; there is no need to move further. You can enjoy working on Windows 11. However, if this does not help, continue reading to implement the fixes explained below:
Technical Troubleshooting To Fix Windows 11 Installation Stuck, Error
Method 1 – Check the PC for compatibility
Most PC users do not know that to install Windows 11; their PC should meet the following system requirements.
- Processor: 1 gigahertz (GHz) or faster with 2 or more cores on a compatible 64-bit processor or System on a Chip (SoC)
- RAM: 4 gigabytes (GB)
- Storage: 64 GB or larger storage device
- System firmware: UEFI, Secure Boot capable
- TPM: Trusted Platform Module (TPM) version 2.0
- Graphics card: Compatible with DirectX 12 or later with WDDM 2.0 driver
- Display: High definition (720p) display that is greater than 9” diagonally, 8 bits per color channel
- Internet connection and Microsoft accounts: Windows 11 Home edition requires internet connectivity and a Microsoft account to complete device setup on first use.

If your PC fails to meet them, you will face Windows 11 install failure and other errors, as shown in the screenshot below.

To check if your computer meets the requirements
Note : Microsoft provides a step-by-step guide for you to open the PC Health Checkup app on its official webpage
1. Install the PC Health Checkup app if not already installed.
2. Press Windows key + S and search for PC Health Check. Select the best search result.
3. Click Check Now.

4. The app will show whether your PC is compatible with Windows 11 or not.

If it is compatible and you are still struggling with Windows 11 and can’t install an update, it seems TPM2.0 and Secure Boot are missing from the BIOS.
What is TPM 2.0?
TPM is a computer chip that offers hardware-based security. When the BIOS/UEFI and CPU do not fall under Micrpspft’s permitted range, you cannot install Windows 11. Following the list of supported AMD and Intel CPU
- 8th Generation Intel Core Processors and Newer Products
- AMD Ryzen Processor
- Ryzen 3000 Series and Newer Products
Steps to check TPM 2.0 on your PC
1. Press Windows + R to open the Run window.
2. Type tpm.msc and press the Enter key.

3. This will open the TPM management window. Here, under the Status tab, if you can read The TPM is ready for use it means TPM is enabled. Verify the TPM version from under the TPM Manufacturer Information.

4. If TPM is compatible but disabled, you will get a message ‘Compatible TPM can’t be found’. This means you must log in to the BIOS to enable it.

To do so, follow these steps.
Enabling TPM 2.0 Via BIOS
1. Press the Shift key while clicking the Restart option.
2. This will help you access the boot page. Here, select Troubleshoot.

3. Click Advanced options.

4. Click UEFI Firmware Settings and press Restart to enter the BIOS.

5. If you cannot find TPM look for PTT as the name may differ depending on the motherboard. However, remember both function the same. Click Settings > Security > TPM 20. Security and enable TPM. Note : On certain systems, you may find terms like TPM Configuration, TPM Support, TPM Device Selection, Intel Platform Trust Technology (PTT), or AMD fTPM Switch. Select either to enable TPM.

Enable Secure Boot
1. Click the Boot or Security tab.
2. Look for Secure Boot and enable it.
3. Save the change and exit to restart the PC.
Method 2 – Perform a Clean Boot
Most of the time, third-party applications interact with your Windows installation. To ensure these programs do not interfere with Windows installation, perform a clean boot. To do so, follow these steps:
1. Press Windows + R to open the Run window.
2. Type msconfig and press the Enter key.

3. Click on the Boot tab. Uncheck Safe boot > click Apply.

4. Click the General tab and select the Selective Startup option.
5. Uncheck the Load startup items option. Click Apply.

6. Click the Services tab > select the box next to Hide All Microsoft Services > and click Disable All.

7. Click the Startup tab > select Open Task Manager.

8. Now select the items one by one and Disable them.
9. Next, enable each item individually and Restart the PC after enabling each item.

This will help fix Windows 11 installation failure with no error code issue and help narrow down the program that is creating issues.
Method 3 – Update Windows
Before you try to upgrade to Windows 11, ensure you have all the Windows updates installed. To check if you have them all, follow these steps:
1. Press Windows + I to open Windows Settings.
2. Double click Update & Security.
3. Windows Updates > Check for updates.

4. Windows now scan for available updates. If you have all the updates installed you will get You’re up to date message. However, it is best that you click View all optional updates and install them too. However, if any updates are missing Windows will install them automatically. Follow these steps until you get You’re up to date prompt.

5. Restart the PC to save changes. Now try to update Windows, you should not get the “Windows 11 installation has failed” error. However, if the error persists, trypersists try the next fix.
Method 4 – Uninstall the Language Pack
Some experts have discovered that there are certain language packs installed on Windows 10 that are not supported by Windows 11. Hence, it is suggested that you uninstall the language pack before attempting to install Windows 11. Here are the steps –
1. Press Windows + S to open the search box and type “change display language”. Click on the same option in the search results.

2. Next, choose English (US).

3. Now, type “Uninstall display language” in the search box and a new box will open. Click on the Install/Uninstall languages button.

4. Now locate the alternative language and delete it from your PC.
5. Restart the Computer.
Method 5 – Create Installation Media and Setup
Another method to fix the error is to create a new installation media. Here is what you need to do –
1. Register for the Windows 10/11 upgrade and choose the free version.
2. Ensure that you have ample free space on your hard drive.
3. Visit the Microsoft official website and download the Media Creation Tool. Remember to choose 32-bit or 64-bit depending on your PC’s architecture.
4. Double-click on the file downloaded and choose “Create installation media for another PC”.
5. Click on Next and follow the onscreen instructions to create the installation media.
Method 6 – Uninstall GPU to fix error 0xc1900101
There have been a few users who have received the “The installation failed in the SAFE_OS phase 0xc1900101” error while installing Windows 11. This is a rare error and the exact cause of this error is not yet determined. However, we have a few steps that have helped others with the same error.
1. Remove all the external devices attached to your PC (except Mouse & Keyboard).
2. Uninstall The GPU Driver by pressing Win + X to open the Power menu and select Device Manager.
3. Click on Display Adapters, to extend and reveal your graphics card.
4. Right-click on the Intel Graphics card and choose Uninstall Device from the context menu.

5. Next, reboot your computer and enter the BIOS by pressing the F9/F10/F11 key.
6. Locate Active Core Settings under the Processor section and modify the Active Processor Core to 1. Remember to save and exit the BIOS settings.

7. Reboot your PC.
Method 7 – Upgrade System Disk
Upgrading your hard drive involves replacing your current disk with a newer one. This will help improve storage, speed, and performance. Here is what you need to do to upgrade the system disk.
1. Select a hard disk that is better than your current hard disk.
2. Backup your important data on cloud storage or external disk.
3. Next, clone the existing hard disk to the new one by choosing the option (Keep Everything).
Note : You can use any third-party disk cloning software. (EaseUS Todo Backup, AOMEI Backupper)
4. If cloning is not possible then you can clean-install Windows 11 by creating a new disk as explained in Method 5.
Note : You will have to physically replace the hard disk. If you are not too confident then we recommend you get a hardware technician to do it for you.
Method 8 – Reinstall Windows 11
Reinstalling Windows 11 is very easy if you follow the steps and do not miss even a single one. Here are the steps –
Reboot your PC and enter the BIOS.
You need to set the Boot Priority to either USB or DVD depending on the Windows installation media you possess.
1. Exit the BIOS and insert the installation media.
2. The PC will boot from the new option you have selected.
3. In the new screen, choose Language, Time, and Currency format, Keyboard, and then click on the Next button.

4. Click on Install Now and then select “I don’t have a product key”.

5. Choose the Windows 11 edition and then click on Next.

6. Accept the Microsoft license agreement and click on Next.
7. Choose the “Install Windows Only” option.

8. Select the hard disk partition and click on Next.

9. The Windows installation process will now begin. Wait for the entire process to complete which will include a reboot of your PC. Remember to unplug the installation media when your PC reboots.
Method 9 – Bypass TPM and Secure Boot Check
If you found that your device doesn’t have TPM 2.0 chip you must be thinking that you can’t use Windows 11, right? Luckily that is not the case. You can update to Windows 11 using a trick that helps bypass system checks for TPM and Secure Boot.
Note : This step will help upgrade to Windows 11 but you will not be able to receive Windows 11 updates.
Before we proceed we suggest taking a backup of the registry as we will make some changes to the Windows registry. To backup the Windows registry press Windows + S and type regedit and press the Enter key. This will open Registry Editor. Click Computer > Right-click Export. This will back up all the keys and subkeys.
1. Once the keys are exported, copy and paste the following command in the address bar Computer\HKEY_LOCAL_MACHINE\SYSTEM\Setup and press the Enter key.

2. Right-click on the blank space > select New > key > Name it as LabConfig.

3. Select LabConfig, right-click on the blank space on the right, and create two DWORD (32-bit) Value options. Name them as BypassTPMCheck and BypassSecureBootCheck.

4. Double-click BypassTPMCheck, change the value data to 1 and select Decimal > OK.

5. Do the same for BypassSecureBootCheck option. Change the value data to 1, select Decimal > click OK.
6. Close Registry Editor and then try to install Windows 11. This should work and you should no longer see the side-by-side configuration is incorrect in Windows 11.
Fixed Windows 11 Installation has Failed to Start
We hope the above solution helps to fix the Windows 11 installation failure or upgrade failed error. If this doesn’t help we suggest optimizing the PC and running a system file checker to fix corrupt system files.
Please let us know which fix worked for you in the comments.
Recommended:
Fixed – “We Couldn’t Find Any Drives During Windows 11 Installation
9+ Ways To Fix Windows Stuck on “Checking for Updates”
 Secure Download
