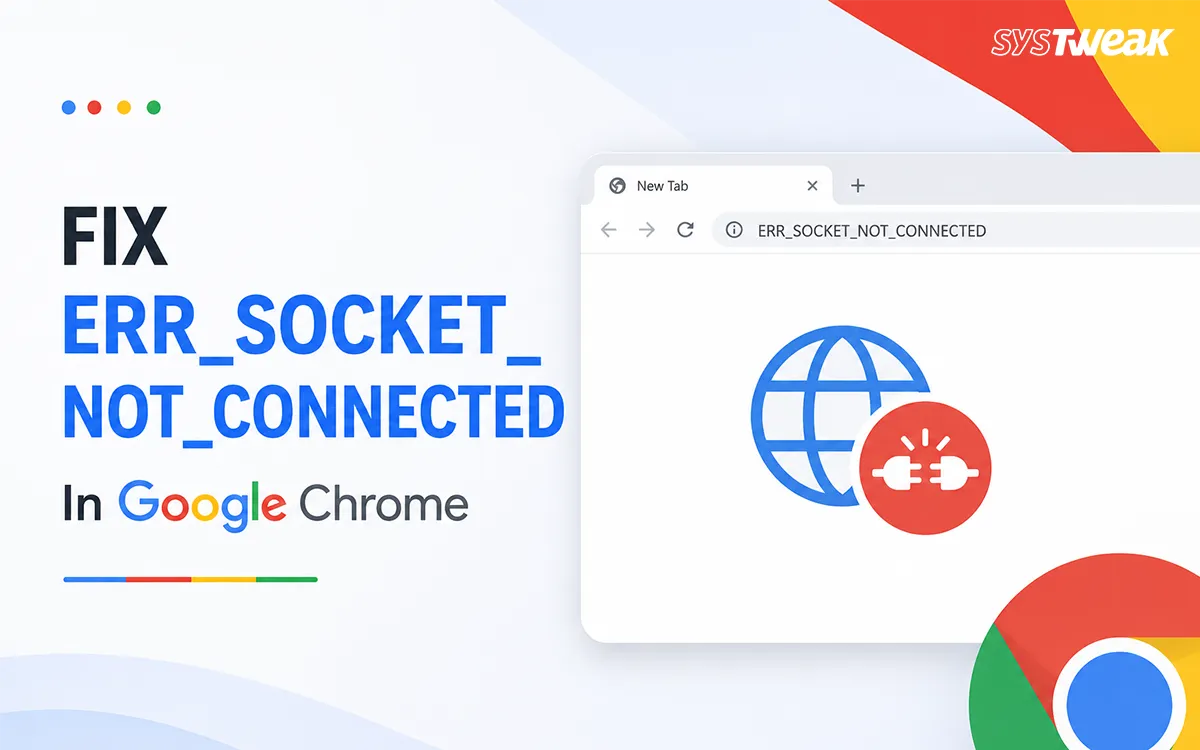

The ERR_SOCKET_NOT_CONNECTED is an error that occurs when Google Chrome fails to connect through a socket to a site. Therefore, pages fail to load, leaving users uncertain about the cause of the problem – whether it is an internet connection problem, a browser problem, or even a problem with the site itself. Fortunately, this error can be fixed. Let us tell you how.
What Does ERR_SOCKET_NOT_CONNECTED Mean?
Socket refers to a communication channel that helps the Chrome browser communicate with the web server by exchanging data. ERR_SOCKET_NOT_CONNECTED is an error caused by attempting to use a connection on a socket that has either failed, was interrupted or was not established in the first place. The causes may include –
- Corrupt Chrome socket pool
- Network settings
- DNS problem
- Problems with VPN or proxy server
- Corruption of browser cache
- Firewall or anti-virus blocking Chrome browser
- Chrome version is too old
- Problem with router
Methods To Fix The ERR_SOCKET_NOT_CONNECTED Error
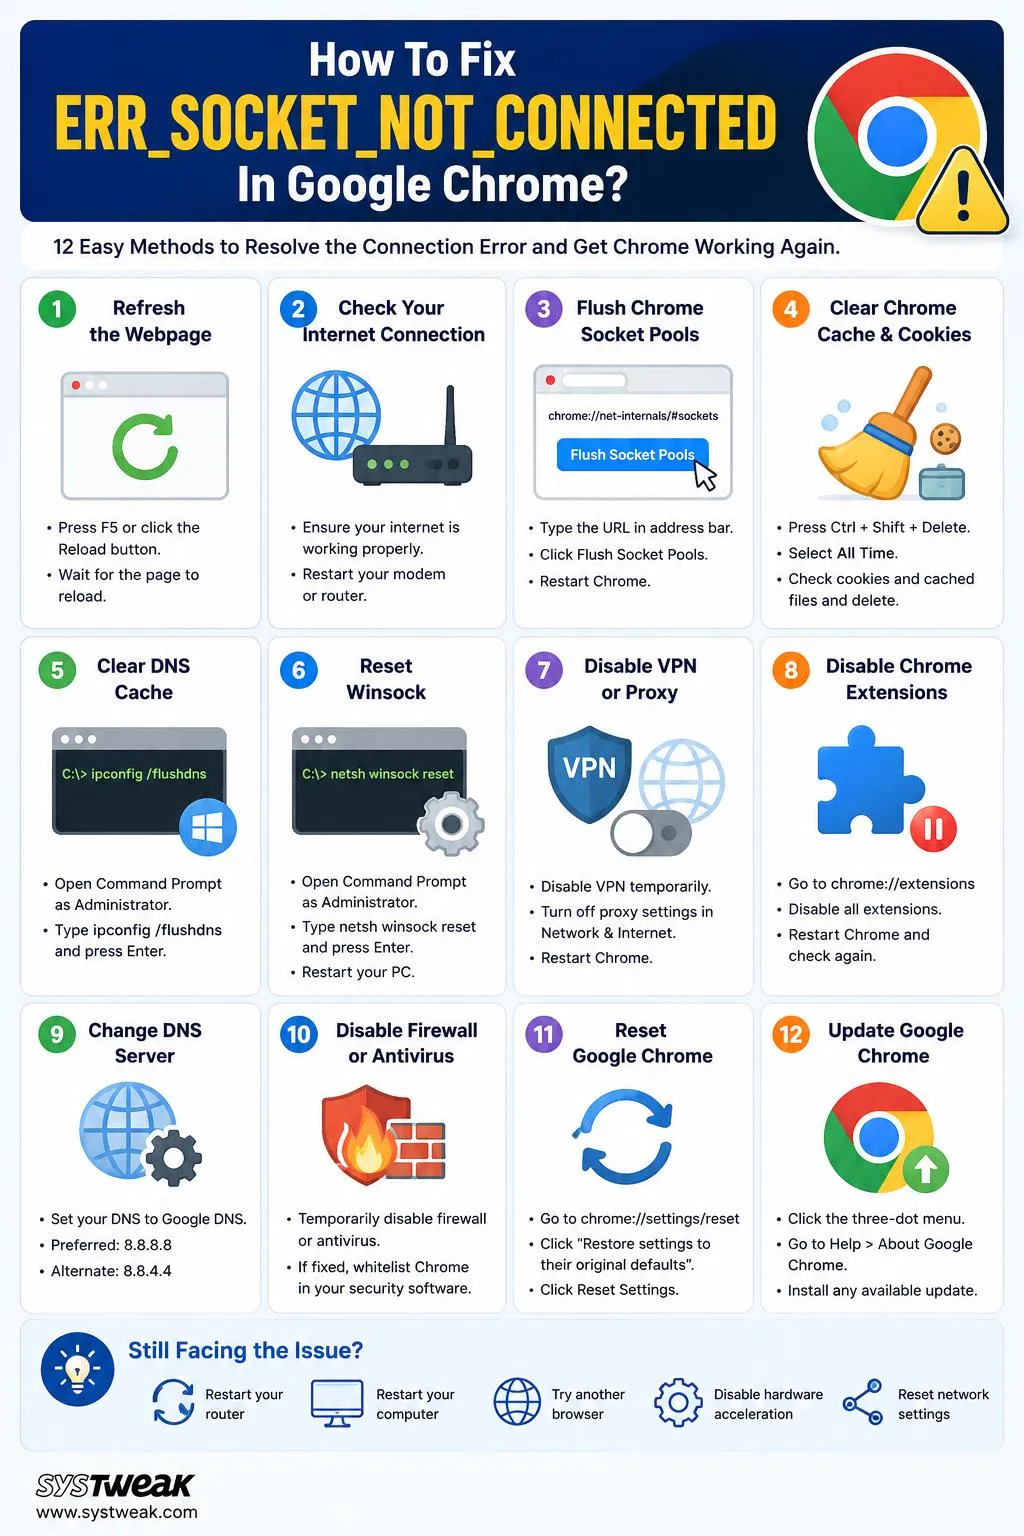
Method 1: Refresh the Webpage
It may be just temporary; all you need to do is to refresh the page.
- Press F5 or press the Reload button.
- Wait until the page is reloaded.
If the connection with the server was lost for some time, Chrome could reconnect successfully.
Method 2: Internet Connection Test
First of all, make sure that your internet connection works properly. Here are the things you could do:
- Check another website
- Take the speed test
- Connect another device to your network.
If all websites fail to open, then restart your modem or router. If possible for you, do one of the following:
- Switch from Wi-Fi to an Ethernet connection.
- Change the Wi-Fi network.
- Use a mobile hotspot.
Method 3: Flush Chrome Socket Pools
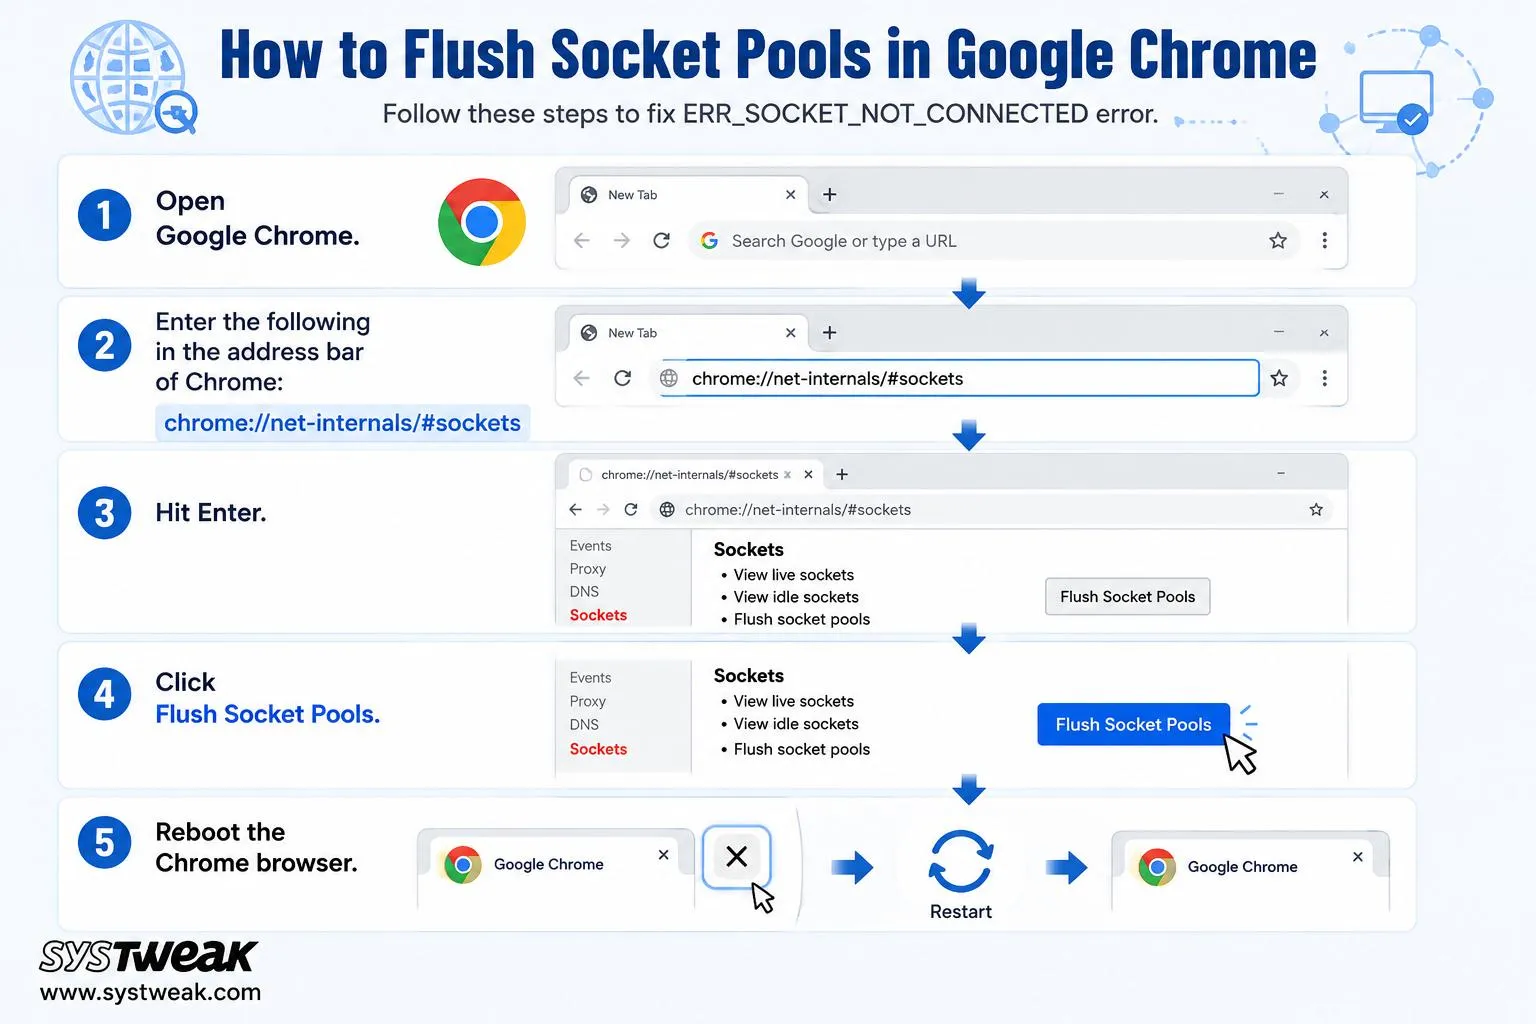
The best solution among these is cleaning the Chrome sockets. The steps involved are:
- Open Google Chrome.
- Enter the following in the address bar of Chrome:
chrome://net-internals/#sockets
- Hit Enter.
- Click Flush Socket Pools.
- Reboot the Chrome browser.
This would force the Chrome browser to recreate all current socket connections.
Method 4: Cleaning the Chrome Cache and Cookies
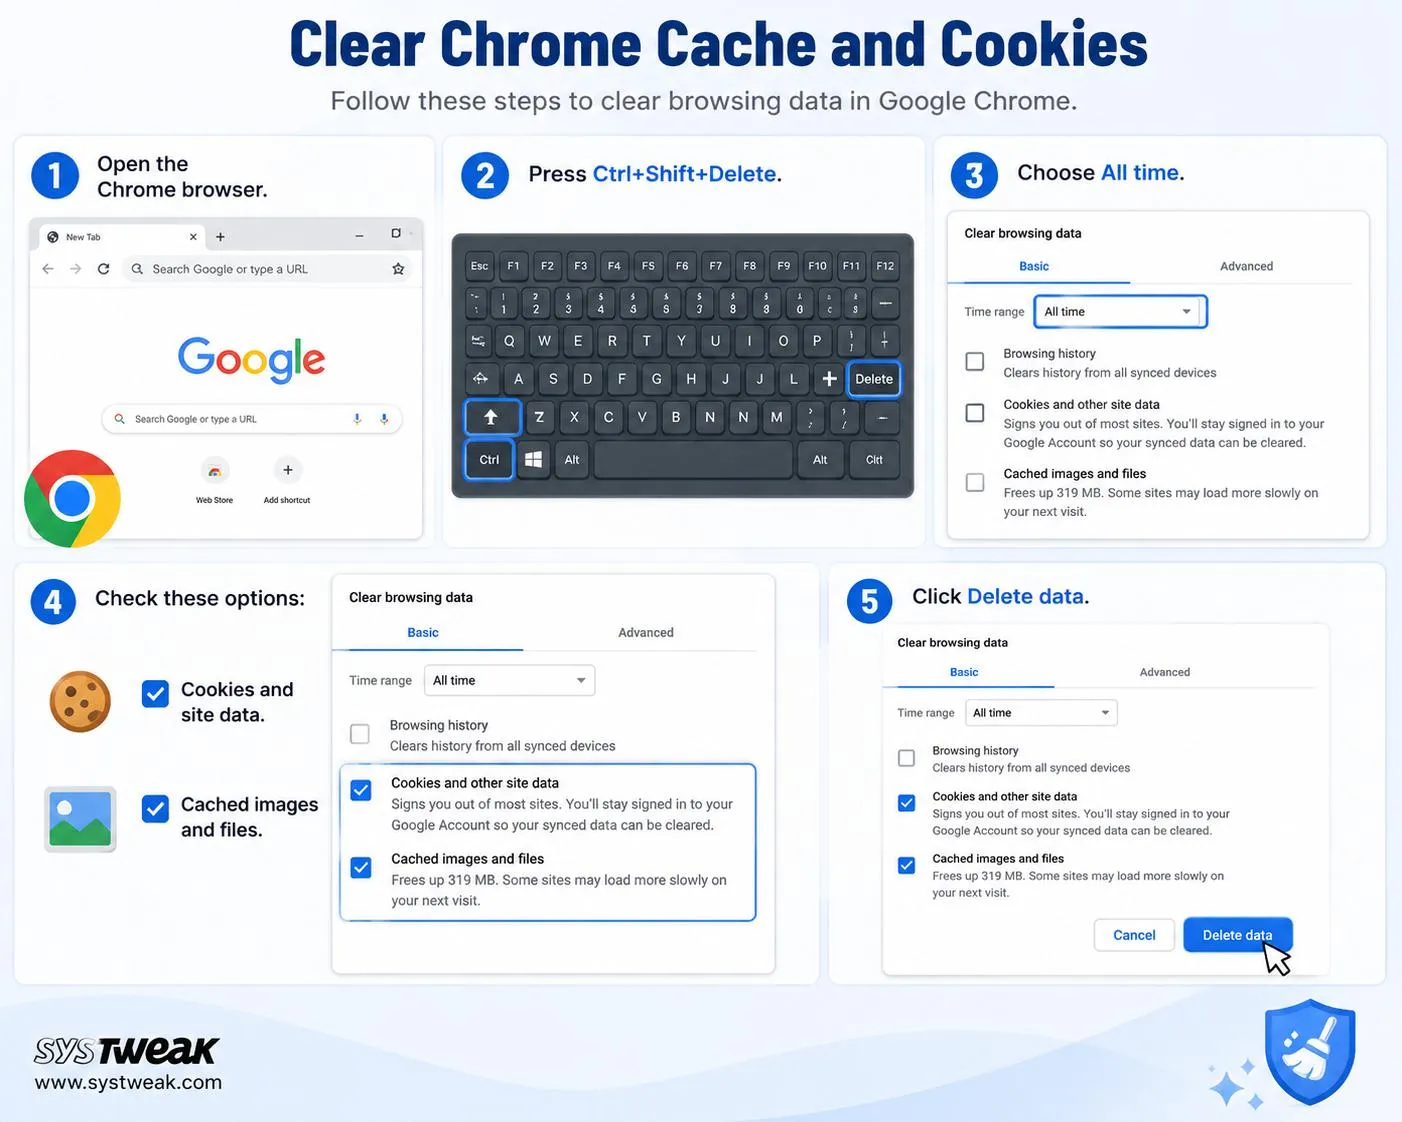
An error with the browser’s cache may make Chrome fail to connect to the server. Here is how you should go about it.
- Open the Chrome browser.
- Press Ctrl+Shift+Delete.
- Choose All time.
- Check these options:
- Cookies and site data.
- Cached images and files.
- Click Delete data.
Method 5: Clear DNS Cache
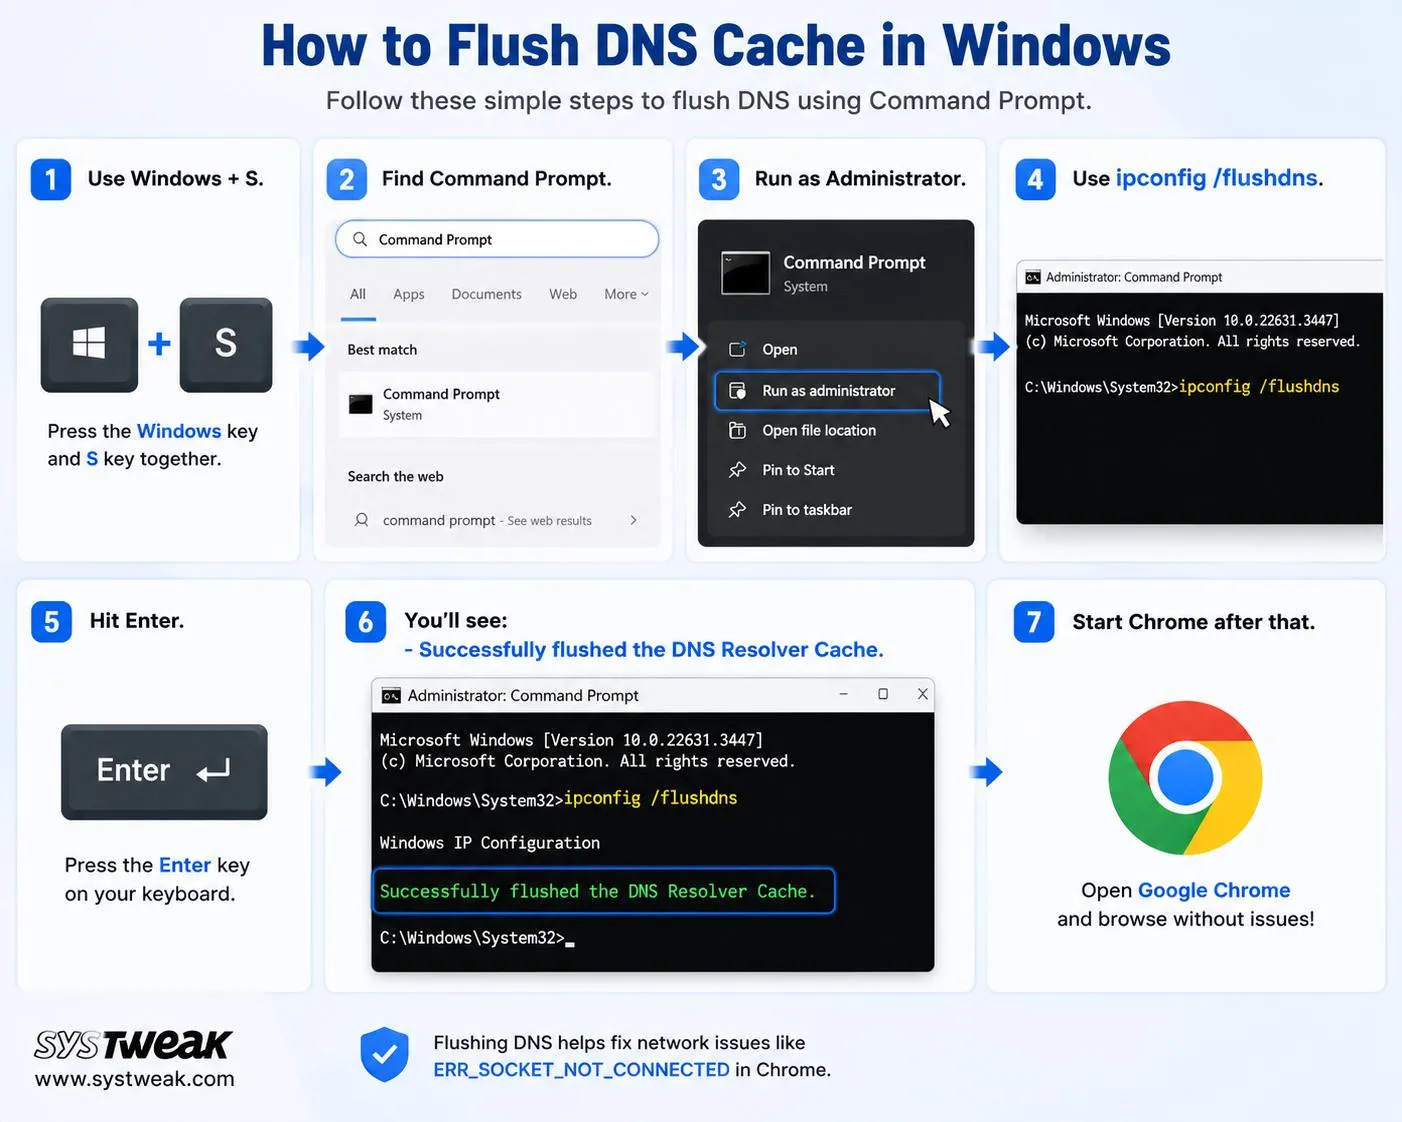
The cache DNS will result in Chrome to use the wrong server IP addresses.
- Use Windows + S.
- Find Command Prompt.
- Run as Administrator.
- Use ipconfig /flushdns.
- Hit Enter.
- You’ll see: – Successfully flushed the DNS Resolver Cache.
- Start Chrome after that.
Method 6: Reset Winsock
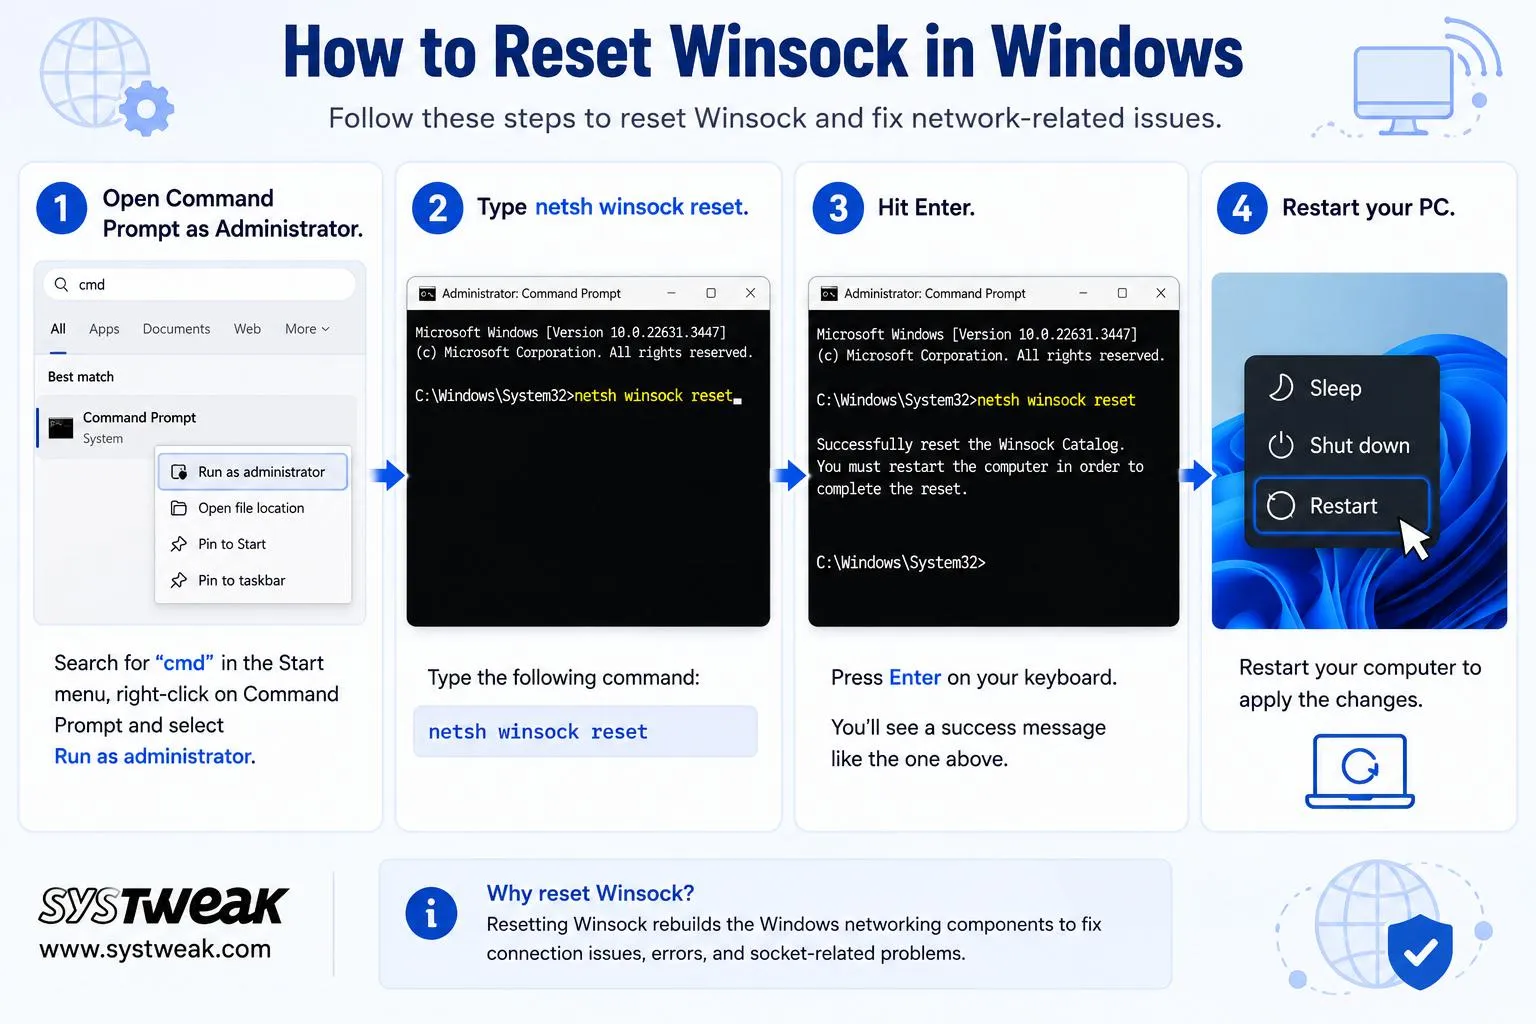
Winsock is responsible for controlling Windows networking. If it gets corrupted, then there will be some socket errors in Chrome. This is what needs to be done.
- Open Command Prompt as Administrator.
- Type netsh winsock reset.
- Hit Enter.
- Restart your PC.
Method 7: Disable VPN or Proxy
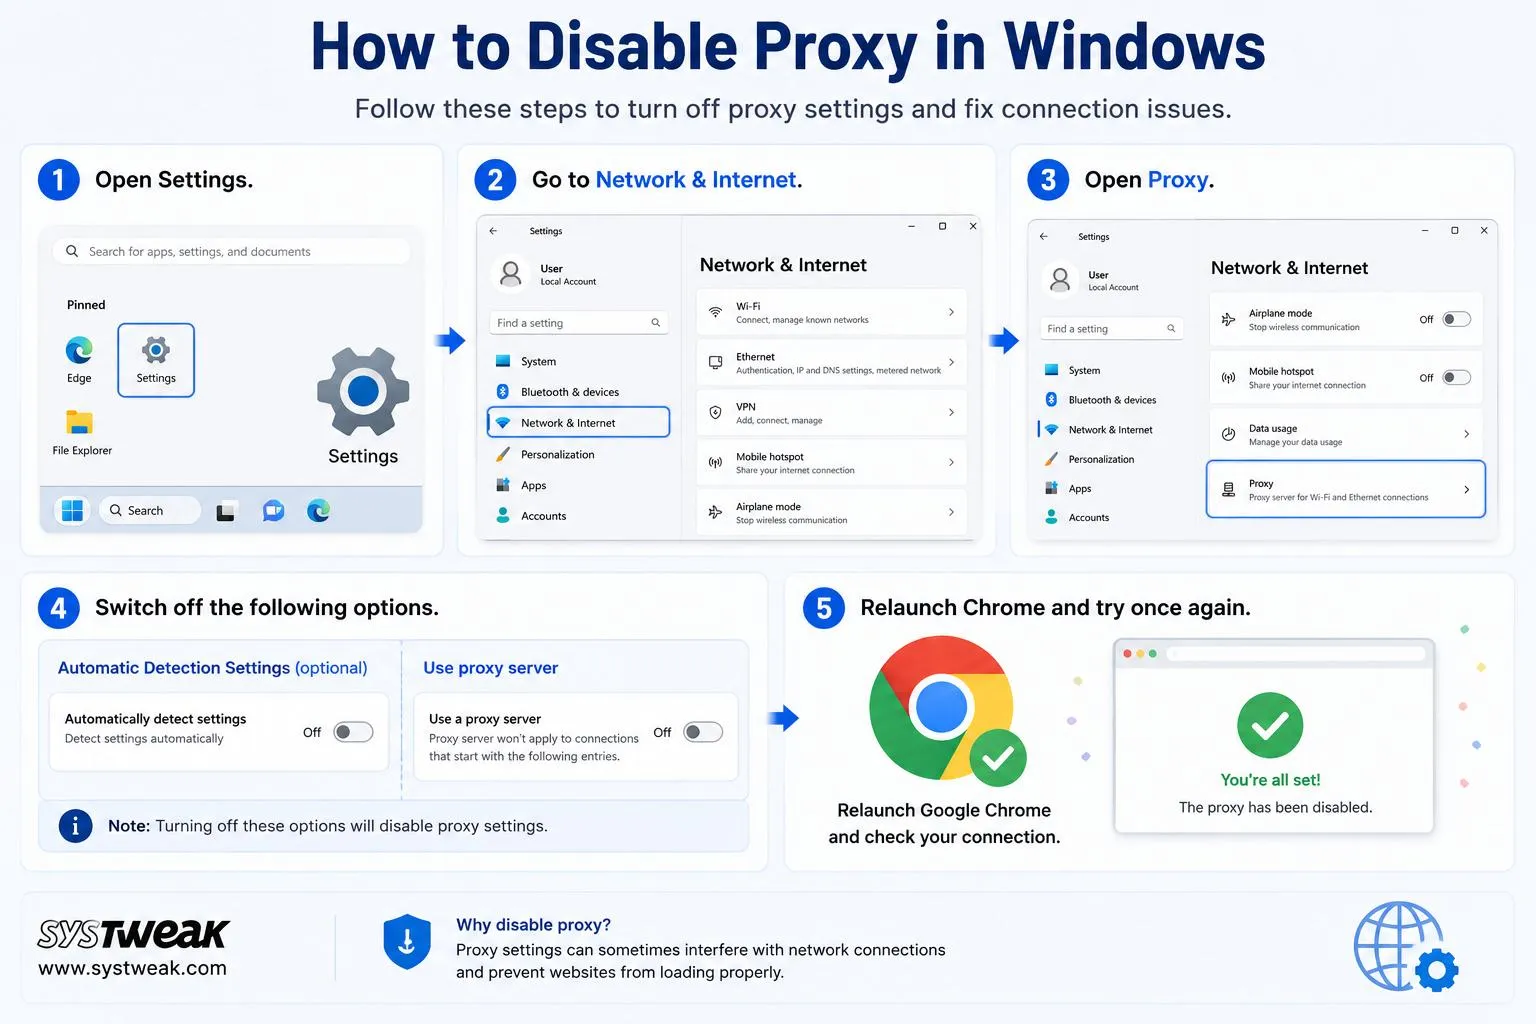
Sometimes, there can be interference from the proxy server or even the use of a VPN service in Chrome’s socket connections. To switch off the proxy:
- Open Settings.
- Go to Network & Internet.
- Open Proxy.
- Switch off the following options.
- Automatic Detection Settings (optional)
- Use proxy server
- Relaunch Chrome and try once again.
Also, switch off the used VPN service on your PC.
Method 8: Disable Extensions of Chrome
The wrong design of some extensions can affect Chrome’s networking.
- Launch Chrome.
- Enter into the address bar chrome://extensions.
- Disable all extensions.
- Relaunch Chrome.
- Check if the website works.
If it works, then switch on extensions one by one till the problem occurs.
Method 9: Change DNS Server
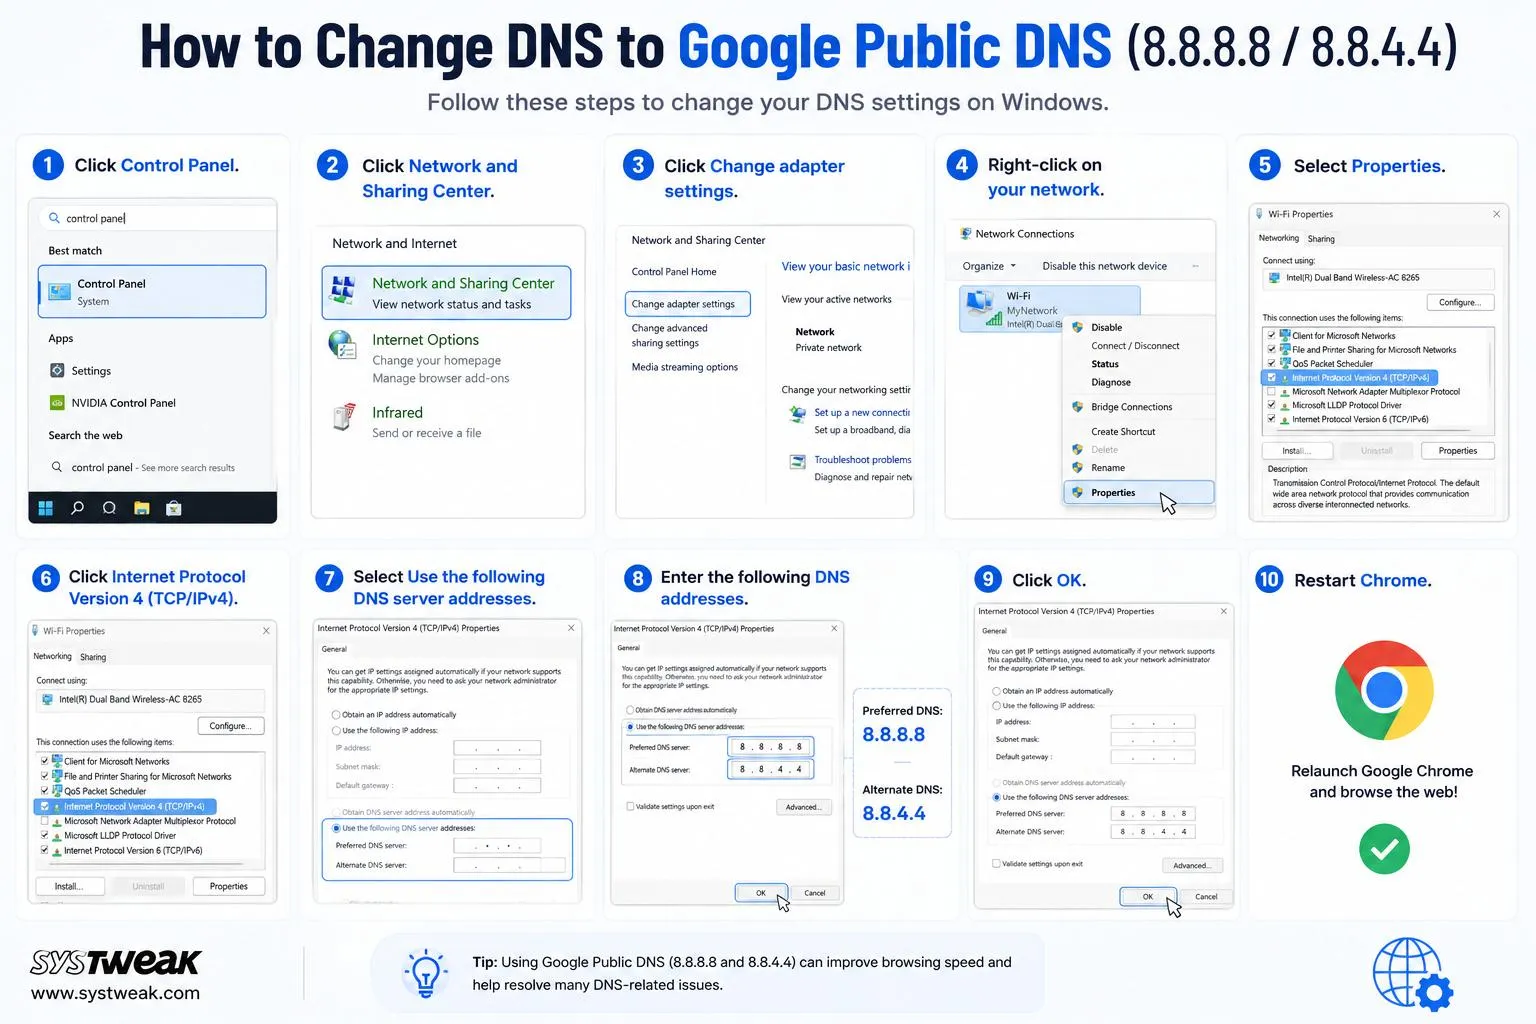
Using Google Public DNS generally solves connectivity issues.
- Click Control Panel.
- Click Network and Sharing Center.
- Click Change adapter settings.
- Right-click on your network.
- Select Properties.
- Click Internet Protocol Version 4 (TCP/IPv4).
- Select Use the following DNS server addresses.
- Input the following information –
- Preferred DNS: 8.8.8.8
- Alternate DNS: 8.8.4.4
Step 9: Click OK.
Step 10: Restart Chrome.
Method 10: Disable Firewall or Antivirus Temporarily
Firewalls or antivirus programs sometimes falsely block network requests from Chrome. Disable the following.
- Windows Defender Firewall
- Third-party antivirus
- Internet Security Programs
If the problem is solved, add Chrome to the exception list in your antivirus software rather than disabling protection.
Method 11: Restore Google Chrome to its default settings
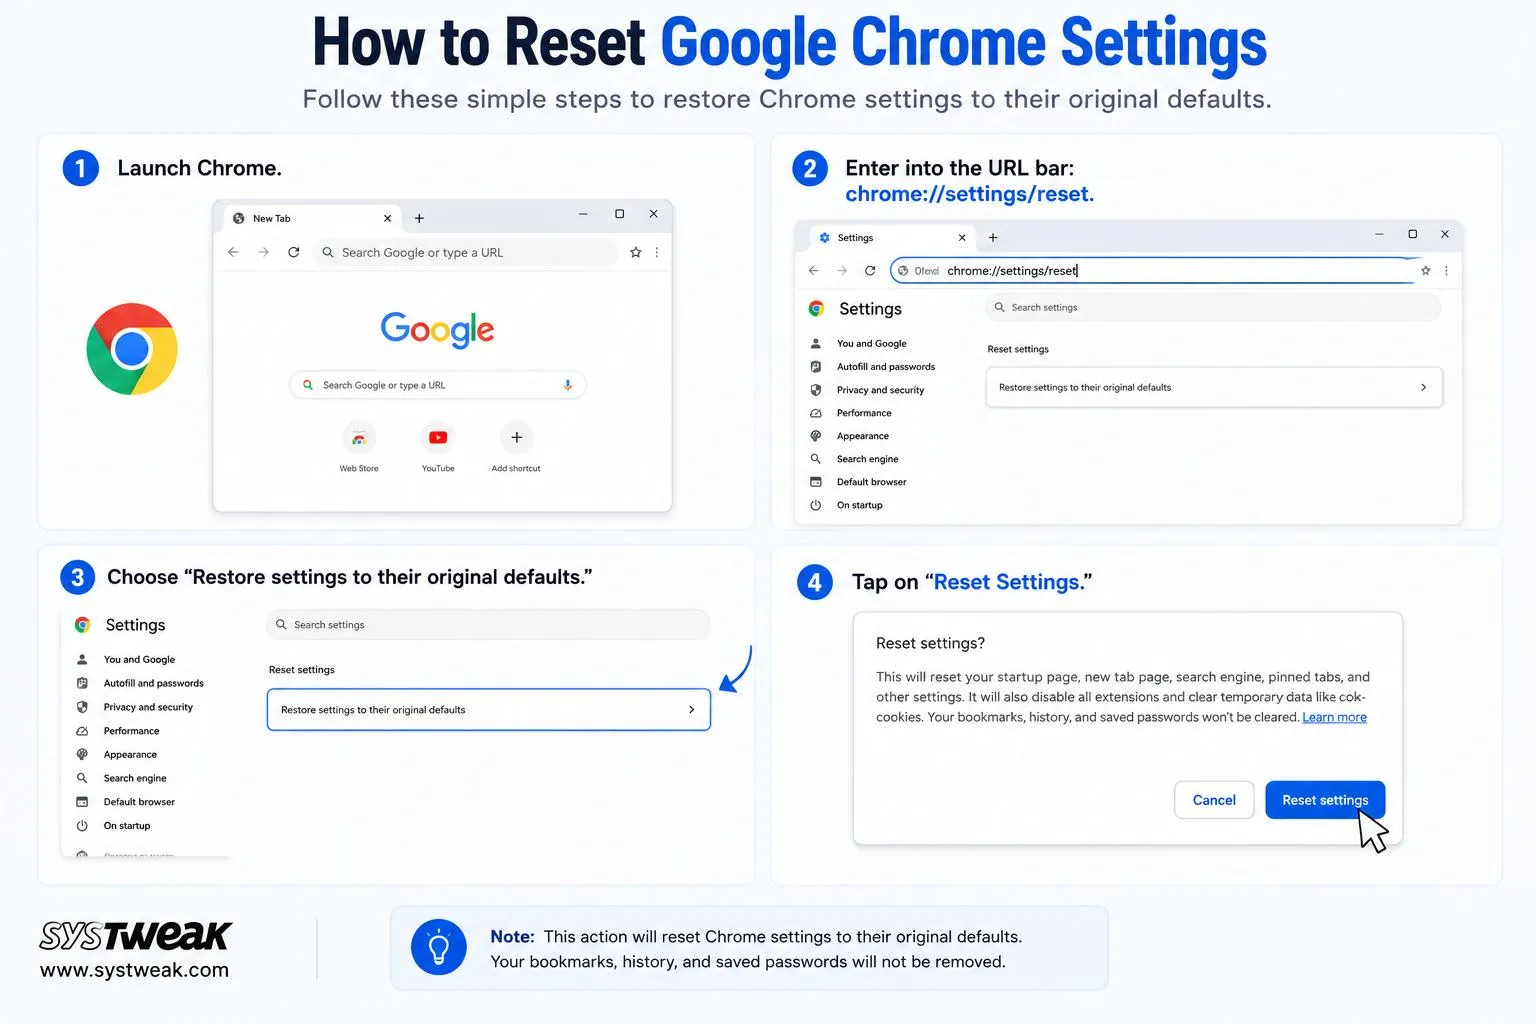
Corrupted settings in Chrome can be reset through the following process:
- Launch Chrome.
- Enter into the URL bar: chrome://settings/reset.
- Choose “Restore settings to their original defaults.”
- Tap on “Reset Settings.”
This will eliminate the following:
- Temporary settings.
- Disabled extensions.
- Startup configuration.
- Changes made to search engines.
Method 12: Update Google Chrome
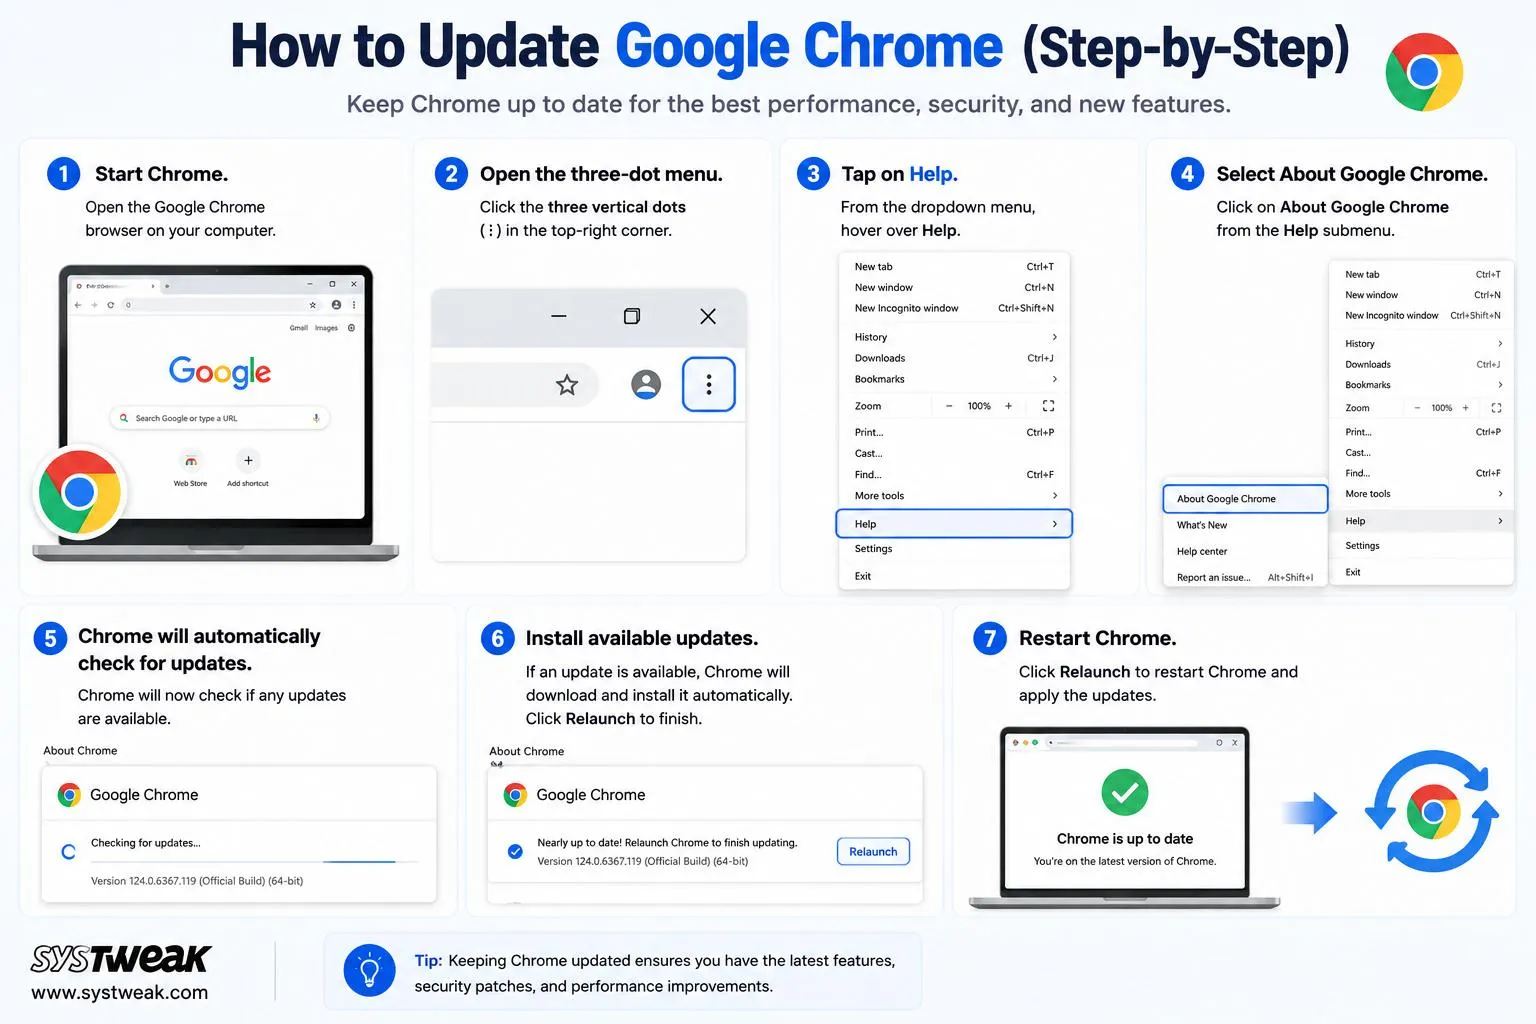
Outdated browsers might have network problems. Here are the steps to update the Chrome browser.
- Start Chrome.
- Open the three-dot menu.
- Tap on Help.
- Select About Google Chrome.
- Chrome will automatically check for updates.
- Install available updates.
- Restart Chrome.
Additional Fixes to Resolve the ERR_SOCKET_NOT_CONNECTED in Google Chrome.
If the problem remains unresolved, use the following troubleshooting tips.
- Router Restart – disconnect the router from the power supply for half a minute and turn it on back on, letting it reconnect fully before launching Chrome.
- A computer restart is your trump card as far as temporary network problems go and can fix many issues once and for all. Make sure you’ve saved your work first and then restart Windows and Chrome.
- Try Different Web Browsers, such as Edge, Firefox, or Opera. If that specific site works fine in another browser, the problem is probably Chrome-specific.
- Hardware Acceleration Disabled – enter the Chrome settings, then go to “System” and disable “Use hardware acceleration when available”. Don’t forget to restart Chrome.
Why Does ERR_SOCKET_NOT_CONNECTED Keep Coming Back?
If this error is repeated, possible causes include:
- Chrome profile corruption
- ISP DNS problem
- Malfunctioning Wi-Fi router
- Conflicts in browser extension
- VPN application
- Antivirus web security application
- Faulty network adapter driver
- Server outages from the websites visited
If the error occurs with one website only and other websites function fine, the source of the error can be the server of the website.
How to Avoid ERR_SOCKET_NOT_CONNECTED Error
Adhere to the following good practices to minimize future occurrence of the error:
- Always update Google Chrome.
- Do not install unnecessary browser extensions.
- Always clear browser cache.
- Regularly restart your router.
- Always use good DNS servers.
- Update network adapter driver.
- Do not use unnecessary VPN applications.
- Regularly check for malware.
- Do not configure more than one proxy in browsers.
- Update the Windows operating system.
Conclusion
The ERR_SOCKET_NOT_CONNECTED error can cause panic among Google Chrome users; however, it normally results from temporary network problems, browser data corruption, DNS problems, or Google Chrome’s socket pools. Most of the time, simply flushing Google Chrome’s socket pools, cleaning the browser’s cache, resetting Winsock, configuring DNS settings, or resetting Google Chrome will help solve the issue.
It is important to consider some simple troubleshooting steps before trying out other more technical approaches to fixing the problem. Through the steps discussed in this article, one can effectively fix this error in Google Chrome.