Are you a Twitch user who likes watching videos, playing games, recording live streams, or saving exciting parts of the stream? If yes, here we explain how to clip Twitch stream.
Twitch, a popular live-streaming platform, offers content for almost everyone. You can find music broadcasts, creative content, game streaming, and more. Due to this, many users look for ways to clip on Twitch. If you are one of those, you are in luck. After testing several methods that help clip Twitch streams, we selected four techniques that work best for making clips on Twitch.
Here’s a quick overview of the 4 methods we will discuss in this post. Take a look at them:
| Techniques | Advantages | Difficulty |
| Advanced Screen Recorder | Without any time restriction, you can record and create a clip on Twitch | Super easy |
| Clip Feature | Built-in feature to record, edit and manage recordings. | Easy to use |
| Xbox Game Bar | Record screen directly without downloading the software. | Easy to use |
| OBS Studio | Simultaneously record more than one window. | Medium |
How to Create and Edit Twitch Clips on PC
1. Creating Clip on Twitch Using Advanced Screen Recorder
When looking for the easiest and most effective method to clip on Twitch, missing Advanced Screen Recorder is not an option. This Windows-compatible screen recording tool offers different modes to record a screen, take screenshots, record via webcam, Live Stream, and trim video. Also, you can annotate the video while recording, which makes clipping Twitch fun. Moreover, using the PC clipper software, you can record in different frame rates and 4D without lagging. You can also record voice separately, system audio from the microphone, schedule recording, and set a timer for auto-split and auto-stop recording.
You can even use the hotkeys and take screenshots while the recording is in progress. Click the Download button to get the tool and enjoy its powerful features.

Once you have downloaded and installed Advanced Screen Recorder, follow these and record from Twitch.
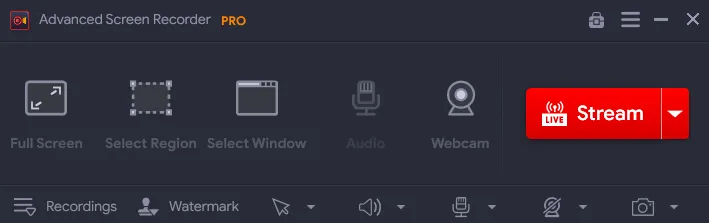
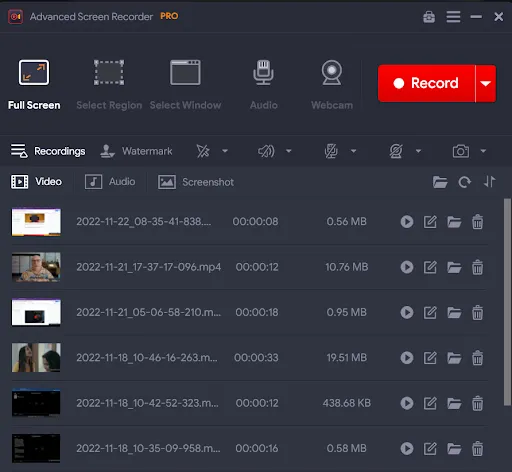
Step 1. Open Advanced Screen Recorder. Choose from the recording modes. You can record Full Screen, Selected Region, or Selected Window.
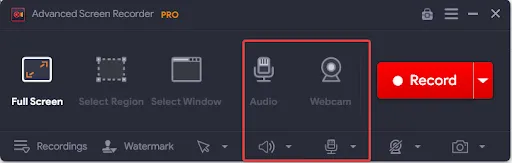
Step 2. You can screen record through your webcam or use a system sound or microphone (if you want). Select the option as per your requirement.
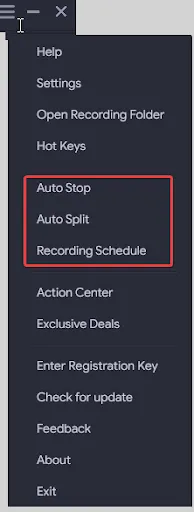
To set Auto Stop, Auto Split, and recording schedule, click the three stacked lines and choose the options from the drop-down.
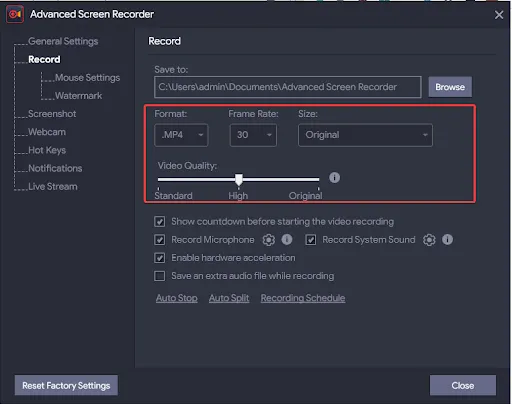
To make further changes in FPS rate, format, size, and video quality, click the three stacked lines > Settings > Record > and make the desired changes.
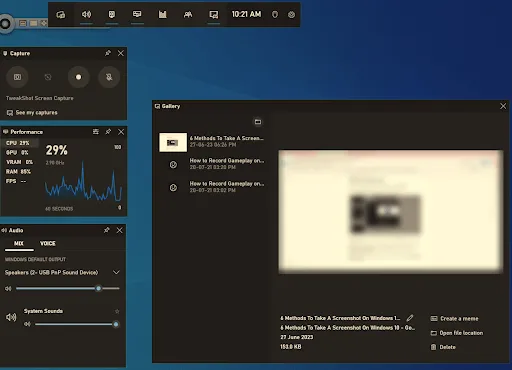
Step 3. Once all the settings are in place, click the Record button to initiate recording. You will get a 3-second timer, and then the recording will begin. To Pause, click the white pause button from the floating recording bar. To restart it click the Record button. To stop, click the Red stop button. To add text and make changes to the video, click the pen and select the options. You can make these changes while the recording is in progress. To take screenshots, click the camera icon.
![]()
Step 4. Once the recording is done, you will see the list of all the recorded sessions under the Recordings Video section and snapshots under the Screenshot section. To record a new session using old settings, click the Record button.
2. Creating Clip on Twitch Using Twitch Clip Feature
If using a screen recording tool on Windows PC gives you chills, try the built-in clip feature. With the help of this feature, you record and make changes to recordings.
To manage recordings, use Clips Manager in the Creator Dashboard. To edit, use Clip Editor.
Follow these steps to clip Twitch on PC:
Step 1. Launch Twitch and log in to your account.
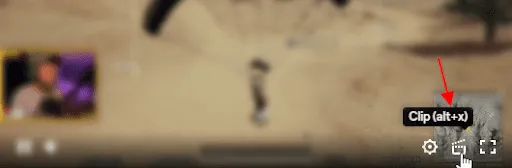
Step 2. Play the Twitch stream to clip. When you reach the part you can capture, hover your mouse cursor to the right of the streaming video and click the Clip button. (a movie clapperboard icon). Alternatively, use Alt + X key combination.
Step 3. The clip feature will clip the live Twitch stern’s last 60 seconds, and you will get a new video. You can drag the handle if you want to change the recording time, you can drag the handle. It can vary from 5 to 60
seconds.
Step 4. Now that you have the clip, you can trim it, add a title, and publish it using the Publish button.
Using the Export or Download option, you can get the clip.
Read Also: How to Screen Record Restricted Content Without Black Screen on Windows
3. Clip Twitch on PC Using Xbox Game Bar
Another best game recording tool is Xbox Game Bar. If you are a Windows 11/10 user, you can use it to clip Twitch streams.
The best part about Xbox Game Bar is that it comes preinstalled on Windows. However, you can record a video that is lesser than 4 hours. You will need to switch to tools like Advanced Screen Recorder for unlimited recording.
Steps to make clips on Twitch with Xbox Game Bar:
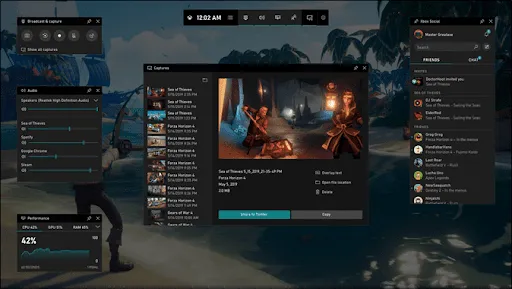
Step 1. Launch the Game Bar by pressing Win + G.
Step 2. To start recording, use Win + Alt + R key combinations.
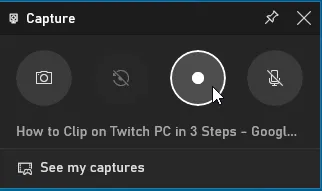
Step 3. Once you’ve recorded the clip, relaunch the Game Bar by pressing Win + G and clicking the Stop button.
Step 4. To access recordings go to Start > Game DVR > On this PC.
4. Clipping Twitch on PC Through OBS Studio
If you don’t want to spend on a third-party tool, try OSB Studio, a well-known open-source screen recorder. It is a great tool to record screens, live stream, and clip Twitch on a PC.
Also, you can use it to record multiple screens simultaneously.
Note : Beginners usually find using OBS difficult. You can switch to other methods if you also face the same problem.
Steps to clip things in Twitch via OBS Studio:
Step 1. Download, install, and run OBS Studio.
Step 2. Go to Settings and pick a location to save the video recordings.
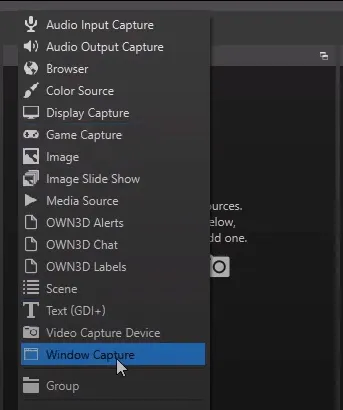
Step 3. Now go back to the home screen and click the + icon under the Source tab. Choose Display Capture or Window Capture.
Step 4. Begin recording, and when done, click Stop Recording.
That’s it. You can clip Twitch on a PC with these four simple methods.
Read Also: Best Way to Record Yourself While Playing On PC – Your Skills Deserve a Face!
How to Manage Clips in The Clips Manager?
If you want to manage the clips on the Clip Manager, then you must first launch the tool by following these steps.
Step 1. Log in to Twitch.
Step 2. Click your profile icon (top right).
Step 3. Select Creator Dashboard.
Step 4. Go to Content → Clips. There are two main views available here.
Clips of My Channel: These clips have been created by you and require management to save space and organize your content.
Clips I Created – These clips have been created from the content of other channels.
- Click the three dots (⋯) next to a clip and select Delete to remove the clip.
- If you want to highlight a clip, then click Feature to highlight it on your Clips page.
- You can use the Filter & Sort option to sort by date and filter by Time Range.
- Finally, click on the three dots next to a clip and choose Report only if the clip violates the rules. You must select a reason and click on Submit.
How to Manage Clips on YouTube?
There is no Clips dashboard on YouTube. You have to sign in to your account on a web browser and follow the steps.
Step 1. Launch YouTube Studio, sign in, and click on Settings.
Step 2. Select Channel, click on Feature eligibility, find clips, and toggle them off.
Step 3. To remove the clip permanently, you can select a video and delete it.
What Are The Other Clip Manager Types?
There are different types of Clip Managers. We have listed all types with examples.
Streaming Platform Clip Managers: These are for Streamers managing community-made highlights. Best examples are Twitch, YouTube, Facebook etc.
Social Media Clips Tools: For small platforms, you can use Instagram, Tiktok, And X (formely Twitter).
Desktop Video Clip Managers: If you want to edit and manage clips on Windows PC, then try Adobe Premiere Pro, DaVinci Resolve, etc.
Cloud-Based Clip Managers: For basic editing without installation and cloud based editors, use Clipchamp, or Kapwing.
Podcast & Audio Clip Managers: If you are into audio highlights, then we suggest Audacity or Descript.
Clipping Twitch on PC is Now Possible
Clipping on Twitch is no more difficult. To create a clip on Twitch when using a PC, you just need to follow the steps explained in this tutorial. However, working with Advanced Screen Recorder is the best choice if you want to save time and do things easily. We hope you will give it a try. Please share your thoughts and feedback in the comments.
FAQs
How to Delete Twitch Clips?
To delete the clips you created on Twitch, go to Creator Dashboard > Content > Clips. Select the clip you want to remove and hit the Delete button.
Can I Twitch Copyrighted Clips?
No, you cannot. If you use copyrighted material, the person can send a takedown notification to Twitch.
How to Delete Clips I Made on Twitch of Someone Else?
If you have created or uploaded the clip, then you can easily delete it from your account. If Someone else has created the clip on Twitch and you wish to remove it, then there are two ways.
- Ask the Channer owner to delete the clip.
- Open the clip, click on three dots, and choose Report. You must enter a valid reason and click on submit. The Twitch platform will automatically delete the clip if it violates the rules set by Twitch.
Recommended :
How to Take Scrolling Screenshot in Windows 11, 10
The Ultimate Guide to Creating Effective Instructional Videos


