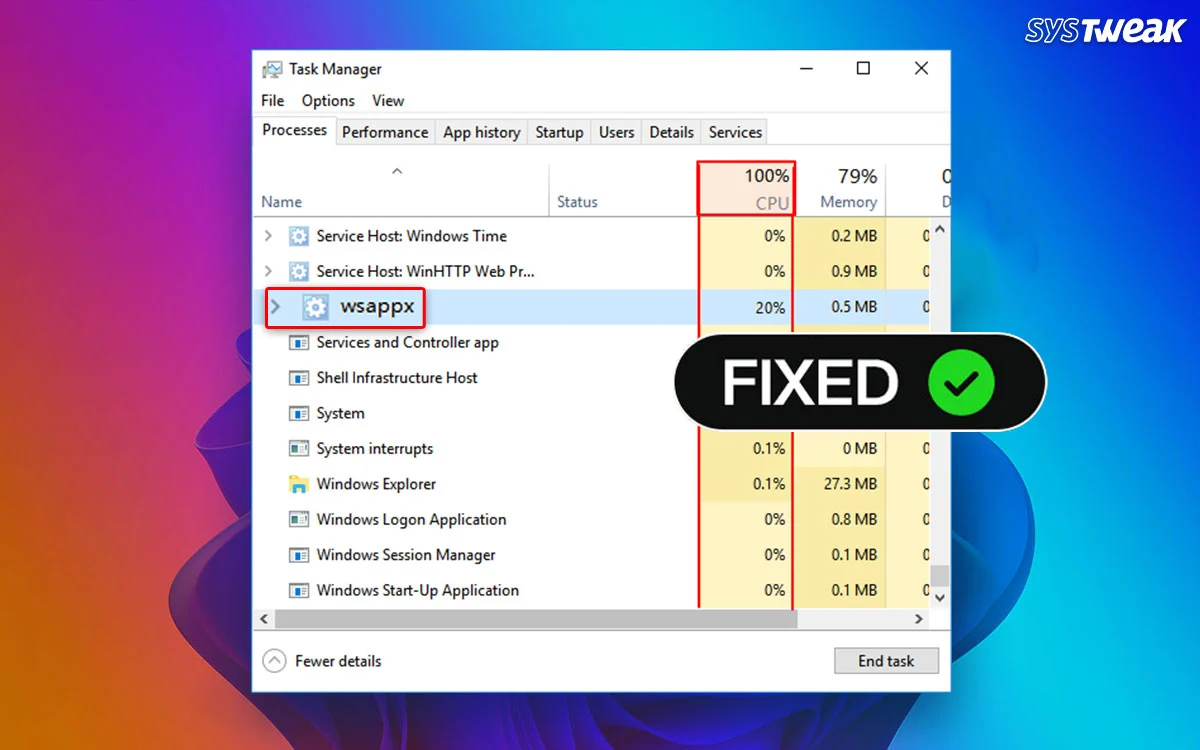
The Wsappx process is also known as Client License Service and AppX Deployment Service. This is a legitimate Windows process used by the Microsoft Store and the applications installed from the Store. The basic functions of the Wsappx process are to install, update, and uninstall Store apps. It also checks if the apps have a proper license. However, some Windows users across the globe have been complaining about issues with this service, like Wsappx high CPU usage and Wsappx high disk usage. We have addressed all the issues with Wsappx and swift and simple ways to fix the Wsappx high memory and other issues.
What Is Wsappx?
Before we begin troubleshooting, let us first understand what this process is and what it does within the Windows OS. The Wsappx is a background process that works in Windows 11/10/8 to manage the Microsoft Store and its related services.
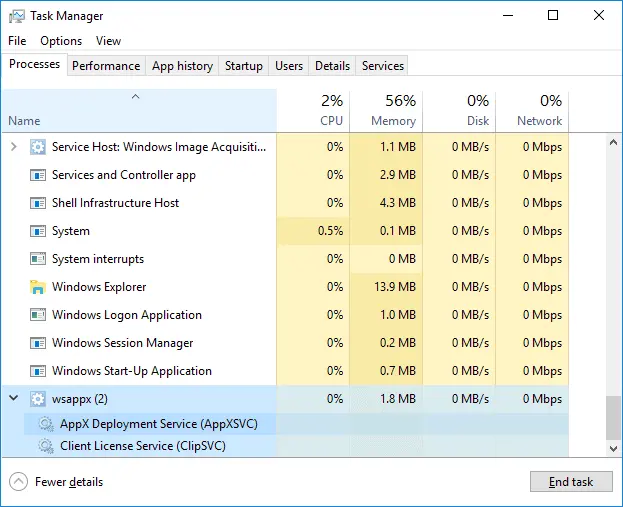
It comprises the following sub-services:
AppX Deployment Service (AppXSVC): This service handles the deployment of Store apps, which includes App install, update, and uninstall.
Client License Service (ClipSVC): This service is used for managing licenses and store protection for apps.
Windows Store Service (WSService) (Windows 8/8.1): This service is available for older Windows versions.
Note : These services generally remain in a dormant state on Windows OS. However, they become active when an app is installed, updated, or removed from the Windows Store. However, they can cause noticeable CPU and disk usage spikes.
Also Read – How To Fix DISM Host Servicing Process High CPU Usage?
Why Does Wsappx Cause High Usage?
The Wsappx process requires significant resources when Store apps are installed, uninstalled or updated. The services concerned with Store and Store apps consume high CPU resources, especially when the Store itself is automatically updating apps. Here are some situations when Wsappx high disk usage issues occur.
Installing/Updating Store Apps
The AppXSVC service becomes active and uses resources in the background whenever apps are installed or updated from the Microsoft Store.
Windows Store Updates
The Windows Store can update apps in the background all by itself, which may cause Wsappx high memory issues.
Background Task Execution
There might be certain maintenance tasks that were scheduled at a particular time that can initiate Wsappx-related services.
Corrupt Store or App Installation
If the Store apps cannot be updated normally, then the Wsappx service may keep on retrying or freeze up, causing high CPU, Disk, or Memory usage.
How To Fix High CPU/Disk Usage Caused By Wsappx?
We have compiled a list of troubleshooting methods that can help fix the high CPU/Disk/Memory issues caused by Wsappx.
Fix 1 – Reboot Your PC
By rebooting your computer, you can clear off the RAM, delete some of the temporary files, and end unnecessary programs, as well as processes and services running in the background. This can help fix temporary glitches and most minor issues.
Fix 2 – Update Windows
Windows updates have resulted in fixing many minor and major PC errors. It is recommended by experts to keep the PC updated at all times. Here are the steps to update your Windows OS.
1. Press Win + I to open the Windows Settings box.
2. Click on the Windows Updates tab in the left panel.
3. In the right section, click on the Check For Updates button.

4. Wait for Windows to connect to the Microsoft server and download/install updates for you.
5. After the update process is complete, press the Check for Updates button a couple of times to check if any pending updates were not done in the first round.
6. Next, click on Advanced Options and then on Optional Updates.

7. Select all the updates displayed here and click on the Download & Install button.
8. Wait for all the updates to complete and reboot your PC.
Also Read – [Fixed] Antimalware Service Executable High CPU Usage Issue
Fix 3- Update Drivers
The next fix, recommended by text experts to fix the error, is to update drivers. There are two ways to update drivers on a Windows PC.
Update Via Device Manager
Device Manager is an inbuilt tool that helps users update drivers. Here are the steps to run this tool.
1. Open the Device Manager by pressing Win + X and selecting Device Manager.

2. Expand the sections that display the yellow exclamation mark.
3. Right-click on these drivers one by one to view the context menu.
4. Select Update Driver and choose Search automatically for updated driver software.
Use The Advanced Driver Updater
The second way to update drivers is to use the Advanced Driver Updater app, which can detect outdated, corrupted, and missing drivers on your PC and download/install the most compatible drivers with a few mouse clicks. Here is what you need to do.
1. Download and install Advanced Driver Updater.

2. Launch the app and click the Start Scan Now button.

3. A list of driver issues will appear on the screen.

4. Locate the outdated drivers in the list and click on the update link next to them.

5. The update process will now begin. Restart your computer once the update is completed.
Fix 4 – Disable Windows Store temporarily
If updating your PC does not work, then you can try to disable the Windows Store on a temporary basis. However, if you disable the Store, then all the apps that rely on the Windows Store will be disabled, especially Calculator, Photos, Mail, etc. Here are the steps to use the Local Group Policy Editor.
1.Press Win + R, type gpedit.msc, and click on the OK button.

2. In the Group Policy box, navigate to the following path using the left panel.
Computer Configuration > Administrative Templates > Windows Components > Store
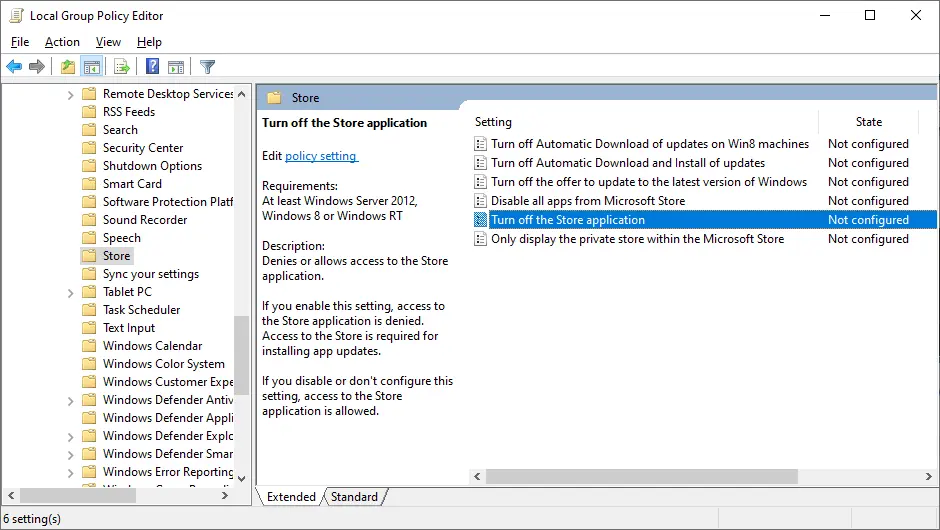
3. Locate Turn off the Store application in the right panel and double-click on it.
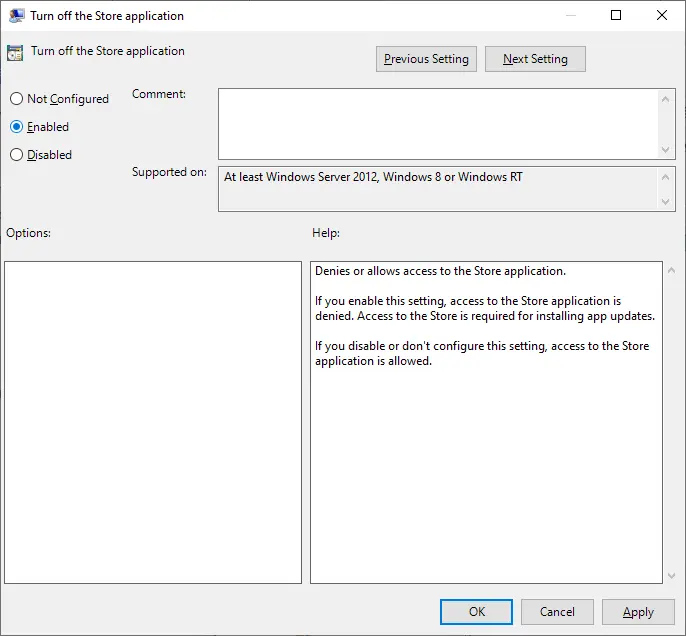
4. Set it to Enabled > Click OK.
Fix 5 – Restart the Windows Update Service
1. Press Win + R, type services.msc, and hit Enter.
2. Find Windows Update service in the new box, right-click it, and select Restart.
3. Also, restart AppX Deployment Service (AppXSVC) if available.
Fix 6 – Reset or Reinstall Microsoft Store
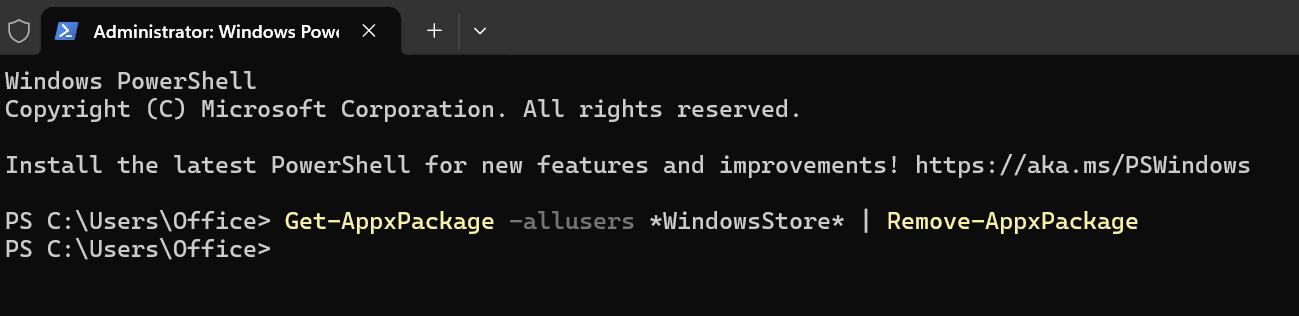
1. Open PowerShell as Administrator (Win + X > Terminal Admin).
2. Copy and paste the following command, followed by Enter.
Get-AppxPackage -allusers *WindowsStore* | Remove-AppxPackage
3. Next, copy and paste the next command and press the Enter key.
Get-AppxPackage -allusers *WindowsStore* | Foreach {Add-AppxPackage -DisableDevelopmentMode -Register “$($_.InstallLocation)\AppXManifest.xml”}

4. The Windows Store app will be reinstalled.
Also Read – 4 Ways to Lower PC Doctor Module High CPU Usage
Fix 7 – Disable Microsoft Store Automatic Updates
1. Open Microsoft Store, click the three-dot menu > Settings.
2. Turn off “Update apps automatically”.
This prevents automatic background updates of apps, reducing Wsappx activity.
Fix 8 – Check for Corrupt System Files
1. Press Win + R to launch the RUN dialog box and type “Cmd”.
2. Press Ctrl + Shift + Enter to open the Command Prompt in elevated mode.
3. Type the following command and press the Enter key to execute it.
sfc /scannow
4. Next, copy and paste the following command line followed by Enter.
DISM /Online /Cleanup-Image /RestoreHealth
Fix 9. Disable Wsappx Permanently (Not Recommended)
Note : This method may disable the Microsoft Store and cause all the UWP apps to malfunction.
1. Open Registry Editor (Win + R > regedit).
2. Copy and paste the following path in the address bar of the Registry Editor and press Enter.
HKEY_LOCAL_MACHINE\SYSTEM\CurrentControlSet\Services\AppXSvc
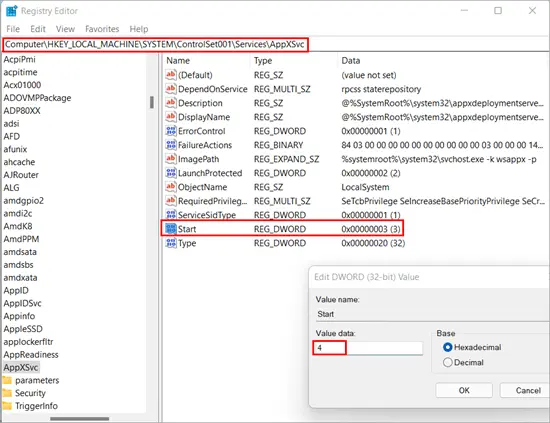
3. Double-click Start value in the right panel, change its value to 4 (Disabled), and restart the PC.
Fix 10 – Run Chkdsk
The Chkdsk command is used to check for Disk errors on your PC. It is a command-line tool provided by Microsoft to all Windows users. Here are the steps.
1. Press Win + R to launch the RUN box and type ‘cmd’.
2. Press Ctrl + Shift + Enter to open the Command Prompt in Admin mode.
3. Type chkdsk C: /f /r and the Check Disk command will search for errors on your PC.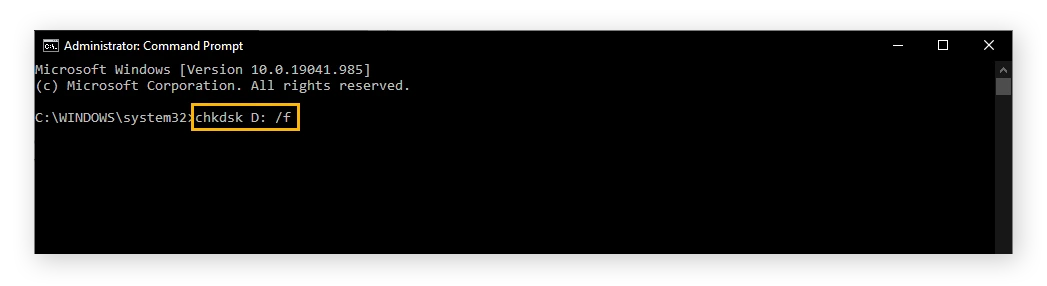
If the chkdsk command does not yield any fruitful results, then follow the next method.
Fix 11 – Scan For Malware
Some experts have stated that the “Wsappx high CPU/disk usage” error occurs due to malware infection. It is recommended that you run a full malware scan on your PC. If you are running third-party antivirus software, you need to follow the steps accordingly. We have described the steps for running a malware scan using Windows Security, a Microsoft default antivirus app installed on your PC.
1. Press the Windows key and type “ Windows Security.”

2. Click on the relevant result under Best Match.

3. The Windows Security app will launch. Click on the Virus & Threat Protection box.
4. Next, click on Scan Options and select Full Scan.

5. Finally, click on the Scan Now button.
After you have completed a malware scan, follow the steps on the screen to quarantine or remove any infected files and restart your PC. If the issue persists, then move to the next section to troubleshoot this error.
| Editor’s Tip – Use A Real-Time Antivirus (Recommended)
When malware infects your system, its potential to cause damage is unpredictable. That’s why we recommend using a real-time antivirus like T9 Antivirus, which actively protects your PC from malware. This app runs continuously, 24/7, to block all forms of malware. In addition to its malware protection, T9 Antivirus helps optimize your PC’s performance, manage startup programs, and includes a free Ad Blocker to eliminate ads while you browse the web.
|

Fix 12 – Check For Problematic Apps
Certain apps cannot update themselves due to a bug or temporary glitch. Similarly, there might be some apps running in the background that may attempt to update but might fail repeatedly. The repeated update may cause Wsappx to loop and consume resources of CPU. Here is what you need to do.
1. Press the Windows key and type “Task Manager”.
2. Click on the relevant result with the same name to open the app.
3. In the Processes tab, look for the apps that are consuming high resources.
4. Right-click on those processes and choose the End task to close them.
5. This will free up resources and allow Wsappx to complete its task.
Fix 13 – Increase Virtual Memory
Some experts recommend turning on the Managing Paging file size option to fix this issue, especially if the issue is due to virtual memory. Here are the steps:
1. Press Win + E to open File Explorer.
2. Locate This PC and right-click on it to choose Properties.
3. A new box will open. Click the Advanced tab.
4. Click on the Settings button under Performance.

5. A new box will further open. Click on the Advanced tab and then click on Change.

6. Now, check the box next to Automatically manage paging file size for all drives and click the OK button.
Fix 14 – Use Task Scheduler to Delay Wsappx Activities.
If you are not able to fix the WsAppx high CPU usage issue with the above steps, then you can try the Task Scheduler.
1. Open Task Scheduler (taskschd.msc).
2. Navigate to:
Task Scheduler Library > Microsoft > Windows > WS
3. You can disable or delay triggers (be cautious, it may affect Store functionality).
Fix 15 – Consider a Clean Boot
Booting in a clean boot environment can help isolate the cause of high resource usage.
If the issue persists, try performing a clean boot to disable any third-party applications or services that may be interfering with the Wsappx process.
1. Press Win + R, type msconfig, and press Enter.

2. In the System Configuration window, go to the Services tab and check Hide all Microsoft services.

3. Disable all non-Microsoft services and click OK.
4. Restart your computer.
Also Read – How to Reduce Hardware Reserved Memory too High on Windows
Fix 16 – Reset Windows
The final step remaining to fix this issue is to reset the PC. Here are the steps –
1. Open the Start menu and search for ‘Reset this PC.’ Then, select the appropriate option from the search results.

2. Click on “Reset PC.”

3. Select “Keep my files.”

4. Follow the on-screen instructions to start the reset process for your Windows computer.
Note : Although Windows provides an option to keep your data during the reset, it is recommended to manually back up your files externally to prevent any potential data loss.
Conclusion
We hope that the above-mentioned methods have helped fix wsappx high disk usage on your PC. The above steps have been tried and tested and are guaranteed to work. We would love to hear about your issue and how you fixed it in the comments section below. We leave you with a few frequently asked questions that may arise while troubleshooting this issue.
Frequently Asked Questions
1. What is WSAPPX’s high disk usage?
The Wsappx service helps Store apps to download, install, uninstall and update Store apps. With all these functions, this service may cause high disk usage or high CPU usage on your PC.
2. Can We Stop WSAPPX?
The Wsappx is an important service that is required by the Windows Store. Hence it cannot be disabled as it manages the Windows Store Apps basic functions like installation and updation.
3. How do I fix WSAPPX?
We have listed all the expert-recommended methods to fix this issue above, You can follow each method one by one and once your issue is resolved, you can ignore the remaining methods.
4. Can I Kill WSAPPX?
The Wsappx is an important process on Windows OS. If you attempt to kill this crucial process then your Windows OS may become unstable, freeze or shut down. There is no provision to forcibly disable this process and we do not recommend that you try to kill this process by any third-party software.
5. Is WSAPPX a Virus?
The Wsappx service is a crucial Windows process and not any sort of malware or virus.
6. Why do I have two Wsappx?
If you view two Wsappx processes in the Task Manager window, then you need not worry. Since this is a legitimate process, this could mean that two or more Windows Store apps might be updating at the same time and this could cause high CPU or disk usage.
7. Why is Wsappx using so much RAM?
The Wsappx is a process related to Windows Store and Windows Universal App platform. If the apps are being installed or updated the Wsappx process will require more resources to complete those tasks. The Wsappx high memory issue could also occur if some app is updating in the background automatically.