LogMein Hamachi is a widely used app that enables you to create a VPN. Gamers for network gaming and file sharing especially favor it. It also creates a secure, encrypted local network, ensuring online privacy. However, many users have reported encountering the “Hamachi service stopped” error while using the app. Furthermore, similar versions of this error have contributed to users’ frustration with the service’s performance.
Why has my Hamachi service stopped
Here are some common reasons behind the issue:
1. Windows Management Instrumentation (WMI) Service Issues: Hamachi depends on the WMI service to run properly. If WMI is disabled or misconfigured, Hamachi may fail to start.
2. Corrupted Hamachi Installation: A corrupted or incomplete installation of Hamachi can lead to the service stopping unexpectedly.
3. Conflicting Software: Certain security software, firewalls, or antivirus programs can interfere with Hamachi’s functionality, causing the service to stop.
4. Dependency Issues: Hamachi’s required services or dependencies are not properly configured, preventing the service from running. This can include missing components or incorrect configurations.
5. Outdated or Incompatible Drivers: Outdated network drivers, especially for network adapters, can cause Hamachi to malfunction or stop working.
6. Windows Updates: A recent Windows update may sometimes introduce changes that conflict with Hamachi’s operation, leading to service interruptions.
7. Network Configuration Problems: Misconfigured network settings, such as DNS or IP, may prevent Hamachi from functioning properly.
8. Hamachi Service Settings: The service is set to manual or disabled instead of automatic. It may fail to start when the computer reboots.
9. Blocked by Antivirus or Firewall: Security software may block or quarantine Hamachi.
Hamachi Service Stopped On Windows – Restart It
Method 1 – Grant Administrative Rights To Hamachi
You can run any third-party app with admin privileges to grant it access to all system resources. Experts suggest granting Hamachi admin rights to make the app run without issues. Here is what you need to do.
Step 1. Right-click on the Hamachi shortcut and choose Properties from the context menu.
Step 2. In the Properties box, click on the Compatibility tab.
Step 3. Check the box in front of Run this program as Administrator.

Step 4. Click on Apply and OK.
Check if this solution resolves the issue. If not, proceed to the next method below.
Method 2 – Activate The WMI Service
Some users are experiencing the LogMeIn service starting problem and have reported that enabling the Windows Management Instrumentation (WMI) service resolved the issue. To try this method, follow these steps –
Step 1. Press Win + R to launch the RUN box and type Services.msc, followed by the OK button.

Step 2. A list of Windows Services will appear in alphabetical order. Locate the Windows Management Instrumentation service and right-click on it to choose Properties.

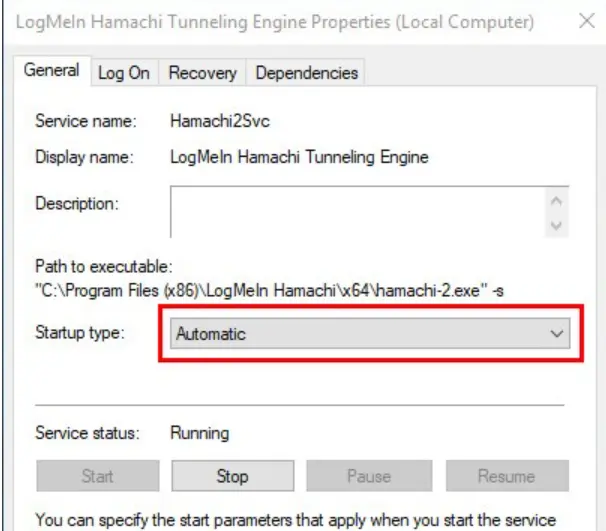
Step 3. Click on the Startup Type dropdown and choose Automatic.
Step 4. Next, click on the Stop button and wait for 10 seconds before clicking on the Start button.
Step 5. Exit the Windows Services box and check if the issue has been fixed.
Method 3 – Modify Dependencies Of WMI
The issue may also arise if the Windows Management Instrumentation (WMI) service needs more dependencies to function correctly. Some users have found that the problem was resolved by modifying the dependencies to include the Workstation through an elevated Command Prompt. Here is what you need to do –
Step 1. Press Win + R to open the RUN box.
Step 2. Type “cmd” and press Ctrl + Shift + Enter to open the Command Prompt in Admin mode.
Step 3. Copy and paste the following command in the command prompt window.
sc config Hamachi2Svc depend= Winmgmt/LanmanWorkstation
Step 4. Exit the Command prompt and reboot your PC.
Method 4 – Disable Your Antivirus & Firewall And Try Again
Some antivirus programs can be overly cautious and mistakenly flag a legitimate app as a false positive. In such cases, it’s advisable to temporarily disable the antivirus and attempt to launch the Hamachi app. Here’s how to disable the Windows Security app –
Disable the Windows Security Antivirus
Step 1. Press the Win key and type Windows Security.

Step 2. Click on the relevant result under Best Match.

Step 3. Next, click on Virus & Threat Protection.

Step 4. Click on Manage Settings.
Step 5. Slide the toggle button under Real-Time Protection towards the left to disable it.
Disable the Windows Firewall
Step 1 – Press Win + I to open Settings.
Step 2 – Navigate to Privacy & Security > Windows Security > Firewall & network protection.

Step 3 – Click on all network profiles (Domain, Private, or Public) one by one.

Step 4 – Under Microsoft Defender Firewall, toggle the switch to Off.
Note : After you have completed your task with Hamachi, you can turn on the Firewall using the same steps described above.
Method 5 – Clean Boot Your PC
If you’re still seeing the “Hamachi service status: stopped” message, the issue could be caused by other applications interfering with Hamachi. You can disable all startup applications and services to identify and resolve the culprit. Here’s how to fix it-
Step 1. To open System Configuration, open the Run window by pressing Win + R, typing msconfig, and pressing Enter.
Step 2. In the Services tab, check Hide all Microsoft services, then click Disable all.

Step 3. Next, go to the Startup tab and click Open Task Manager.

Step 4. In Task Manager, right-click each application under the Startup tab and select Disable. Repeat this for all applications in the list.
Step 5. Return to System Configuration, click Apply, OK, and restart your computer.
After your PC restarts, try running Hamachi again. If the issue is resolved, enable the disabled applications and services one by one to identify which is causing the problem. Once you find the culprit, you can disable it or uninstall it.
Method 6 – Update Drivers
One of the most successful methods to resolve the LogMein Hamachi Service Status: Stopped Message is to update network drivers. Drivers are small programs that bridge the gap between Hardware and Software. If you want to make the performance of your VPN better, then you must update your network adapter. There are two ways to update network drivers: Manually by Device Manager or Automatically by Advanced Driver Updater.
Manual Method
Step 1 – Press Win + X to open the Power menu and select Device Manager.

Step 2 – In the new box that opens, expand Network Adapters.

Step 3 – Right-click on each and choose Update driver
Step 4 – Adhere to the instructions on your screen to complete the driver installation.
Step 5 – Reboot your PC.
Automatic Method
You can update the drivers manually using the Device Manager, but we recommend that you use the Advanced Driver Updater tool. This third-party application helps users detect and download the latest drivers. It also resolves driver issues like missing, corrupted, outdated, or incompatible drivers.
Here are the steps –
Step 1 – Download and install Advanced Driver Updater using the button provided below.

Step 2 – Launch the app and click on the Start Scan Now button.

Step 3 – Wait for the scan to complete, and a list of driver issues will be listed on the screen.

Step 4 – Press the Update button next to the network drivers and wait for the process to complete.
Step 5 – Reboot your PC for changes to take effect.
Read Also: How To Improve Windows Startup Speed
Method 7 – Configuring Hamachi’s settings
Some Experts recommend that modifying Hamachi’s Settings can fix Hamachi errors on a Windows PC. Here is what you need to do.
Step 1 – Press Win + R to open the RUN dialog box.
Step 2 – Type “Services.msc” and click on the OK button.
Step 3 – In the services box, locate the “LogMeIn Hamachi Tunneling Engine” service and double-click on it.
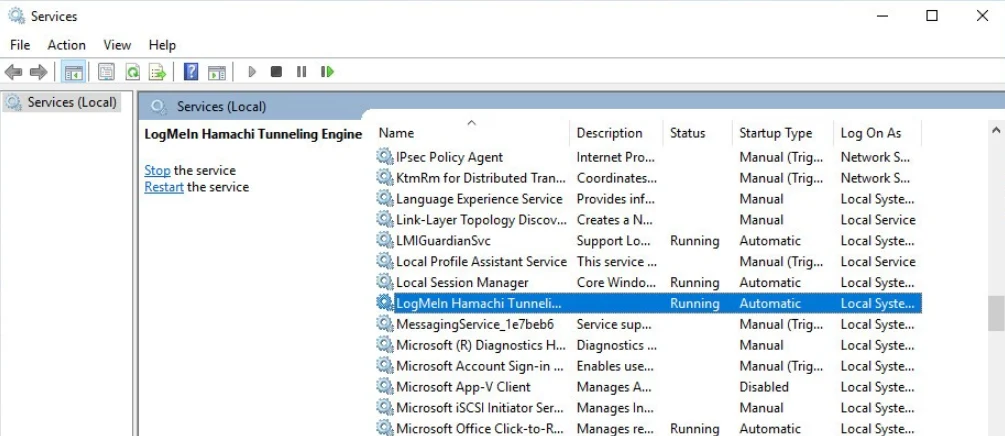
Step 4 – The Properties window will now open, where you have to click on the Start button.
Step 5 – Next, click on the Recovery tab and follow these options listed below.
First Failure
Second Failure
Subsequent Failures
Step 6 – Look for the option Reset fail count after and set it to 0 days.
Step 7 – Next, look for the option Restart service after and set it to 1 minute.
Step 8 – Click on Apply, followed by OK.
Step 9 – Next, press Win + R to launch the RUN dialog box and type CMD.
Step 10 – Press Ctrl + Shift + Enter to open the Command Prompt in elevated mode.
Step 11 – Type the following commands one by one, followed by the Enter key.
net stop Hamachi2Svc
net start Hamachi2Svc
Step 12 – Restart the PC.
Method 8 – Restore System To An Earlier Date
Sometimes, a new Windows update or installing a new app might interfere with the normal functioning of Hamachi. In this case, we recommend that you carry out a system restore if possible. Here are the steps –
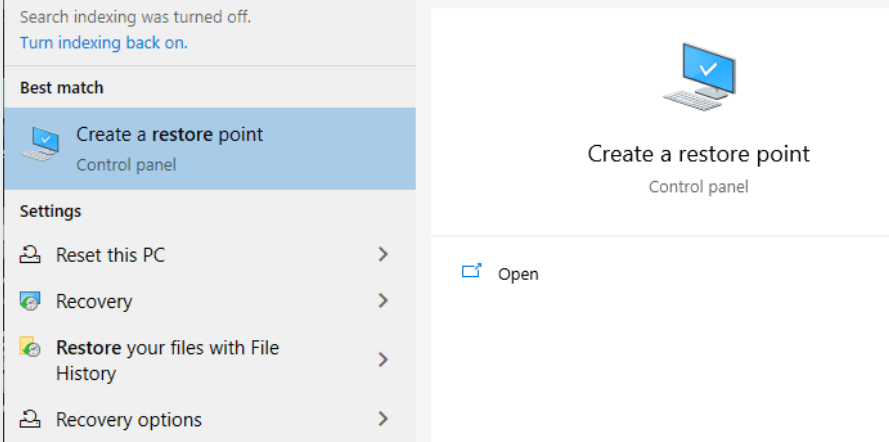
Step 1 – Press the Windows key and type System Restore.
Step 2 – Click on “Create a Restore Point” from the search results.
Step 3 – A new box will open where you have to click on the System Restore button.

Step 4 – Next, choose the date to which you wish to restore your PC and click on the Next button.
Step 5 – Follow the onscreen instructions to complete the restore process.
Read Also : How to Fix Windows 10/11 System Restore Is Taking a Long Time
Method 9 – Restarting The Hamachi Service Via A Script
This is an advanced fix for advanced PC users. Read the steps and attempt them only if you understand them.
Step 1 – Press the Windows key and type “Notepad”.
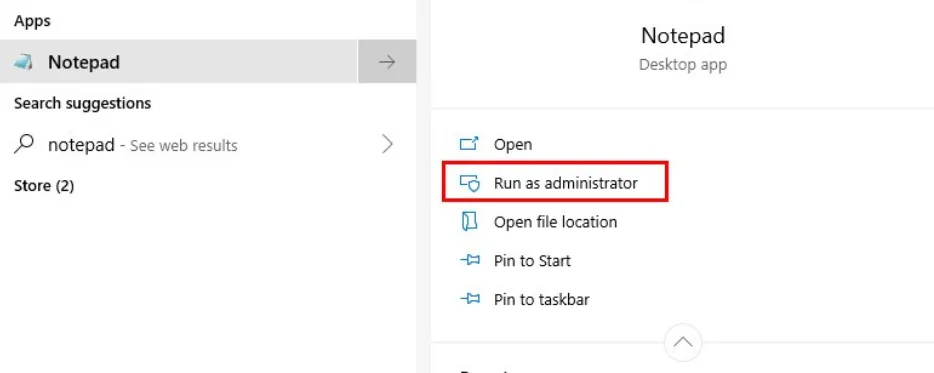
Step 2 – Choose “Run as administrator” to open Notepad in admin mode.
Step 3 – Copy and paste the following code into Notepad.
net stop Hamachi2Svc
net start Hamachi2Svc
start “C:\Program Files (x86)\LogMeIn Hamachi\hamachi-2-ui.exe”
exit
Step 4 – Click on the File tab in the top-left corner and choose Save As.
Step 5 – In the Filename section, type “HamachiReload.cmd”.
Step 6 – In the Save As Type section, choose All Files.
Step 7 – Use the address bar on the top to navigate to C: Windows\System32 and click on the Save button.
Once you have saved the script, we will now describe the steps to run this task using the Task Scheduler app.
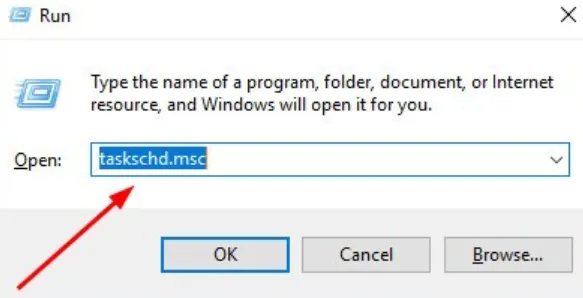
Step 1 – Press Win + R to open the RUN dialog box, type taskschd.msc, and hit the Enter key.
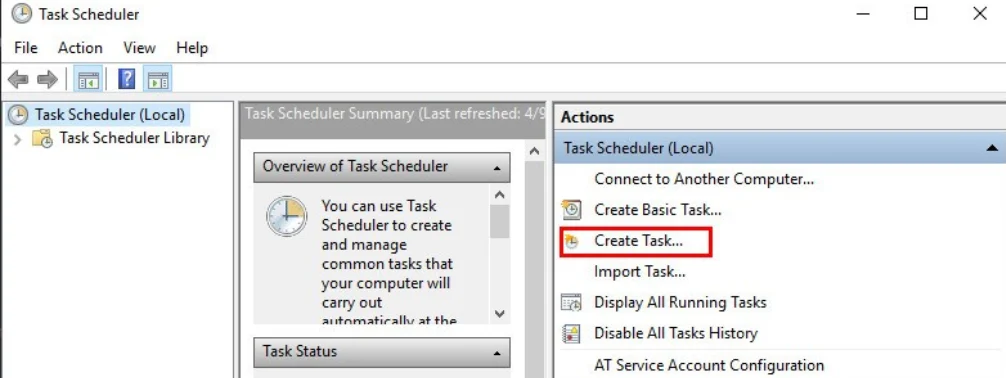
Step 2 – In the Task Scheduler window, click on Create Task under Actions in the right pane.
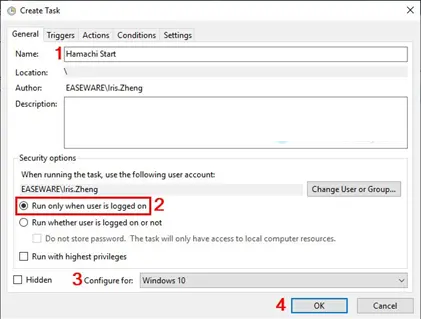
Step 3 – A new window will open, and under the General tab, carry out these three sub-steps
a). Input a Name for the task.
b). Select the “Run only when the user is logged on” option.
c). In the Configure For dropdown, select Windows 10 and click on the OK button.
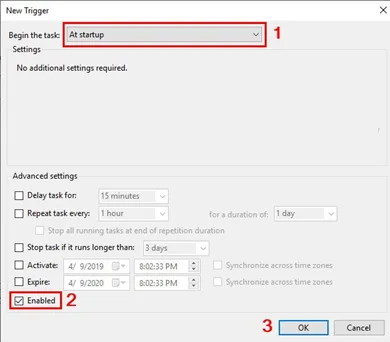
Step 4 – Next, click on the Triggers tab and select New.
Step 5 – Change a few settings here, like –
a). Click the Begin the task dropdown and choose At startup.
b). Check the Enabled option at the bottom-left corner.
c). Click on the OK button.
Step 6 – Now, click on the Actions tab and choose the New button.
Step 7 – Click on the Action dropdown and choose “Start a program”.
Step 8 – Click on the Browse button and import the Notepad file created above by pasting the location of the Notepad file.
C:\Windows\System32
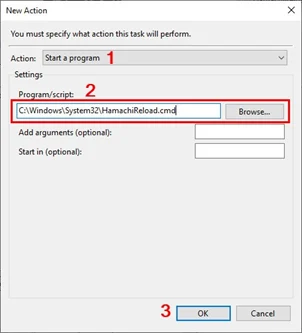
Step 9 – Click on the Open button, followed by the OK button.
Step 10 – Finally, click on the Conditions tab and uncheck all the options.
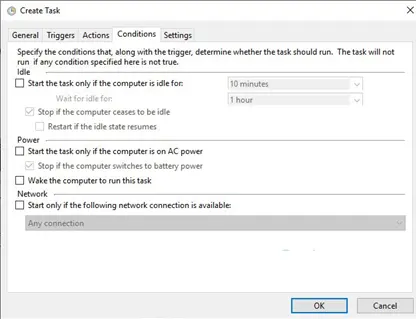
Step 11 – Click on OK to exit the Task Scheduler and reboot your PC.
Method 10 – Reinstall LogMeIn Hamachi
Another fix, as suggested by experts, is to reinstall LogMeIn Hamachi. To do so, you first need to completely uninstall the app and then reinstall it from the official service.
Step 1 – Press the Windows key and type “ Add Remove Programs”.

Step 2 – Click on the relevant search result, and a list of apps installed on your PC will appear on your screen.
Step 3 – You can scroll down through the list and locate LogMeIn Hamachi or type the name in the search box above the list of apps.

Step 4 – Once you locate the app you wish to uninstall, click on the three dots next to it and choose Uninstall.

Step 5 – Adhere to the onscreen instructions; the app will be completely uninstalled from your PC.
Step 6 – It is necessary to restart your PC after every uninstallation and then reinstall the app from the official source.
Method 11 – Check Network Adapter
Step 1 – Press Win + R, type ncpa.cpl, and click on OK.

Step 2 – Look for Hamachi Network Interface.
Step 3 – Right-click > Enable (if disabled)
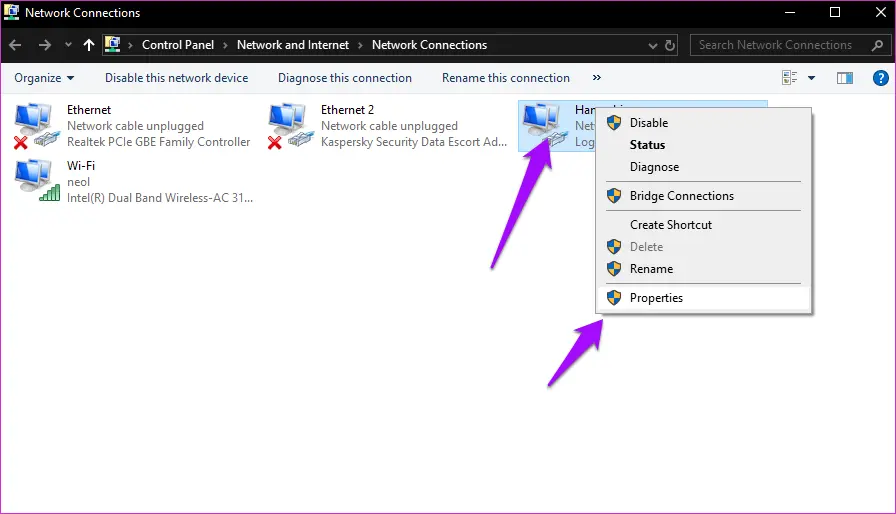
Step 4 – If it’s missing, reinstall Hamachi
Method 12 – Check Event Viewer for Errors
Step 1 – Press Win + X > Event Viewer
Step 2 – Look under Windows Logs > System.
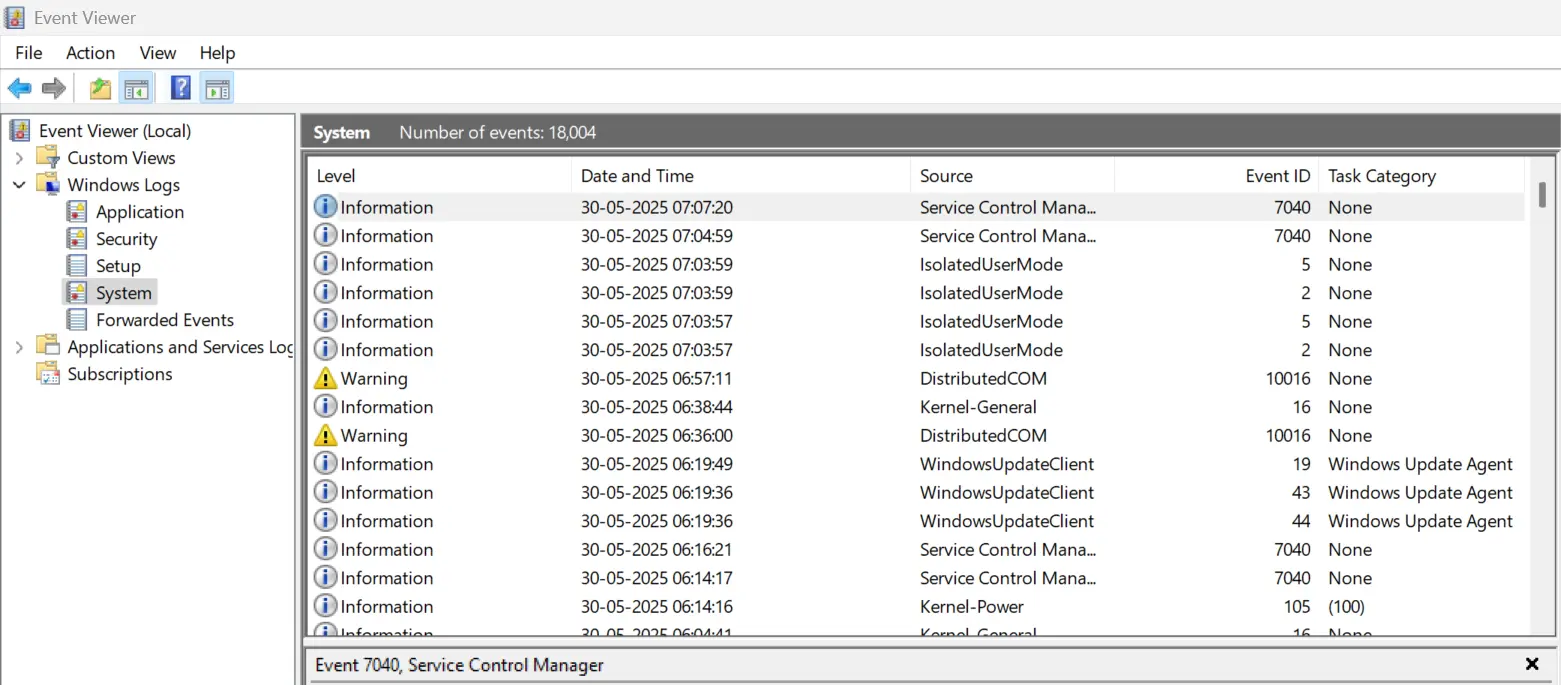
Step 3 – Filter by Error and look for anything related to Hamachi or Tunneling Engine
Have You Fixed The Hamachi Service Stopped Error
In conclusion, this error can often be resolved by troubleshooting key areas such as enabling the Windows Management Instrumentation (WMI) service, checking for service dependencies, and ensuring no conflicting applications or software exist. If these solutions don’t work, reinstalling Hamachi or adjusting firewall and antivirus settings might help restore its functionality. Following these steps can fix the error and get Hamachi running smoothly again.