
Where is my Team’s recording saved?
Is recording a Team meeting becoming a challenge? Does the admin policies, license restrictions and change Microsoft quietly rolled out in October 2024 that disabled or greyed out the recording button for thousands of users troubles you too?
Whether you are a professional who needs to record a client call, a student trying to re-listen to lecture, or someone who switched to Teams from Skype after Microsoft officially retired it on May 5, 2025, this how to guide answers every question you might have.
From how to use the built-in recording option to setting up auto-recording, what to do when the option is greyed out or missing, where recordings are saved, how transcription works, and other common queries with alternatives everything is here.
Important :
The built-in recording feature is not available to Free Microsoft Teams and Skype users.
You need a paid Microsoft 365 Business licence (Basic or higher).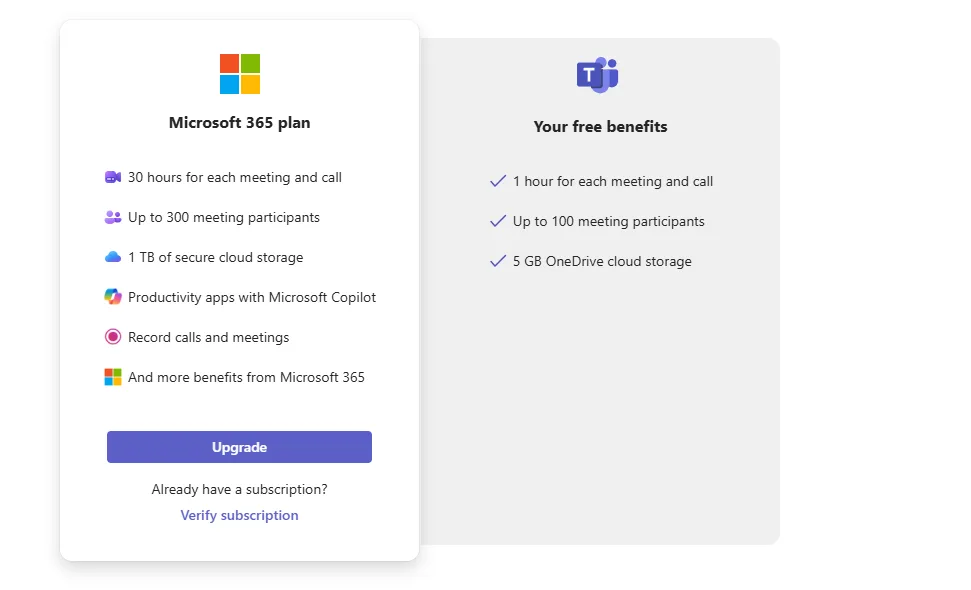
Below in section 7 we have listed some alternative recording methods that you can use to record meetings without a paid licence.
Who Can Record a Teams Meeting?
Microsoft Teams is controlled by two things – Microsoft 365 license and your organization’s admin policy. When either is missing the recording button disappears.
When the following three conditions are met Teams meeting can be recorded –
- You have a valid Microsoft 365 licence that comprises of – Office 365 E1, E3, E5, F3, A1, A3, A5, Microsoft 365 Business Basic, Business Standard, Business Premium, or higher.
- You are from the same organization (email domain must match) as the meeting organizer.
- Your IT administrators has enabled cloud recording in your organisation’s Teams meeting policy (Microsoft’s recoding policy.)
This means if either of the conditions are unfulfilled the recording button vanishes.
| Type of User | Can Start? | Can Stop? | Requirements to be Fulfilled |
| Meeting Organizer | Yes | Yes | Needs a valid license + enabled admin policy. |
| Participant from same organization | Yes | Yes | Needs a valid license + enabled admin policy. |
| External user | No | No | Can only record 1:1 call when recording policy allows it. |
| Guest (invited through a link) | No | No | Guests cannot start, stop, or manage recordings. |
| Anonymous User | No | No | Do not have recording rights. |
| Team Free User | No | No | Personal or free Microsoft users cannot record Teams meetings. |
Recording Continues If Organizer Leaves
Participants from the same organization with the same rights and license can record the meeting even when the organizer is not present or has left the meetings. Also, if a meeting goes beyond four hours Teams stops the recording and start a new one till the meeting is in progress.
Additional Control – Teams Premium A Teams Premium or Microsoft 365 Copilot licence holder who organizes the meeting can restrict who is allowed to record directly from Meeting Options. They can allow – If you are a presenter with the same right but the recording is still greyed out, possiblity is that the organiser may have applied a restriction.
How to Record a Teams Meeting Windows 10/11 (Built-In Method)
Note : If the steps slightly differ for you, check the Microsoft Teams version. The steps listed below are as per the latest interface in which the record option has moved from the bottom toolbar to the top.
1. Microsoft Teams Desktop App
1. Sign in to your Teams account.
2. Select the account you want to use.
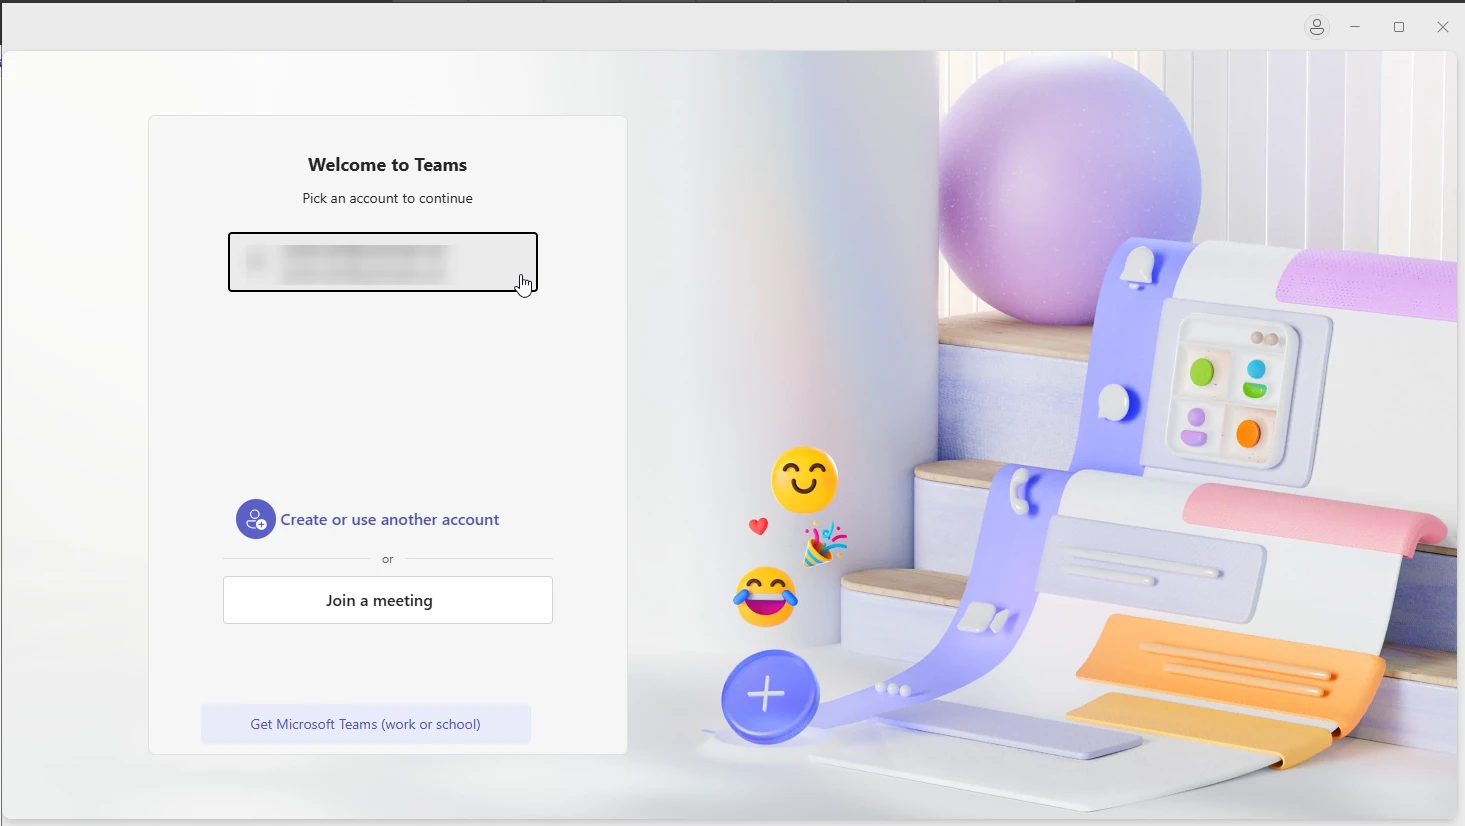
3. If you are initiating a meeting click Start meeting > invite people or copy the meeting link and share it.
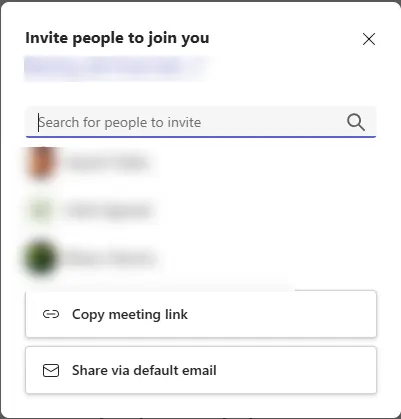
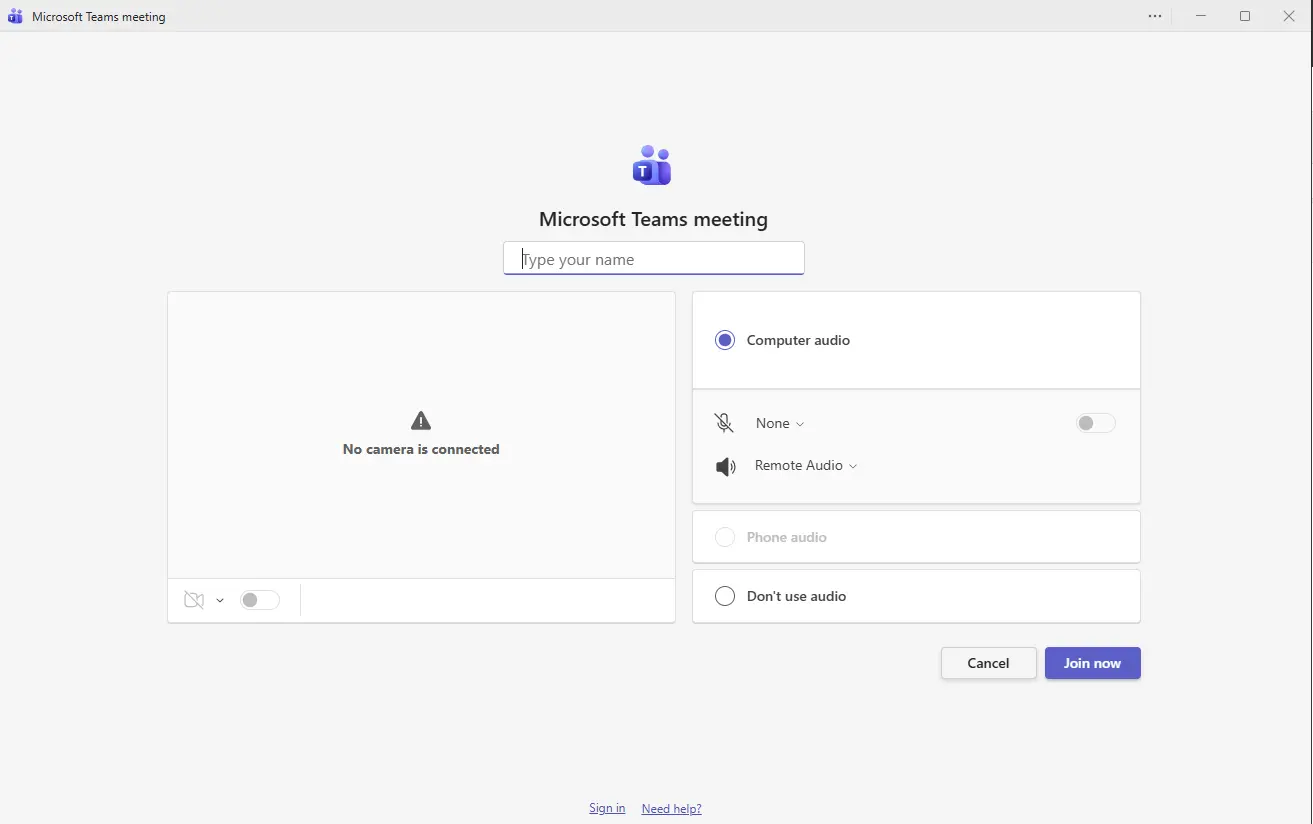
If a meeting is scheduled click Join a meeting > enter the meeting ID > users name > click Join meetings to attend a Teams meeting.
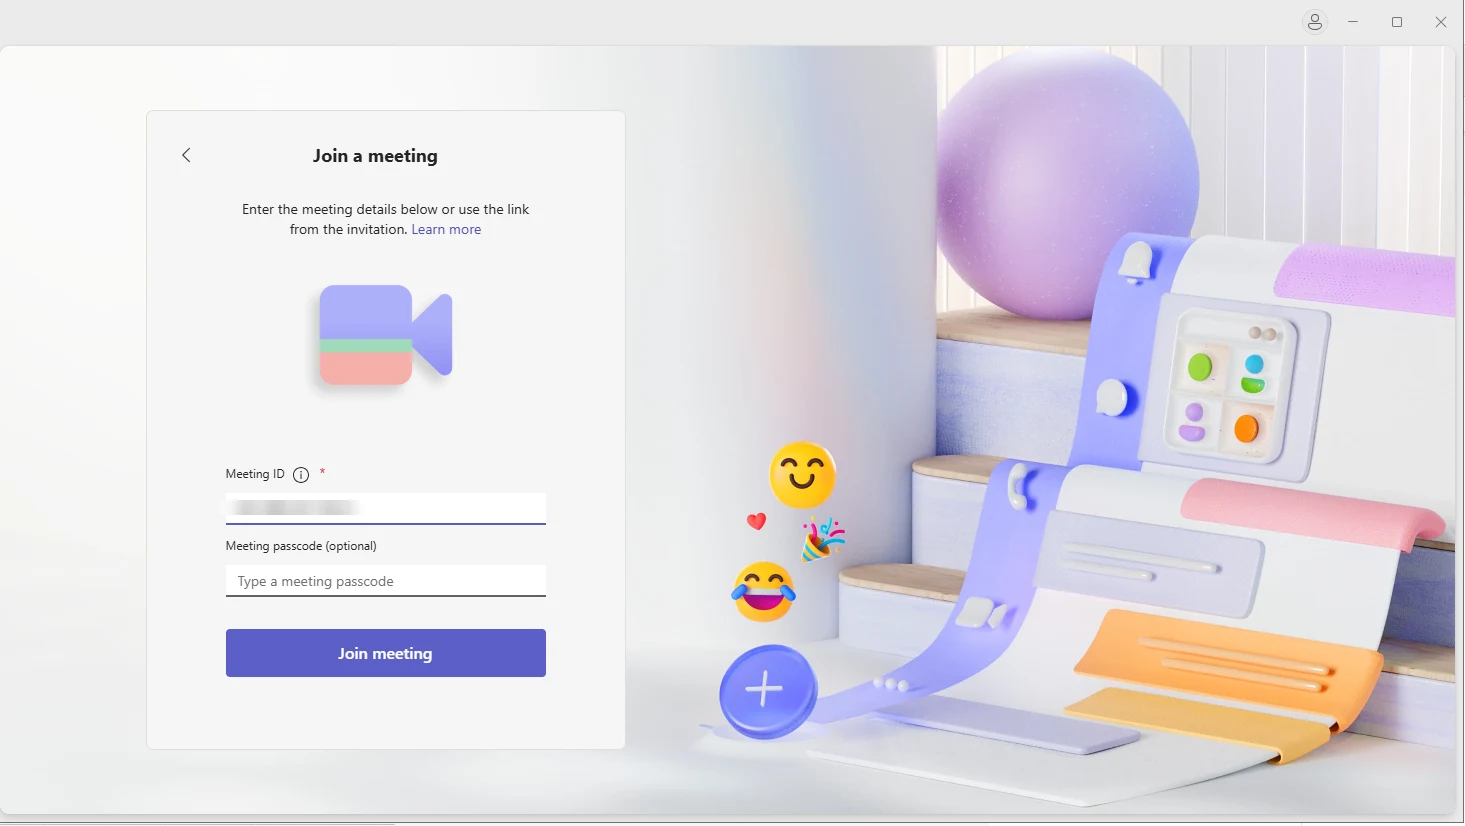
Type the name with which you want to join , select the audio and click Join now. Wait until you are in the active meeting window.
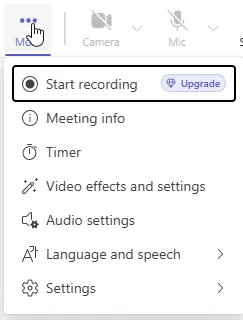
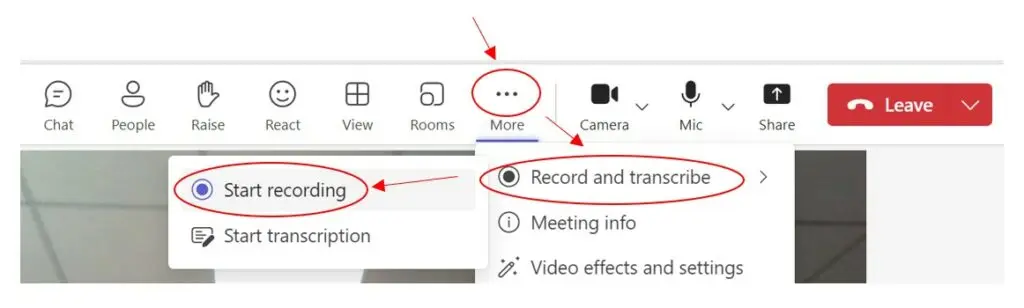
4. Once in the meeting, go to the control bar at the top of your screen. Click the three-dot icon labelled More.
![]()
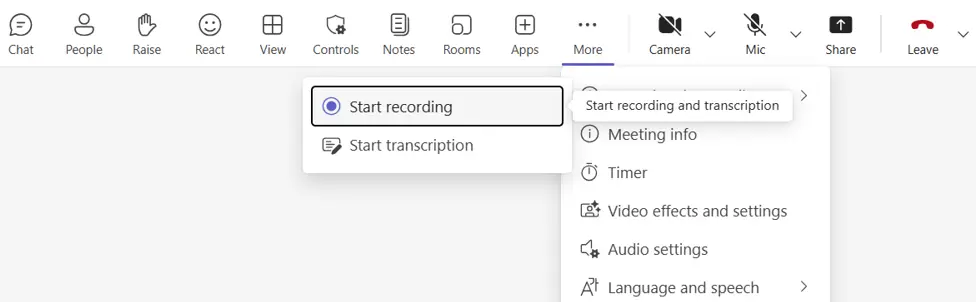
5. In the dropdown menu, hover over Record and transcribe.
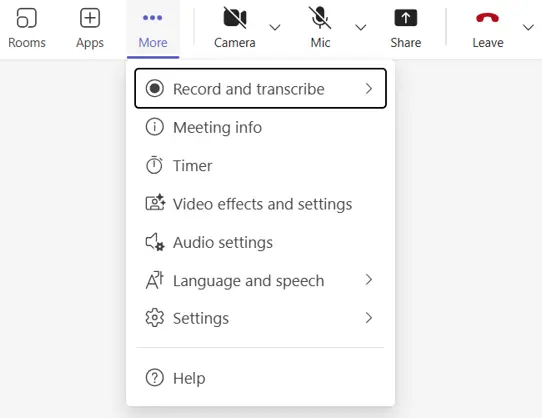
6. Select Start recording from the sub-menu that appears.
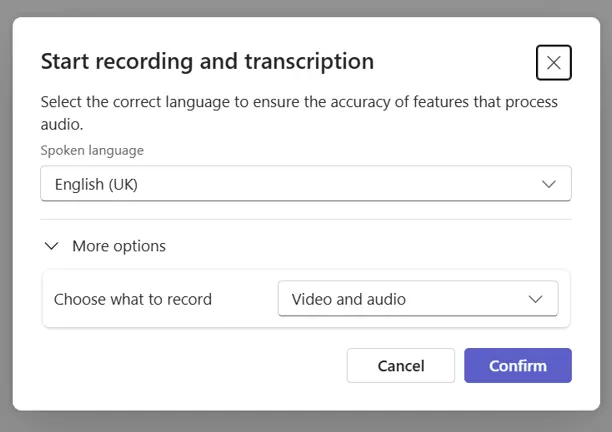
7. You will now get a confirmation dialog. Here, select the language > choose what to record and click Confirm to begin recording.
8. A red recording indicator will appear at the top of the meeting window and everyone in the meeting will be notified about the recording in progress.

9. This way you can record and transcribe a meeting.
2. Audio-Only Recording
If you don’t need the video recording you can now record only the audio and reduce the file size significantly. To record audio follow these steps:
1. Click More during an active call > Record and transcribe > Start recording.
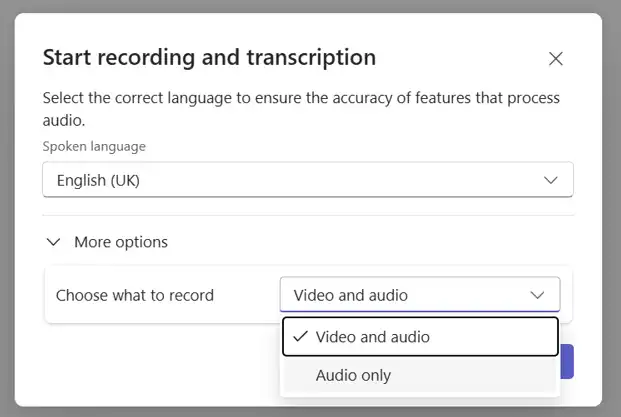
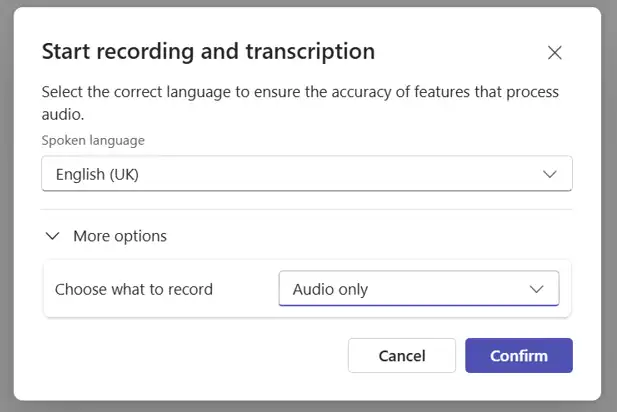
2. In the confirmation dialog from the ‘Choose what to record’ dropdown, select Audio only.
3. Click Confirm. The recording will now be done in audio-only mode.
| Cannot Find ‘Record and Transcribe’ in the Menu?
If the ‘Record and transcribe’ option is missing from the More actions menu, scroll down if the menu is long to ensure you have not missed it. However, if it is not there then chances are that it is disabled by your admin or you may not have the required licence or the October 2024 Copilot policy change may be affecting it. |
How to Stop the Recording?
To stop the recording follow these steps:
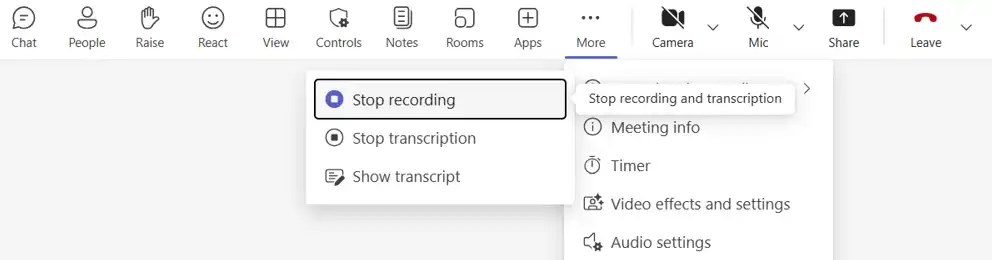
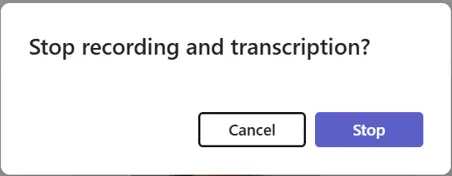
1. Click the three-dot More icon during the meeting > Record and transcribe > choose Stop recording to end both recording and live transcription. However, if you only want the transcription to stop choose Stop transcription.
2. Confirm the action by clicking Stop button.
The recording will be processed and saved automatically to OneDrive or Sharepoint. This may take a few minutes after the meeting ends.
What Teams Can Record and What It Cannot?
| What Is Recorded | What Is NOT Recorded |
| Audio from all participants | Whiteboard content and annotations |
| Video from up to 4 participants simultaneously | Shared notes or OneNote content |
| Screen sharing (presentations, apps, windows) | Content shared via app-share (only desktop share is captured) |
| PowerPoint Live slides (visual only) | Embedded videos or animations in PowerPoint Live |
| Meeting chat (as a separate transcript) | More than 4 video streams at once |
3. Teams on Web Browser (Chrome / Edge)
Rather than using the desktop app if you are using Teams in a browser on Windows 10 or 11 you can record meeting by following these steps:
1. Go to teams.microsoft.com and join or start your meeting.
2. Click the three-dot More button in the meeting toolbar at the top of your screen.
3. Select Record and transcribe > Start recording.
4. Confirm the action to start the recording.
The web version works similar to the desktop desktop app. If you face any issues recording a meeting from the desktop app, try the web version. Switching to browser sometimes resolves policy or app-version issues.
Additional Steps for Mobile Users
How to Record a Teams Meeting on Mobile (iOS & Android):
Whether you are an Android or iPhone user if you have the license and admin permissions you can record meetings from the Teams mobile app.
Steps to record Teams call on iOS (iPhone) and Android:
1. Open the Microsoft Teams app and join your scheduled meeting, or use a meeting link to join.
2. Once joined, tap the three-dot More at the bottom of your screen.
3. Tap Start recording from the options that appear.
4. A notification to all participants about the recording will be shown.
To stop recording on mobile:
1. Tap the three-dot More options icon again > Stop recording.
2. The recording will process and save after the meeting ends.
Note : Mobile users might not get the 'Record and transcribe' as a combined option. It shows as 'Start recording'. To record and get transcription, switch to a desktop app.
Where Is the Teams Recording Saved?
The recordings are saved onto Microsoft OneDrive or SharePoint not on Microsoft Stream as Stream Classic was retired and replaced in 2021.
All recordings today as per Microsoft’s official storage documentation are saved as standard files in Microsoft 365 cloud storage. Stream now only works as the video playback layer.
| Meeting Type | Where It Saves | Location |
|---|---|---|
| Private / scheduled meeting | Organizer’s OneDrive for Business | OneDrive > My files > Recordings folder. |
| Channel meeting (within a Teams channel) | SharePoint site for that Team | Teams channel > Files tab > Recordings folder. |
| Group call or Meet Now | Organizer’s OneDrive | OneDrive > My files > Recordings. |
| 1:1 call | The recorder’s OneDrive | OneDrive > My files > Recordings. |
Guests and external participants cannot access recordings without the organizer sharing the recording link.
| Recording Expiry — Cannot Find an Old Recording
IT admin can set an automatic expiry policy, due to which you see an expiry countdown on the recording in your meeting chat. How to change or remove expiry date from recording?
|
How to Record a Teams Meeting Automatically
To record all your meetings, without manually clicking Start recording every time, you can set a meeting to record automatically.
Setting Up Auto-Recording – New Teams Calendar
1. Open Microsoft Teams > click Calendar in the left sidebar.
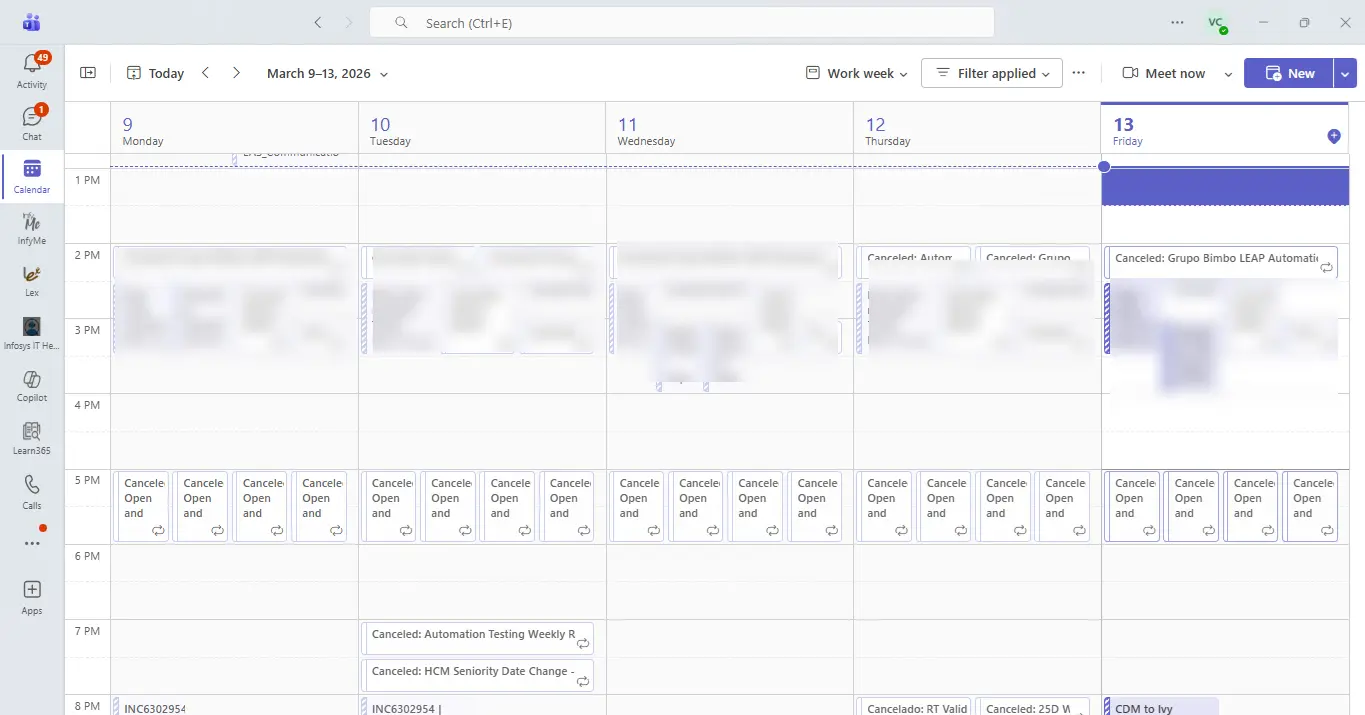
2. Click on your scheduled meeting > Edit > More options > Meeting options.
3. Under the Recording and transcription section, you will find the Record automatically toggle. Enable it > Save the changes.
Setting Up Auto-Recording – Classic Teams Calendar
1. Open the meeting in your Teams Calendar > edit > in the meeting description area, hold Ctrl and click Meeting options > Record automatically toggle it On > Save.
| How Auto-Record Works?
Recording starts even when a single participant joins. The organizer don’t need to be present for auto-recording to start. |
Note : The auto-record option requires a Teams Premium licence or specific admin policy settings. If you are still facing problems, connect with IT admin.
Writer’s Recommendation:
If Teams is crashing during recording or meetings, video is freezing or there is a lag during screen share, it can be due to outdated audio or display drivers. To fix this we suggest using a tool like Advanced Driver Updater that scans PC for outdated or problematic drivers that are a common cause for Teams call quality issues.
Alternative Ways to Record a Teams Meeting
For those who cannot use the built-in Teams recording option here are alternatives that you can use:
1. Browser Extensions
You can use browser extensions like Blue dot on Chrome (and Edge) and others to record your Teams meeting directly in your browser.
1. Install the extension from the Chrome Web Store or Edge Add-ons.
2. Join the Teams meeting in the browser > click the extension icon > select Start recording.
The extension will record your screen and audio.
Note : Browser extensions capture only what is visible on your screen. They do not integrate with Teams.
2. Record with PowerPoint Live
If you are presenting a PowerPoint deck using Teams’ PowerPoint Live feature you can use PowerPoint built-in recording feature.
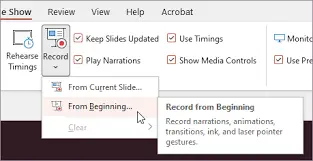
1. Open your presentation in Microsoft PowerPoint on Windows 10 or 11.
2. Click the Slide Show tab > select Record Slide Show > choose Record from Beginning or Record from Current Slide.
3. Record > export the file as a video (File > Export > Create a Video).
This method helps create video versions of presentations that were shared in Teams meetings.
3. Third-Party Screen Recorders (Windows 10 & 11)
Windows 10 and 11 both include Xbox Game Bar that you can open by pressing (Win + G). You can use it to record your screen including Teams meeting windows. Besides this, you can use third-party tools like Advanced Screen Recorder, or OBS Studio.
Windows Xbox Game Bar: Press Win + G to launch the capture panel. Press Win + Alt + R to start recording > stop it and you can find it under Videos > Captures folder.
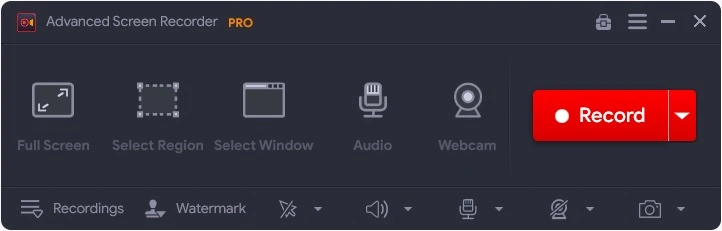
Advanced Screen Recorder: Download and install it from the link given below.

Open the application > go to your Teams and initiate/join a meeting > go to Advanced Screen Recorder and click on Record > choose the audio sources you want to record for direct voice recording > start the recording > end recording by clicking the Red stop button. Go to Recordings tab to find the saved recordings.
OBS Studio: Free, open-source tool. Set up a Screen Capture source pointing to your Teams window and start recording via the Start Recording button.
Note : When you record using a third-party tool remember other meeting participants are NOT automatically notified. Therefore, to avoid any legal or ethical action inform participants before recording them.
Frequently Asked Questions
Final Thoughts
Recording a Teams meeting on Windows 10 or 11 is easy once you know which option to use. The built-in method can be accessed once the call starts. More > Record and transcribe > Start recording.
However, if the record has suddenly disappeared check with your IT admin, check the plan you are using, and also check that Copilot should be enabled.
Note : Teams Free or migrated Skype users using it for free cannot used the built-in recording option. However, they can use third part tools like Advanced Screen Recorder to record screen, take screenshots, record only audio and do other recording tasks.


