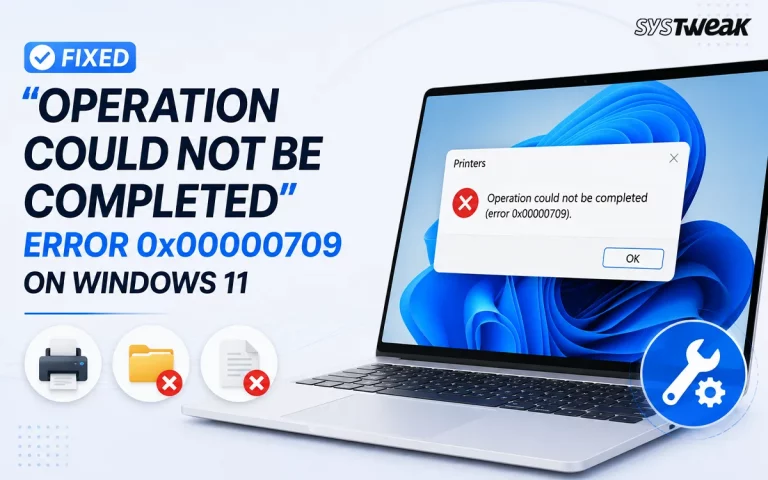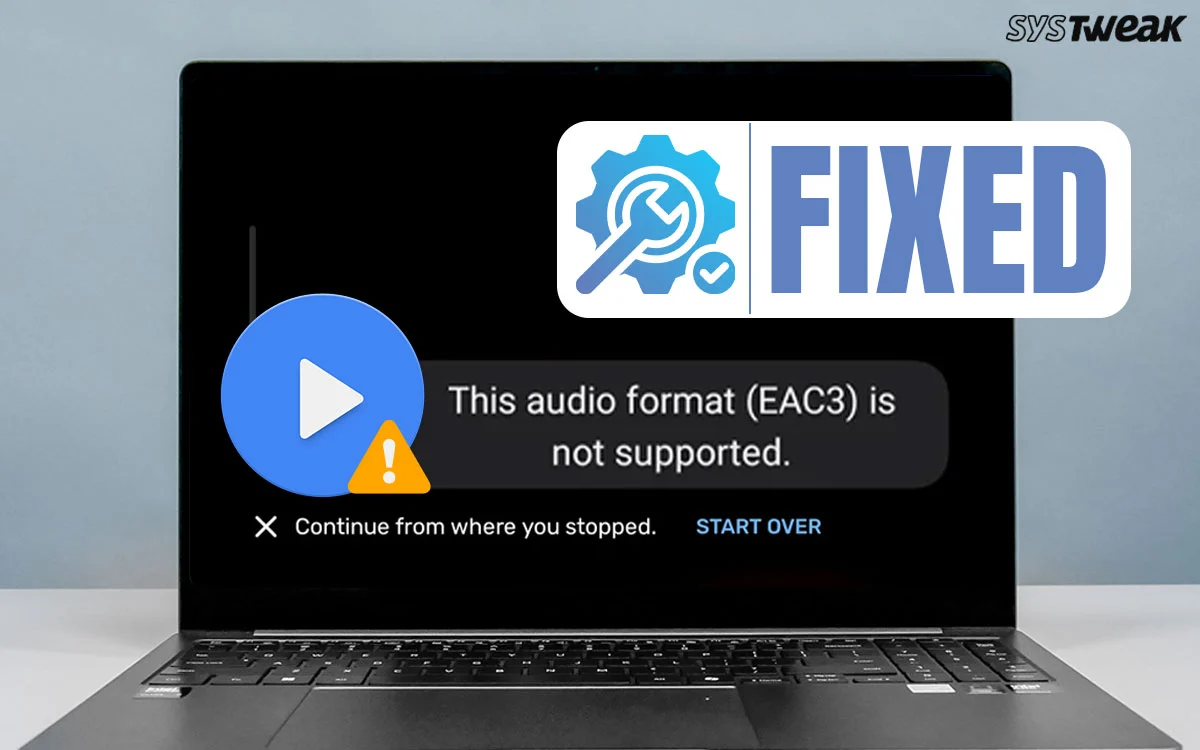
Are you receiving “The audio format EAC3 is not supported” error message when you try to play a video or audio file. In some cases, you will be able to view the video file but will not be able to hear the audio file. This could be because the audio attached is in EAC3 format which is not supported by many audio/video players and displays this error message. We have explained a few methods to fix this issue and ensure you will be able to play EAC3 audio on your PC.
What Is EAC3 Audio File?
It is the latest version of AC3. It provides better audio quality as well as a lower bitrate. This file format supports more channels and is used by most streaming platforms like Netflix, Amazon Prime Video, etc. It is also supported by high-quality video files like Blu-Ray rips and other video formats that include Dolby Digital Plus sound. However, common audio formats such as MP3, WAV, FLAC, and AAC containers do not support EAC3.
Ways to Fix The Audio Format EAC3 is Not Supported
Method 1: Use VLC Player
The VLC player is one of the most popular players that can play most audio files and formats. You can install and open the EAC3 file in the player. If it does not open, then you can use the VLC player to save the EAC3 audio file into another format. Here are the steps.
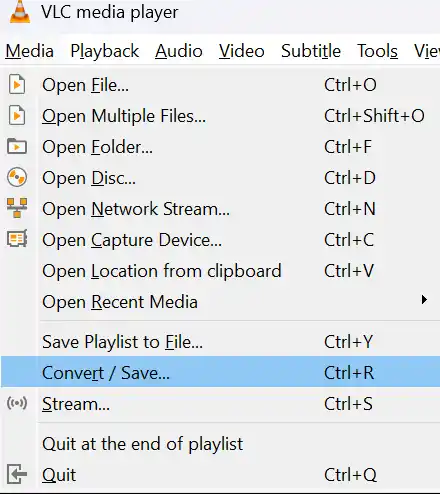
1. Launch the VLC player and click on the Media tab on the top-left corner.
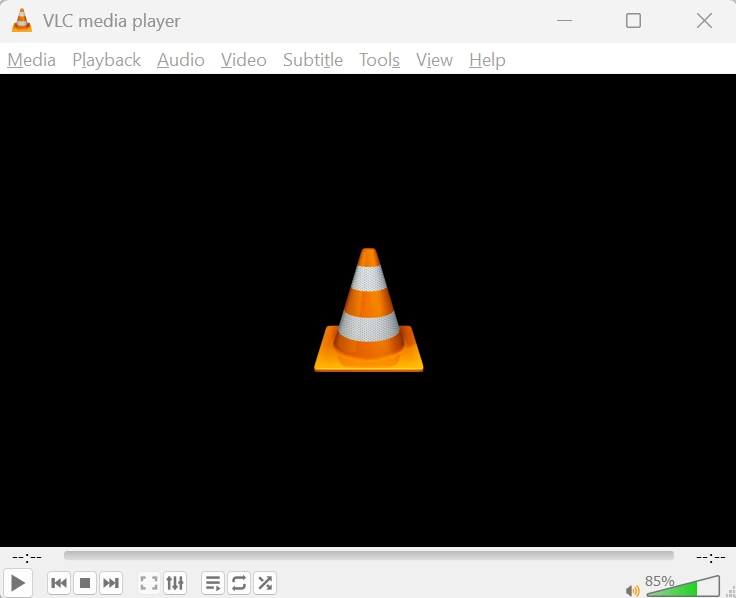
2. Click on Convert/Save from the dropdown.
3. In the new box, click on Add under File Selection.
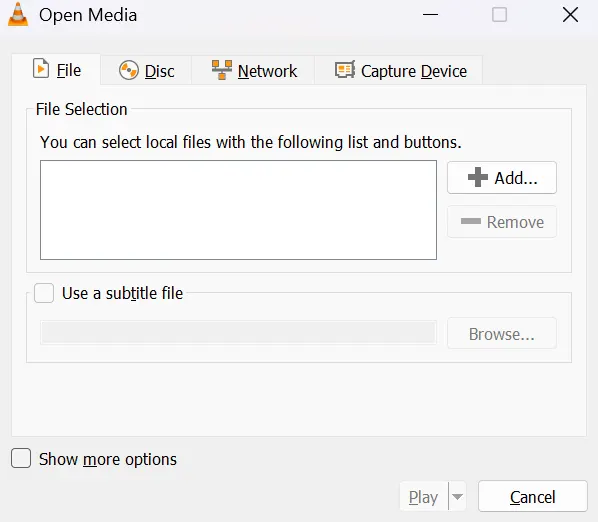
4. Choose the EAC3 file you want to convert.
5. Click on the Convert/Save button.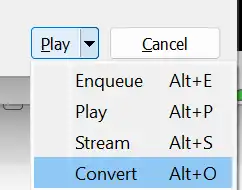
6. A new box will open again where you have to choose the Profile by clicking on the dropdown next to it.
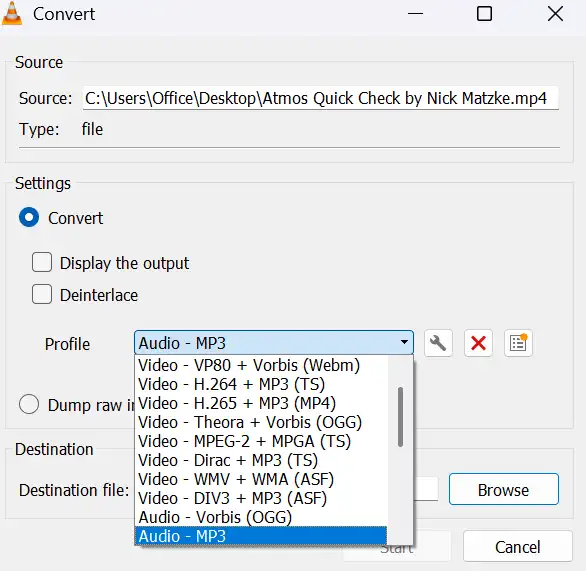
7. Click on the Browse button in the Destination section and specify the new file name and the location where you wish to save the converted file.
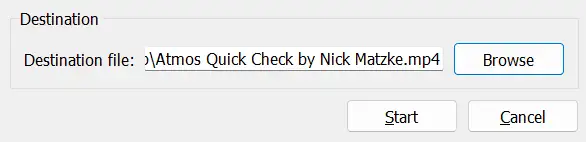
8. Click on the Save button.
9. Next, click on the Start button.
10. The file will be converted and saved in your specified location.
Note : There are other tools that can help convert audio files. If you want an alternative to VLC, then use any of the following tools.
- HandBrake (PC)
- FFmpeg (PC)
- Video Converter Android App
Method 2: Install Codecs To Your Player
If you do not want to use VLC and are using another player like MX player, then playing an EAC3 file might give you the “This audio format EAC3 is not supported by MX Player” error message. In this case, you need to add codecs to your MX player. Here are the steps.
1. Launch MX Player and click on Settings.
2. Locate the Decoder section and scroll down until you see Custom Codec.

3. Look for the EAC3 codec, which will help fix the “This audio format EAC3 is not supported by MX Player” error.
4. Click on Download and let the process complete.
5. Restart the player and your issue should have been resolved.
Read Also : How To Fix Error Code 100013 – “Sorry, The Video Player Failed To Load”
Method 3: Convert EAC3 To Another Supported Format
One of the easiest ways to fix the issue is to convert your EAC3 audio file into other common audio formats such as MP3 format. You can search for free Audio converters online and get your file converted.
Method 4: Use Another Player
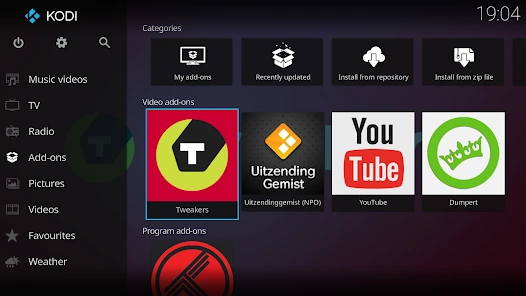
If the above methods do not work then you can install any other audio player like GOM Player or transfer the file to your Android smartphone and use the Kodi player.
Bonus Tip: How To Recover EAC3 Audio Files
We have received many requests from our users, stating that they have deleted all the EAC3 files as they did not work in their PC. But after following the methods listed above, we are sure that you will be now able to play the EAC3 files. If you have deleted any audio files, then there might be a chance to recover them back using a data recovery software like Advanced File Recovery. Here are the steps to use this application.
1. Download and Install Advanced File Recovery using the Download button provided below.

2. Open the app and select the drive where the deleted audio files were stored.

3. Click on the Scan Audio and Scan Video options and click on the Start Scan button.

4. Once the scan completes, a list of audio and video files that can be recovered will be presented on your monitor.
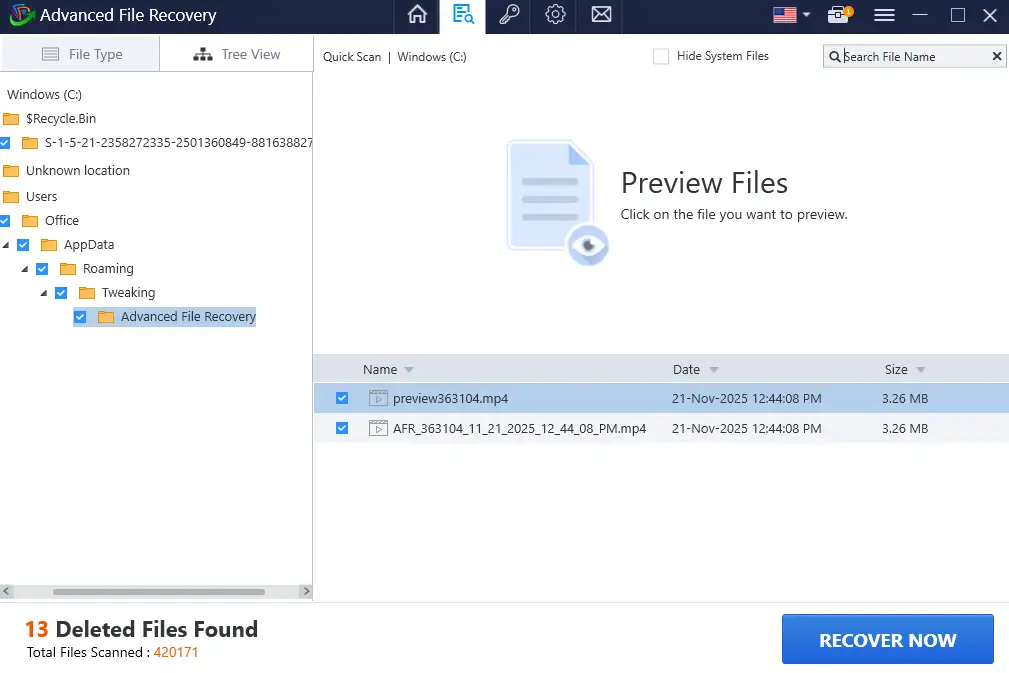
5. Choose the EAC3 files you wish to retrieve and hit the Recover Now button.
Note : Always choose a different driver to store the received files so that they do not overwrite the deleted audio files.
Conclusion:
This guide has listed the best ways to solve “The audio format EAC3 is not supported” issue by using the VLC or MX player. You can also use an alternative player like GOM player or Kodi player for Android. But if you want to use the MX player then we have explained the steps to add codecs to your MX player.
Recommended : Ways to Fix YouTube Audio and Video Out Of Sync on Windows Easily!