
The error “The application was unable to start correctly” is usually followed by an error code 0xc00007b, which reflects a missing DLL file that supports the running of the respective application. It appears when there are compatibility issues or configurational errors with your application.
If you are facing a similar problem, this post is for you. We have curated a list of working fixes that will allow you to solve the error. So, let’s get started!
What Causes Error 0xc000007b
This error on Windows 10 can be caused due to various reasons. Here we list the most common causes:
- A mix of 32-bit and 64-bit applications and Windows versions.
- Corrupt or missing files and programs.
- Running outdated Windows.
- Missing DLL files.
- Incompatible Drivers
Whatever the reason, here we explain different ways that will help fix this error.
10 Ways to Fix The Application Was Unable to Start Correctly Error
After looking at the list of issues, if you can identify what triggered the error on your PC, that would be great. If not, there’s no need to worry. Check out the following fixes and try them on your own.
Note : We recommend that you reboot your PC before you try any of the troubleshooting steps mentioned below. If it is a temporary glitch, then it can be solved by a simple restart.
Fix 1 – Check for Windows Updates
The first thing you should do is ensure that there are no missing updates to be installed on your PC. There are updates and software definitions that decide which applications can be supported on a system. If by chance you have not installed the latest updates, do that on priority.
Step 1 – Press Windows + I to open System Settings.
Step 2 – Find the Windows Update option in the left panel.

Step 3 – Click on Check for Updates to fetch new updates in the opened options.

Step 4 – If an update appears, download it and install it immediately.
Step 5 – Restart the computer and try running the application that showed the error before.
It is important to understand that updates play a crucial role in the functioning of the operating system. Hence even if it is a security update, ensure it is installed.
Fix 2 – Install the Direct X Component for Missing DLL Files
If you are wondering why the application cannot launch on your PC, chances are that the problem is with a DLL file on your PC. These registry files allow proper communication between applications and the operating system. DirectX is a collection of Application Programming Interfaces that hold all the necessary .dll files that allow an application to run smoothly.
Here’s how to install the Direct X component –
Step 1 – Download the Direct X installer from the official Microsoft website.
Step 2 – Run the downloaded installer and follow the instructions to install.

Step 3 – Once the installation is complete, restart your computer.
Note : All DirectX updates will be done through Windows Update only as explained in the above method.
After the computer restarts, try running the software that showed the error ”the application could not start correctly”. It should work now.
Fix 3 – Change the Compatibility Mode of Application
If you are facing issues with launching an application on your OS, change its compatibility mode to another OS where it works. Here’s how you do it –
Step 1 – Select the launch file for the application you want to run.
Step 2 – Right-click on it and go to its properties.

Step 3 – You may find the Compatibility tab in the opened properties.

Step 4 – Click on the Run this application in compatibility mode for option and use the available dropdown to select the OS of your choice. 
Step 5 – If you have recently upgraded your OS and the application was working fine on the last version, select that from the list and save the changes.
Launch the application to check if the error the application was unable to start correctly persists. Keep changing the compatible OS until the issue is resolved.
Fix 4 – Update PC Drivers
Sometimes the issue also revolves around whether or not the drivers being used on the PC are compatible. There have been instances where users got the fix after upgrading the drivers. Now the question here is which driver to upgrade? Knowing that the Windows Driver Update utility is triggered manually for a particular driver, one can not identify which driver is causing the issue.
To resolve the problem, the best way is to use Advanced Driver Updater. Why? Because it can update all the outdated drivers at once. All you have to do is –
Step 1 – Download the application from the link below to install Advanced Driver Updater.

Step 2 – Click on Start Scan Now to initiate a scan that will find outdated, corrupted, and incompatible drivers.

Step 3 – Once the scan is over, you can see a list of all the driver anomalies on your screen.

Step 4 – Click on the Update button next to the driver you wish to update, and the app will automatically download and install the right driver on your PC,
Step 5 – After the app completes all the driver updates, you must restart the PC for changes to take effect.
Fix 5 – Use SFC & DISM Commands for System Files
If none of the above things worked, the issue lies within the system files. Thankfully, Windows provides an internal mechanism to resolve such issues. These SFC and DISM commands can be run using the command prompt.
Step 1 – Go to the start menu and search for Command Prompt

Step 2 – In the search results, click on Run as administrator to gain admin privileges.
Step 3 – Use the following command to initiate the SFC scan on your computer.
SFC/Scannow
Step 4 – Once the scan is over, move on to the following commands and use them one after the other (press enter after each command).
dism /online /cleanup-image /checkhealth

dism /online /cleanup-image /scanhealth
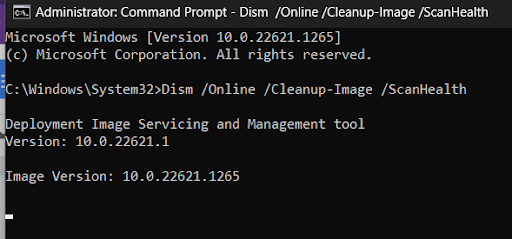
dism /online /cleanup-image /restorehealth

Step 5 – After running all the commands successfully, close the command prompt window and restart your PC.
Restarting your PC should resolve the error after running the commands properly.
Read Also : Fix DISM /Online /Cleanup-image /Restorehealth Is Stuck
Fix 6 – Reinstall the Application
If you keep facing issues with running the application even after running all the above hacks, the issue lies in the installed copy of the app. Look online for the latest application version that is bothering your experience and reinstall it immediately. You can easily uninstall the current version by following the given steps –
Step 1 – Press Win+R to open the Run search.
Step 2 – Use the command Appwiz. cpl and hit enter to open existing programs.
Step 3 – Easily find the application that is causing the issue.
Step 4 – Select it and uninstall the application by double-clicking.
Step 5 – Once the app is uninstalled, use the latest version installer that you have already downloaded to reinstall the application.
Once this reinstallation works, check and find if the error the application was unable to start correctly is fixed or appears again.
Fix 7 – Reinstall the .NET Framework on your PC.
Microsoft has developed a software framework called .NET Framework that helps apps developed using the .NET technologies. If you are receiving errors while launching apps, then you can try to reinstall .NET Framework.
Step 1 – Press the Windows key and type “Control Panel”.
Step 2 – Click on the search result with the same name.
Step 3 – A new box will open, where you have to click on Programs and Features.
Step 4 – In the new window, click on Turn Windows features on or off in the left panel.

Step 5 – The Windows Features box will open. Locate .NET Framework 3.5(include .NET 2.0 and 3.0) and check the box before it.

Step 6 – Click on the OK button.
Fix 8 – Run The CHKDSK Command
Some experts have stated that if there are memory or RAM issues on your PC, then some apps might not start. In this case, you have to run the CHKDSK command to check and fix the issues. Here are the steps-
Step 1 – Press Win + R to launch the RUN box.
Step 2 – Type “cmd” and then press Ctrl + Shift + Enter to open the Command Prompt in admin mode.
Step 3 – Now copy and paste the following command, followed by the Enter key.
chkdsk c: /f /r
Step 4- Press Y when prompted and reboot your PC.
Fix 9 – Reinstall Faulty Microsoft Visual C++ Redistributable Packages
One of the advanced troubleshooting steps that can be undertaken to fix this issue is to reinstall Microsoft Visual C++ Redistributable Packages. These packages are developed by Microsoft and are required by most apps to run. If the installation gets corrupted, then you might face error 0xc000007b on your PC.
Step 1 – Press Win + R to open the RUN dialog box and type Control.
Step 2 – Press the OK button to launch the Control Panel.
Step 3 – Now, click on Programs and Features, and a list of apps installed on your PC will appear on the screen.
Step 4 – Locate Microsoft Visual C++ Redistributable Packages installed and right-click on each one to choose Uninstall.

Step 5 – After all the packages have been removed, navigate to the Microsoft official page to download the packages again.
Note – It is important to reinstall all Visual C++ Redistributables (2010–2022). Please check if your PC uses a 32-bit architecture, then use the x86 version. If your PC is 64-bit, then you must install the x64 version. To identify your architecture, Press the Windows key and type “System Information”. Click on the result with the same name and look for System Type in the new box.
Fix 10 – Modify The Registry Value
The final method to fix this issue is to modify the value of the LoadAppinitdlls key. Here is what you need to do.
Step 1 – Press Win + R to open the RUN dialog box and type “Regedit”.
Step 2 – Press the Enter key to open the Registry Editor. If you get a UAC prompt box, then press Yes on the box.
Step 3 – Copy and paste the following path into the address bar on the top of the Registry Editor window.
HKEY_LOCAL_MACHINE\SOFTWARE\Microsoft\Windows NT\CurrentVersion\Windows
Step 4 – In the right panel, locate LoadApplnit_DLLs key and double click on it.
Step 5 – In the new small box, change the value data to “0”.
Step 6 – Close all the windows and reboot your computer.
Fixing Things Up!
The error application was unable to start correctly, is usually caused by these issues. Other than these fixes, ensure you are using a compatible application version. For instance, if your operating system supports 64-bit architecture, ensure the app is also made for 64-bit. Also if you are still using a 32-bit PC, we recommend you switch to a 64-bit architecture as it is more compatible with the current set of applications in the market.
That brings us to the end of this post. Make sure you try these fixes out and let us know which works best for you.
Hope you can resolve the error. Thanks for reading. Good luck!
FAQs
Q.1 What does the “application was unable to start correctly” error mean?
When you get the “application was unable to start correctly” error while trying to launch an app, it means that the files required to launch this app are either missing or corrupted. To fix this, you need to reinstall the app or system files like .NET Framework or Visual C++ Redistributable Packages.
Q.2 What does status code 0xc000007b mean?
Status code 0xc000007b typically signals an application or system error caused by incorrect system file configurations. It indicates that the application failed to start because the system couldn’t load essential files or components, commonly due to missing or corrupted system libraries, such as DLL files.
Q.3 How can you fix the 0xc00007b error in games?
To resolve the 0xc00007b error when launching games, start by reinstalling key components like the Microsoft Visual C++ Redistributables and the .NET Framework, as these are often essential for games to run properly. You should also try running the game as an administrator. Additionally, updating your graphics drivers or verifying the game files through your game launcher can help fix the problem.
Q.4 Why does Windows fail to start correctly with error 0xc000007b?
The 0xc000007b error usually arises from missing or corrupted files, issues with the .NET Framework, or problems related to Microsoft Visual C++ Redistributables. Incompatibility between the applications or even damaged disk sectors can be responsible for this error.
Recommended :
How to Fix Error Code 0xc0000225 (For Any Hardware) in Windows 10
Fix “0x80070643” Windows Update or Installation Errors


