Windows Resource Protection (WRP) safeguards critical Windows files, folders, and registry keys. It prevents apps, malware, or users from changing essential system components. WRP relies on a service called Windows Modules Installer (TrustedInstaller) to repair those files.
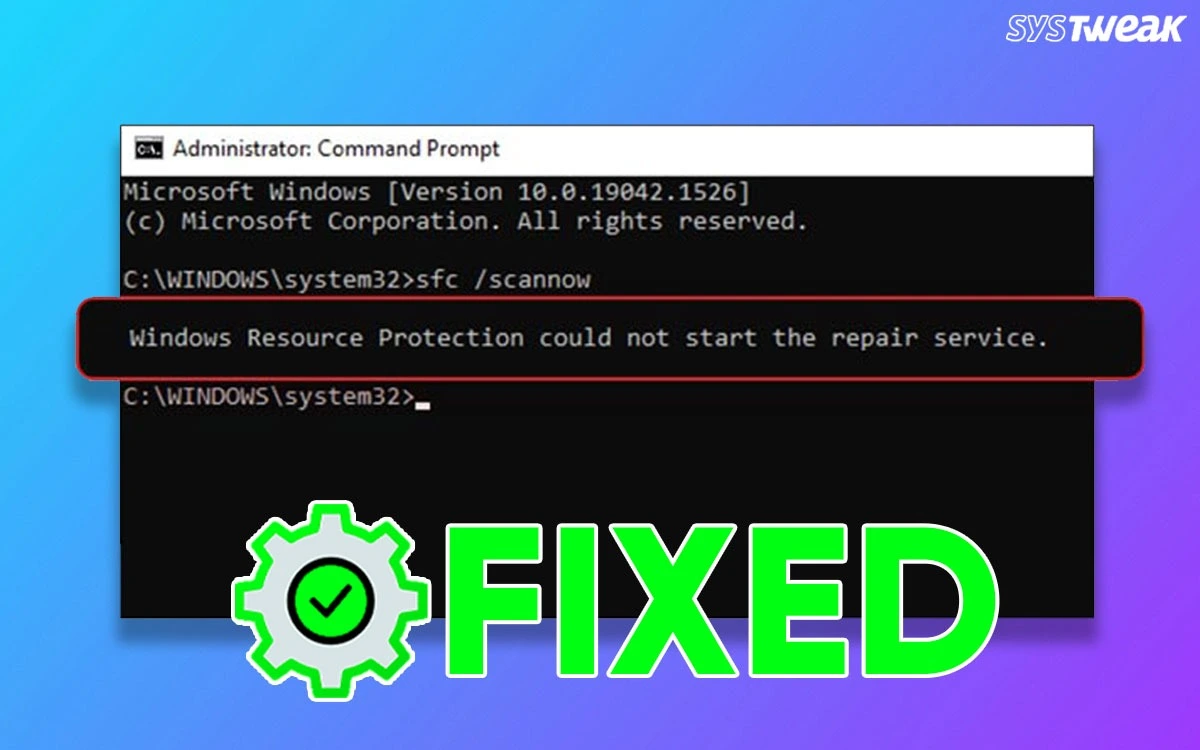
However, some Windows users have complained about receiving the “SFC Windows Resource Protection Could Not Start The Repair Service.” This error means that the SFC tool wanted to repair system files, but the TrustedInstaller service was not running or was blocked. We have listed a few effective methods that have been tried and tested by our team of experts to resolve this issue.
Why Does The “Resource Protection Could Not Start The Repair Service” Error Occur?
There could be many reasons as to why users face this issue, but the most common ones are listed below.
- Windows Modules Installer service disabled
- Corrupt system files.
- Malware or incomplete Windows updates
- System optimization tools have disabled important services
Resolve The Windows Resource Protection Could Not Start The Repair Service Error
Fix 1: Start The Windows Modules Installer Service
This is the most important method that should be followed first to fix this issue. Here is what you need to do.
1. Press Win + R, type services.msc, press Enter.

2. Find Windows Modules Installer.
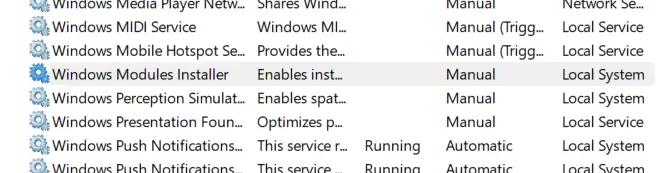
3. Double-click it.
4. Set Startup type → Manual
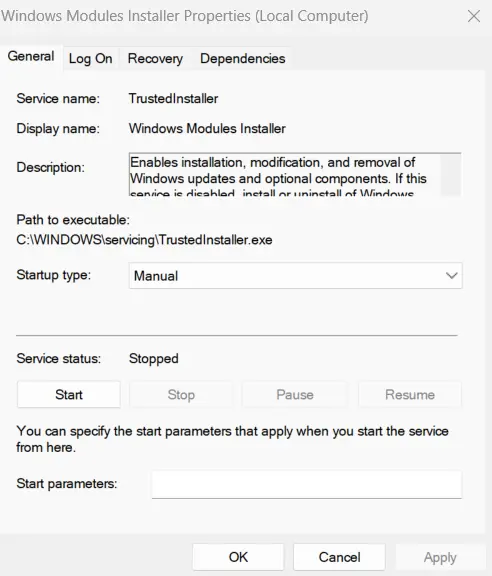
5. Click Start
6. Click Apply → OK
7. Now, retry running the System File Checker app using Command Prompt by typing this command.
sfc /scannow
Read Also: Stop Code Kernel Mode Heap Corruption Error in Windows 11/10
Fix 2: Start TrustedInstaller Via Command Prompt
If Services does not work, then try using these commands.
1. Open Command Prompt as Administrator.
2. Then copy and paste the following commands, one by one, followed by the Enter key.
sc config trustedinstaller start= demand
net start trustedinstaller
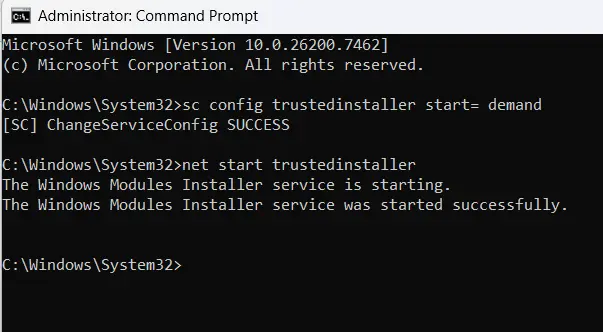
4. Once it says service started successfully, then execute the SFC command.
sfc /scannow
Fix 3: Run SFC in Safe Mode
Some experts have suggested that third-party apps may cause conflicts and prevent other apps from running. In this case, we will try running the SFC tool in safe mode. Here are the steps.
1. Press Win + R → type msconfig
2. Go to the Boot tab
3. Check Safe boot → Minimal
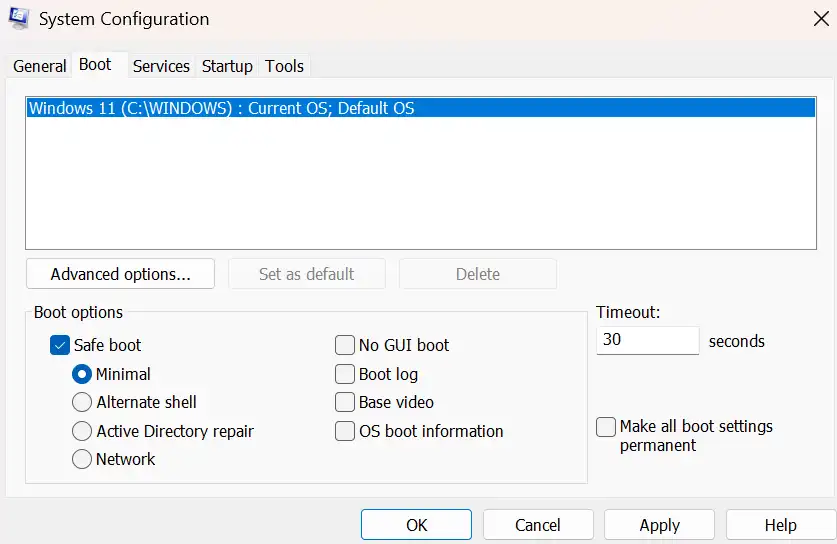
4. Restart your PC
5. Open Command Prompt (Admin) and run this command.
sfc /scannow
After finishing, return to msconfig and uncheck the Safe Boot option.
Read Also: Solved – Blue Screen Clock_Watchdog_Timeout Error
Fix 4: Repair Windows Image Using DISM
If the above methods do not work, then we will take help from the Deployment Image Servicing and Management utility, which is an inbuilt tool for system image recovery.
1. Open Command Prompt in Admin mode.
2. Run these commands one by one, followed by the Enter key.
DISM /Online /Cleanup-Image /CheckHealth
DISM /Online /Cleanup-Image /ScanHealth
DISM /Online /Cleanup-Image /RestoreHealth
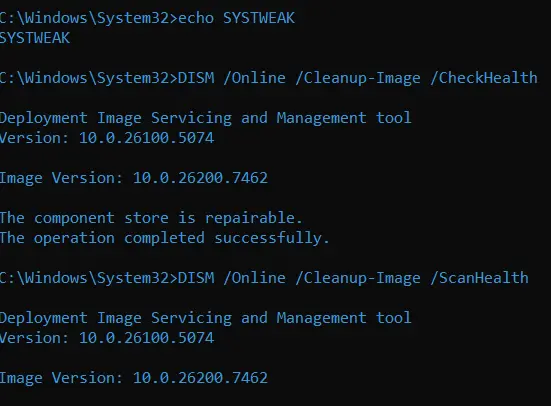
3. After all the commands have been successfully executed, run the SFC command.
sfc /scannow
Fix 5: Check Service Dependencies
The TrustedInstaller service depends on other services. We must also ensure these are running properly.
1. Press Win + R, type services.msc, and press the OK button to open the Windows Services box.
2. Locate the services mentioned below and double-click on each of them to open the properties box.
Remote Procedure Call (RPC)
DCOM Server Process Launcher
RPC Endpoint Mapper
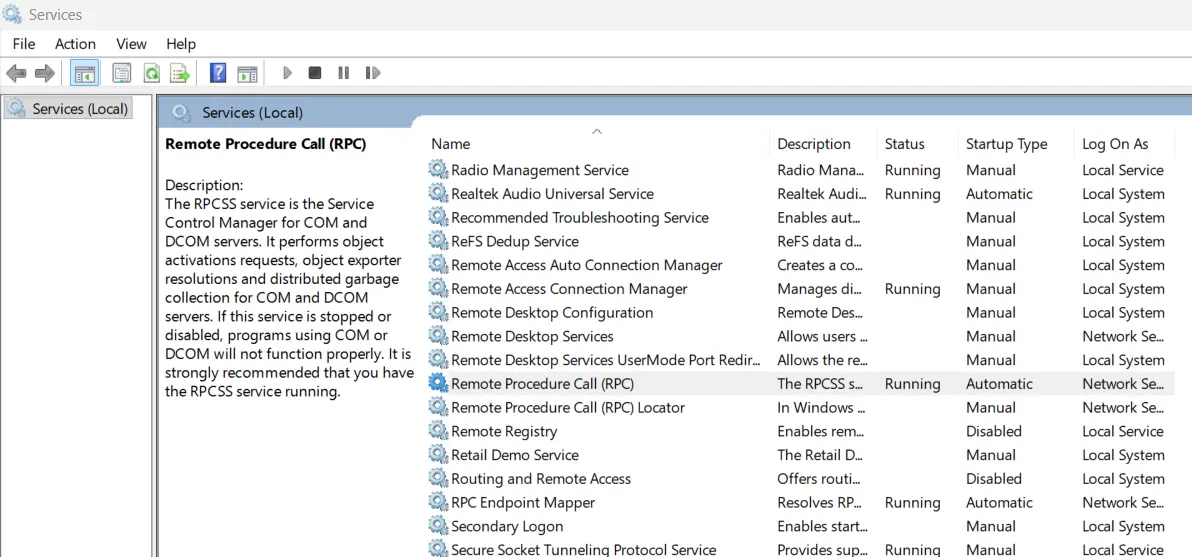
3. Click on the Start button to ensure all these services are running.
Note : They should be running and set to Automatic or Manual.
Fix 6: Update Windows
1. Press Win + X to open the Windows Power Menu and choose Settings.
2. Click on the Windows Update Tab in the left panel.
3. Next, click on the “Check For Updates” button on the right side.

4. Windows will automatically check for updates, download, and install them on your PC.
5. Next, click on Advanced Options.
6. On the new page, click on Optional Updates under Advanced Options.

7. Finally, click Driver Updates and check the box before the drivers you wish to update.
8. Click on the Download & Install button and wait for the update process to complete.
9. Reboot the PC.
Read Also: How to Fix Windows Update Error Code 0x80073712?
Fix 7: Registry fix (advanced – only if nothing works)
Note : Do this only if you’re comfortable editing the registry.
1. Press Win + R → type regedit

2. Copy and paste the following path in the address bar of the Registry Editor.
HKEY_LOCAL_MACHINE\SYSTEM\CurrentControlSet\Services\TrustedInstaller
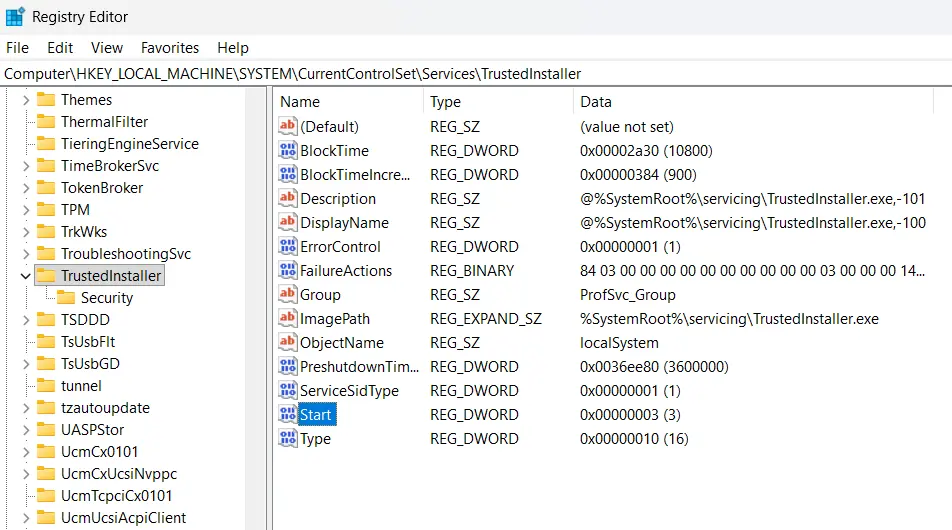
3. In the left panel, double-click on the Start key to open a small box.
4. Type “3” under Value Data.
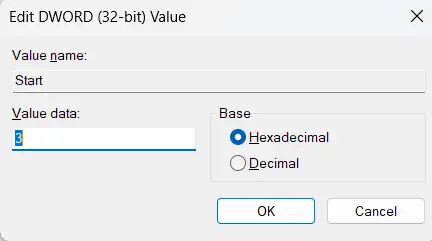
5. Restart and try again.
Bonus: Use Advanced File Recovery to Recover Lost Files
If the error persists and you have to format your PC, then you can recover any lost files using Advanced File Recovery software. This is an amazing program that can recover deleted files from the deepest and hidden sectors of your hard disk. Here are the steps to use this app.
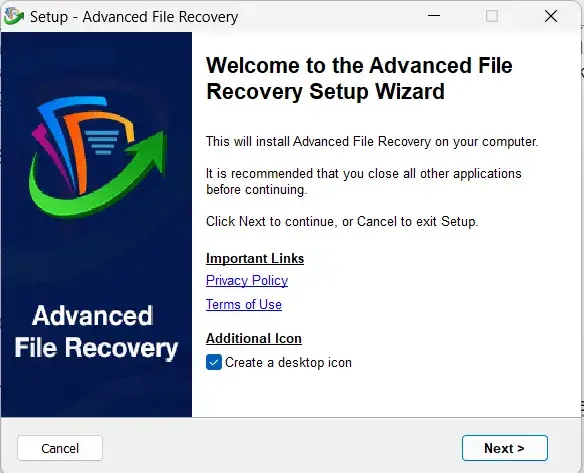
1. Download Advanced File Recovery using the Download button provided below.

2. Double-click on the downloaded file and follow the onscreen instructions to install the file.
3. Launch the app and choose the drive you wish to scan.

4. Choose the type of files you wish to recover or select “Scan All Data”.

5. Click on the Start Scan button.
6. After the scan is completed, a list of files that can be recovered will be available on the screen, within the app’s interface.
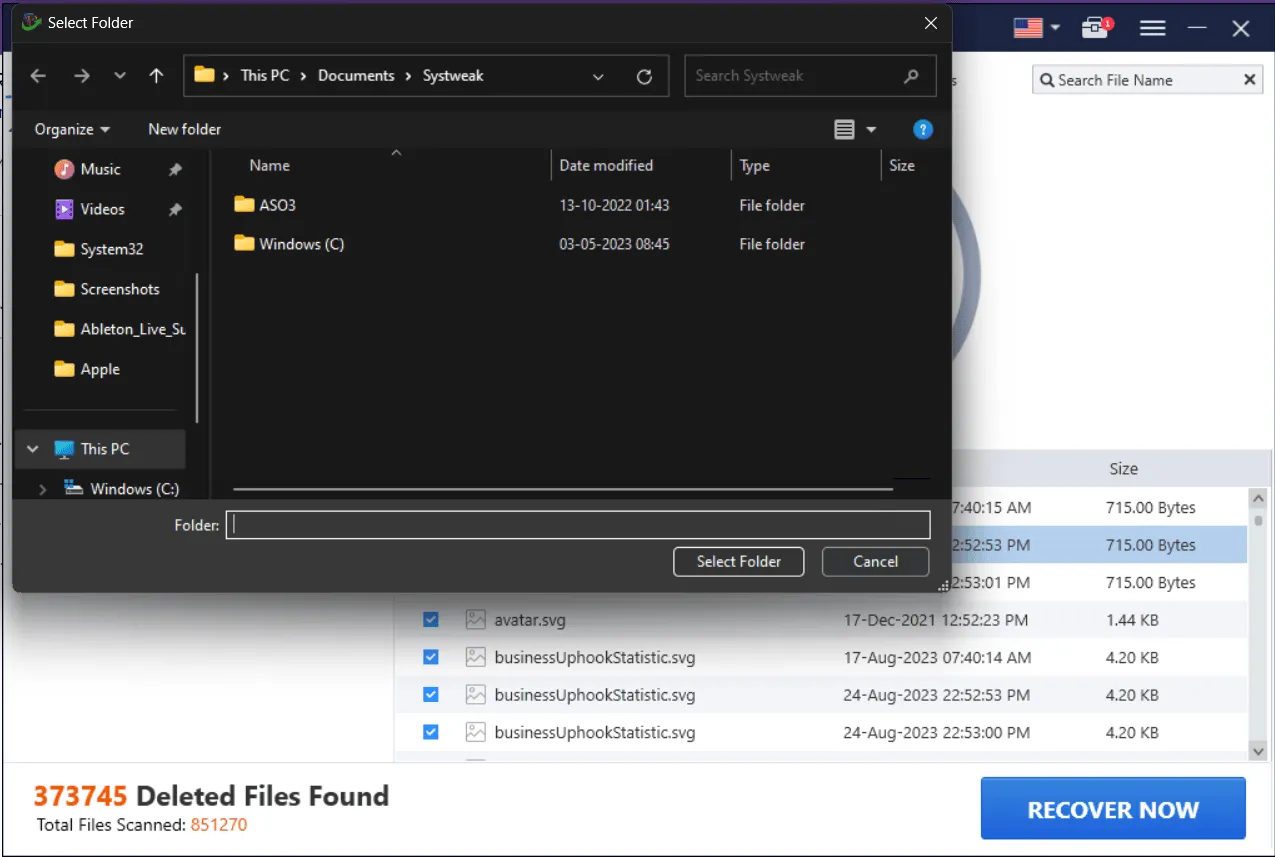
7. Select the files you wish to recover and click on the Recover Now button.
8. Select another drive to recover the deleted files so that the recovered files are not overwritten on the lost files that are being recovered.
9. Wait for the recovery process to complete.
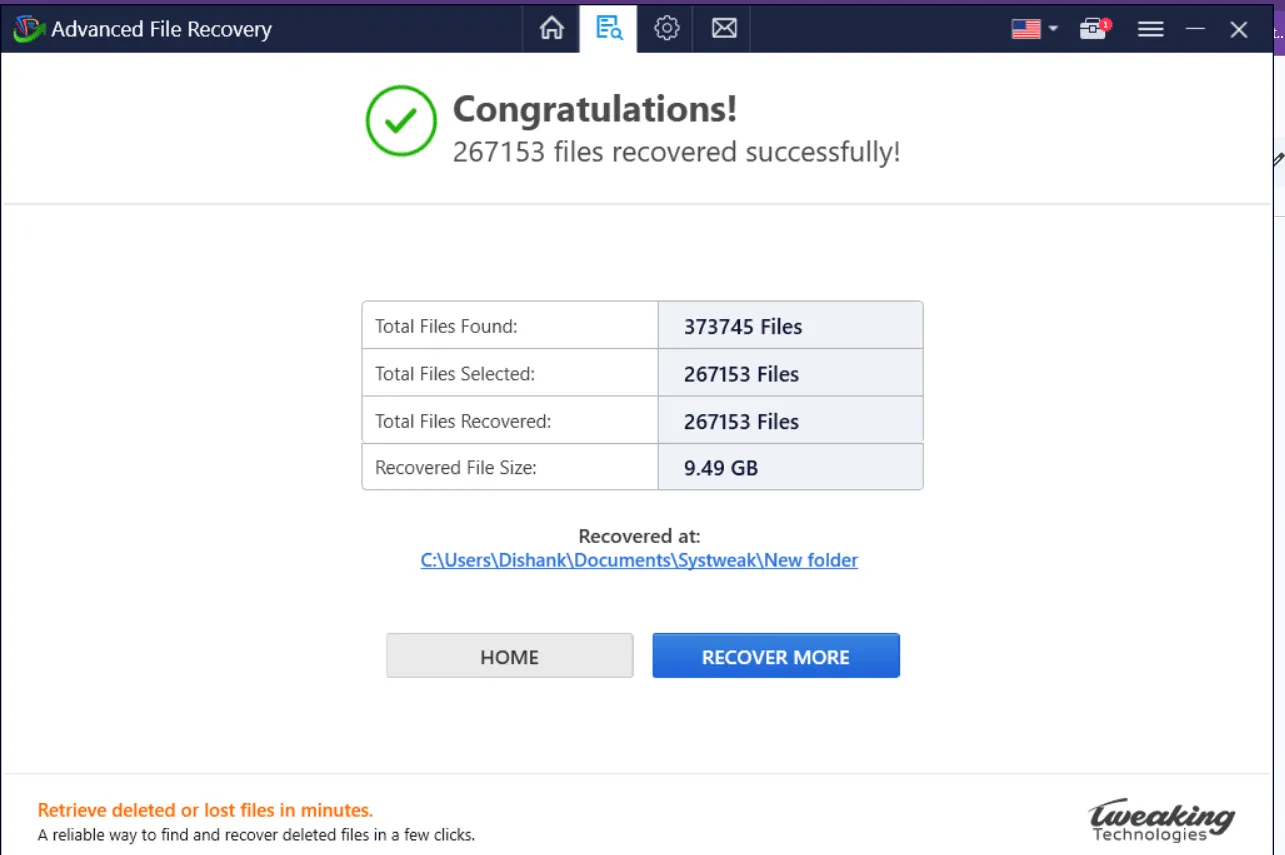
10. A summary will be presented on your screen. You can either recover more files or exit the app.
Conclusion:
The above mentioned steps will help you fix the issue. If you have lost any files during this error, you can use the Advanced File Recovery program to fix this issue in no time. We would love to hear about your experience in our comments section below.
Recommended : Best File Recovery Software For Windows PC (Paid & Free)