Computer freeze/hang or abrupt restart are major issues faced by Windows users across the globe. But some users face this issue only after PC wakes from sleep. There have been reports that when the Windows PC awakes from sleep, it freezes or hangs making the PC unusable. The only quick solution is to reboot the PC. However, this cannot continue and we have list with the best troubleshooting steps to fix this issue forever.
Resolve Computer Freezes After Waking Up From Sleep
We have listed a few tried and tested methods that will help fix PC freezing or hanging issues.
Fix 1 : Disable Fast Startup
The Fast Startup helps you restart you computer quickly but it can also lead to freeze issues. Hence we recommend that you disable it.
Step 1. Launch RUN box (Win + R) and type Control.
Step 2. Click on OK.
Step 3. In the Control Panel box, click on Power Options.
Step 4. Click on Choose what the power buttons do in the left panel. Step 5. Click on Change Settings That Are Currently Available.
Step 6. Remove the check mark before Turn On Fast Startup.
 Step 7. Click on Save Changes button and exit all the windows.
Step 8. Reboot the PC.
Fix 2 : Modify Your Power Plan
Some experts recommend modifying the current power plan and creating a new one to fix this issue.
Step 1. Open Control Panel by typing it in the Windows Search (Win + S) box and clicking on the result with the same name.
Step 2. Click on Hardware and Sound followed by Power Options.

Step 3. Click on Create a power plan in the left panel.
Step 4. Type a new name for a new Power Plan and click on the Next button. Step 5. Select the settings using the option provided and click on the Create button.
Fix 3 : Update Windows
Windows updates contain security updates, bug fixes, patches and new features. It is possible that this could be a common bug and has been resolved by Microsoft. Hence you should always keep your PC updated.
Step 1. Press Win + I to open Windows Settings.
Step 2. Click on the Windows Update tab in the left panel.

Step 3. Click on the Check For Updates button.
Step 4. Click on Advanced Options and then Optional Updates.

Step 5. Check the boxes beside the updates and click on Download & Install.
Step 6. After all updates are complete, restart the computer.
Fix 4 : Run DISM Scan
The DISM tool helps to fix corrupted system images.
Step 1. Press Win + R to open the RUN dialog box.
Step 2. Type “CMD” and press Ctrl + Shift + Enter to open the command prompt in elevated mode.
Step 3. Copy and Paste the following command followed by the Enter key.
dism /online /cleanup-image /restorehealth

Step 4. After the process is complete, restart your computer.
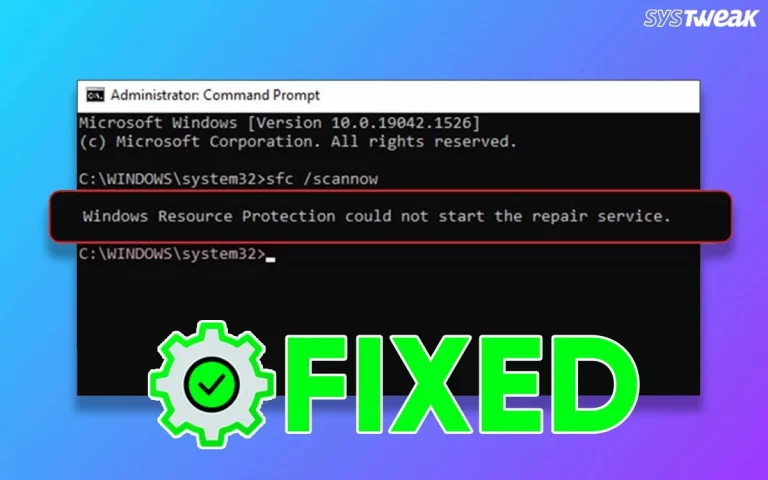
Fix : 5 Run SFC Scan
Step 1. Press Win + R to open the RUN box and type “cmd.”
Step 2. Press Ctrl + Shift + Enter to open the Command Prompt in admin mode.
Step 3. Type the following command and press the Enter key.
sfc /scannow
Step 4. Wait for the scanning process to complete. It will automatically replace any corrupted system files.
Step 5. Reboot your PC and check if the issue has been resolved.
Fix 6 : Update BIOS
Step 1. Visit the official website of your PC manufacturer and navigate to the downloads section.
Step 2. Enter the make and model of your PC to get resources related to your machine.
Step 3. Look for BIOS updates and click on the download button next to it.
Step 4. After the drivers have been downloaded, double click on the file and follow the onscreen instructions to install the driver.
Step 5. Reboot the PC after drivers have been installed.
Fix 7 : Update Drivers
Drivers are a key component of the Operating System. They help communicate between the hardware and software on your PC. Hence it is important to update the drivers regularly to avoid PC issues like freezing, working slow or displaying errors. There are three ways to update the drivers –
Update via Device Manager
The Device Manager is a built in tool that helps users identify the driver issues on your PC. It can also update drivers and fix issues to a certain extent.
Step 1. Press Win + X to open Power menu and choose Device Manager.
Step 2. Look for drivers with yellow exclamation mark and right click on them to view the context menu.
Step 3. Click on Update Drivers and follow the steps to update the drivers.
Update via OEM website
After trying to update via Device Manager, you now know which drivers are outdated or corrupted. You can download those drivers from the official website of the PC manufacturer. Visit the OEM website and download drivers related to the make and model of the computer.
Update via Advanced Driver Updater
The final option to update drivers is via Advanced Driver Updater. This third-party driver updates software scan and identifies all the driver anomalies on your system. It then downloads and installs the latest and most compatible drivers for your system.
Step 1. Download Advanced Driver Updater using the Download button provided.

Step 2. Double click on the downloaded file and adhere the instructions on screen to complete the installation process.

Step 3. Launch the app and click on the Start Scan Now button.
Step 4. Wait for the process to complete.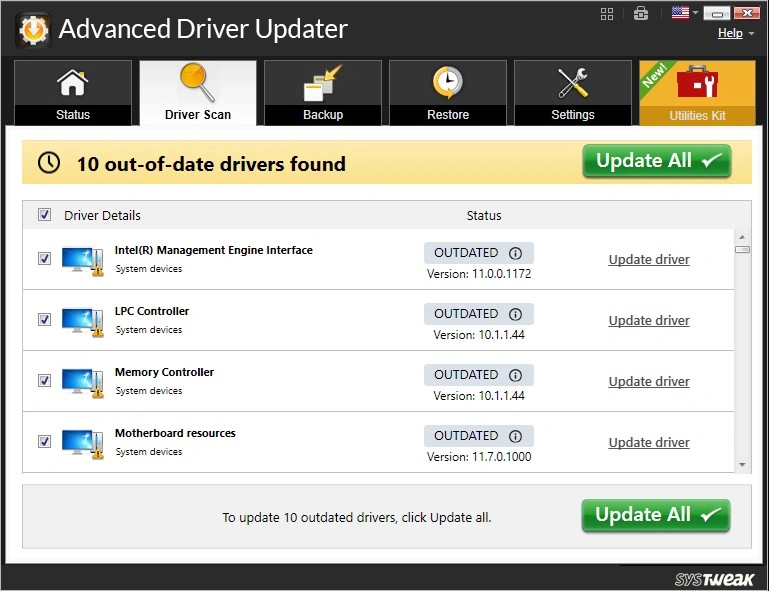
Step 5. A list of driver anomalies will be presented on your screen. Click on the Update link next to each driver to update them.
Step 6. Reboot your PC after all updates have been completed.
Bonus Tip – Use Display Driver Uninstaller To Completely Uninstall Graphics DriversSome experts have suggested using Display Driver Uninstaller to uninstall the graphics driver and then reinstalling it. Step 1. Download Display Driver Uninstaller from the official website. Step 5. Click on Clean and Restart.
Step6. After the driver has been uninstalled, you can visit the official website for your graphics card and download the graphic driver. |


Fix 8 : Disable Hibernate Feature
Experts have suggested disabling the Hibernate feature. Here is what you need to do.
Step 1. Press the Windows button and type cmd.
Step 2. Click on Run as administrator under Command Prompt.
Step 3. Copy and paste the following command and press the Enter key.
powercfg.exe /hibernate off
Step 4. If you get the UAC prompt then click on the Yes button.
Read Also : Laptop Stuck On Hibernating – Here’s How To Fix It
Fix 9 : Clean Boot
This method helps identify if the error is caused due to a conflicting third-party application. By disabling all the third-party services, we can achieve a clean boot and check if the PC freezes or hangs after waking from sleep.
Step 1. Press Win + R to launch the Run dialog box, type “msconfig,” and click OK.
Step 2. Navigate to the “Services” tab in the new box.

Step 3. Check the box that says “Hide all Microsoft services”.
Step 4. Click the “Disable all” button.
Step 5. Click on the “Startup” tab.
Step 6. Click on “Open Task Manager,” and a new window will open.

Step 7. Disable all startup items by right-clicking on each item and selecting “Disable”.
Step 8. Close the Task Manager and return to the System Configuration window.
Step 9. Click “OK” and then reboot your PC.
Fix 10 : Disable USB Selective Suspend
Step 1. Launch RUN box (Win + R) and type Control.
Step 2. Click on the OK button.
Step 3. Click on Hardware and Sound > Power Options.
Step 4. In the left panel, click on Change When The Computer Sleeps.
Step 5. Click on Change Advanced Power Settings.
Step 6. Click on USB Settings > USB selective suspend setting.
Step 7. Change it to Disabled.
Read Also : USB Selective Suspend – What is It and How to Enable and Disable It
Fix 11 : Use PowerShell Tool To Reset Power Scheme
Step 1. Press Win + X to open Power menu.
Step 2. Click on Terminal Admin.
Step 3. Copy and paste the following command followed by Enter.
powershellCopyEditpowercfg -restoredefaultschemes
Fix 12 : Reset Windows
The final steps to fix this issue are to reset your Windows. We recommend that you take a backup of your files before attempting the following steps.
Step 1. Open Start menu and search for ‘Reset this PC.’ Then, select the appropriate option from the search results.

Step 2. Click on “Reset PC.”
Step 3. Select “Keep my files.”
Step 4. Follow the on-screen instructions to start the reset process for your Windows computer.
Conclusion On Computer Freezes After Waking Up From Sleep
We hope that the above steps have helped to resolve the issue. Do write to us in the comments section below about your experience and which method helped you resolve the issue.
Recommended :