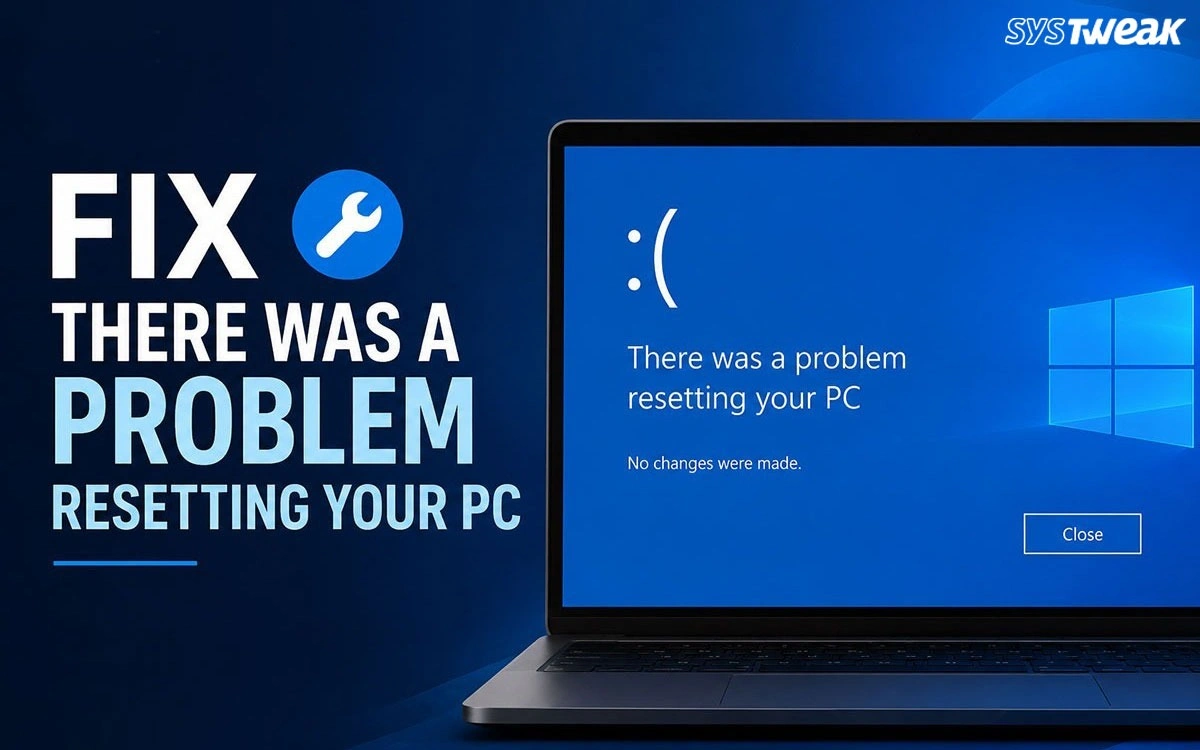

You decided to reset your pc as it had a problem that needed fixing. In response, windows gave an error: “There was a problem resetting your PC. No changes were made.” Therefore, your pc has returned to the same state you were attempting to get away from, which means you are now looking for a solution to fix the fix.
This error means Windows could not complete the reset process,for both Windows 10 and Windows 11 and the reasons are the same for both.As a general rule, the most common issue is corruption, disabling, or inability to read the needed files from the Windows Recovery Environment (WinRE). Fortunately, there are usually ways to solve these issues without losing any of your personal files.
What Causes this Error
The “There was a problem resetting your PC” error on Windows 10 and Windows 11 is generally due to one of these:
- System files used by the reset process are either corrupted or missing.
- Windows Recovery Environment (WinRe) has been damaged or disabled.
- There isn’t free space available on c drive for the reset to unpack and reinstall files.
- A third party Antivirus or security software locked system files while trying to do a reset.
- The last reset attempt was interrupted (power outage/shutdown) which put windows into an unstable state.
- The recovery partition is either missing or too small.
- Malicious code/virus damage to Windows Recovery components.
Fix 1: Run SFC and DISM
Requires: Ability to boot into Windows
System File Checker (SFC) scans for and repairs corrupted system files of Windows. DISM fixes the Windows image itself if SFC can’t fix things by itself. Run both in sequence; this usually fixes the majority of cases that fail because of system file corruption.
On both Windows 10 and Windows 11:
1. Press Windows key and type “Command Prompt” in the search bar.
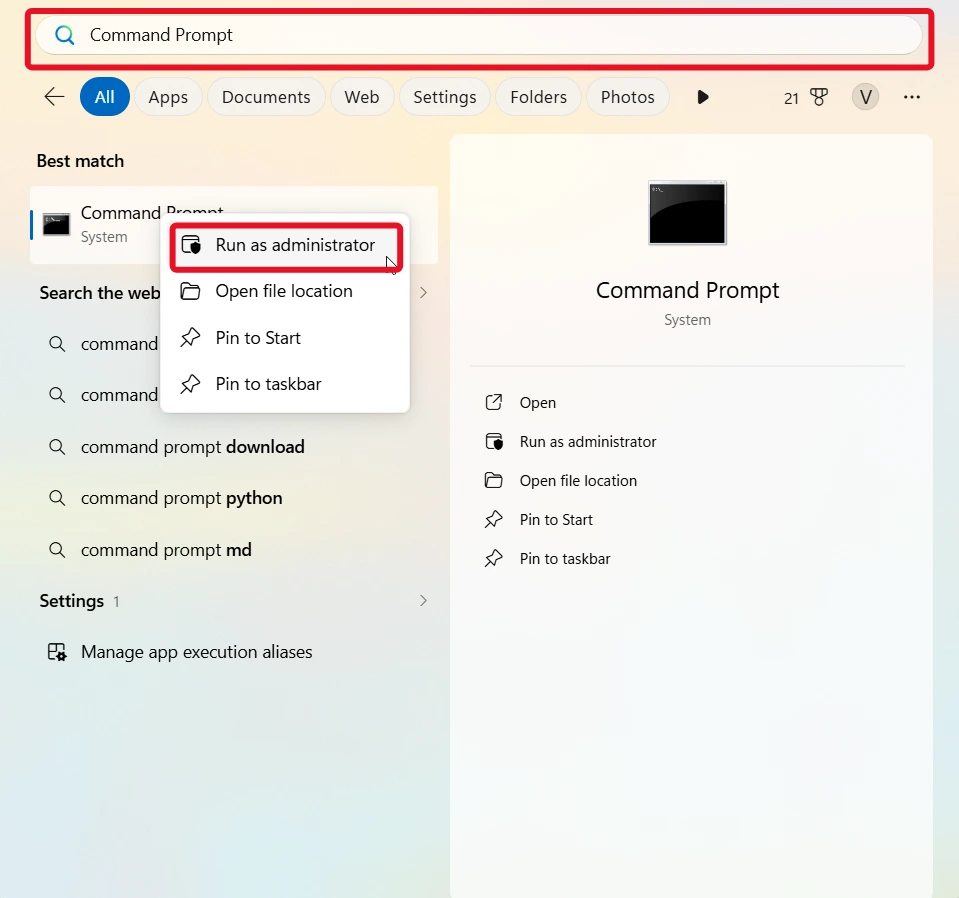
2. Right-click it and select “Run as administrator”.
3. Type the following “sfc /scannow” and press Enter. Let it run and show “Verification 100% complete”.
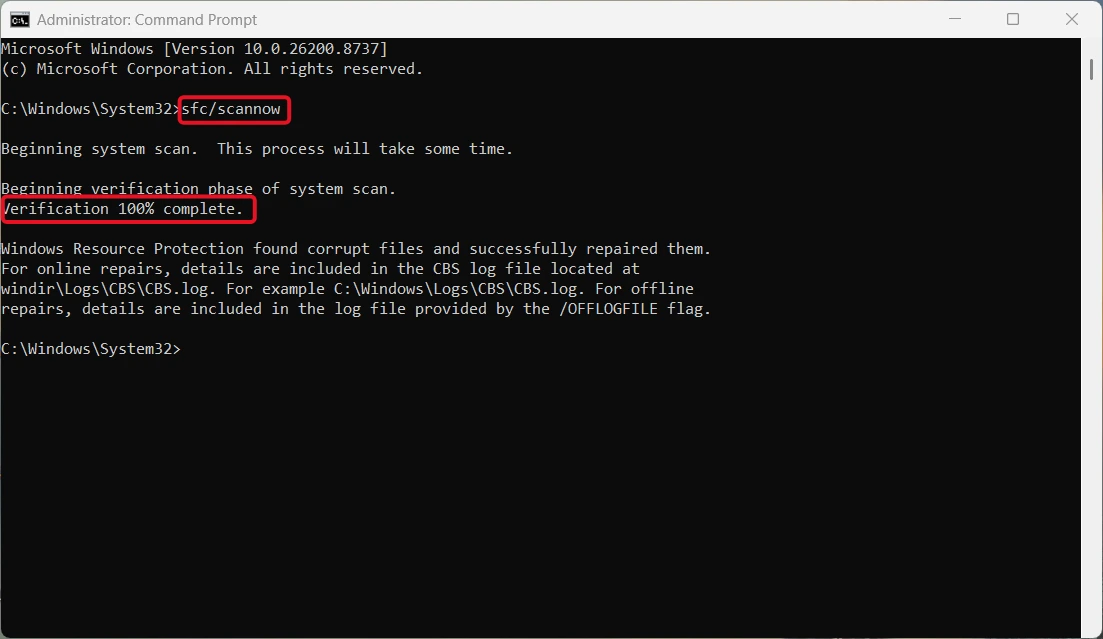
4. Once SFC finishes, run: “DISM /Online /Cleanup-Image /RestoreHealth”.

5. Restart your PC when DISM completes.
6. Try resetting again.
Fix 2: Check and repair WinRE using REAgentC
Requires: Ability to boot into Windows
The Windows Recovery Environment (WinRE), which performs your actual “Reset” when you click on “Reset this PC,” will fail to perform your reset right away if WinRE has been disabled or points to a missing file. This is one of the best fixes for this specific error and one that many guides miss.
1. Open Command Prompt as administrator (as instructed above) .
2. Check whether WinRE is currently enabled by typing “reagentc /info”.
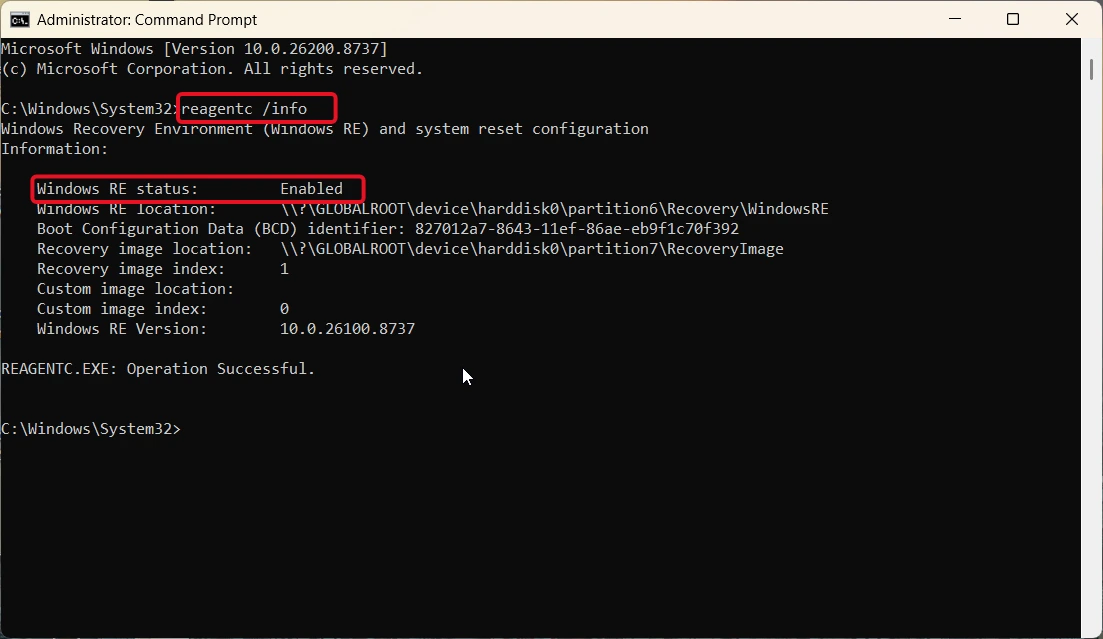
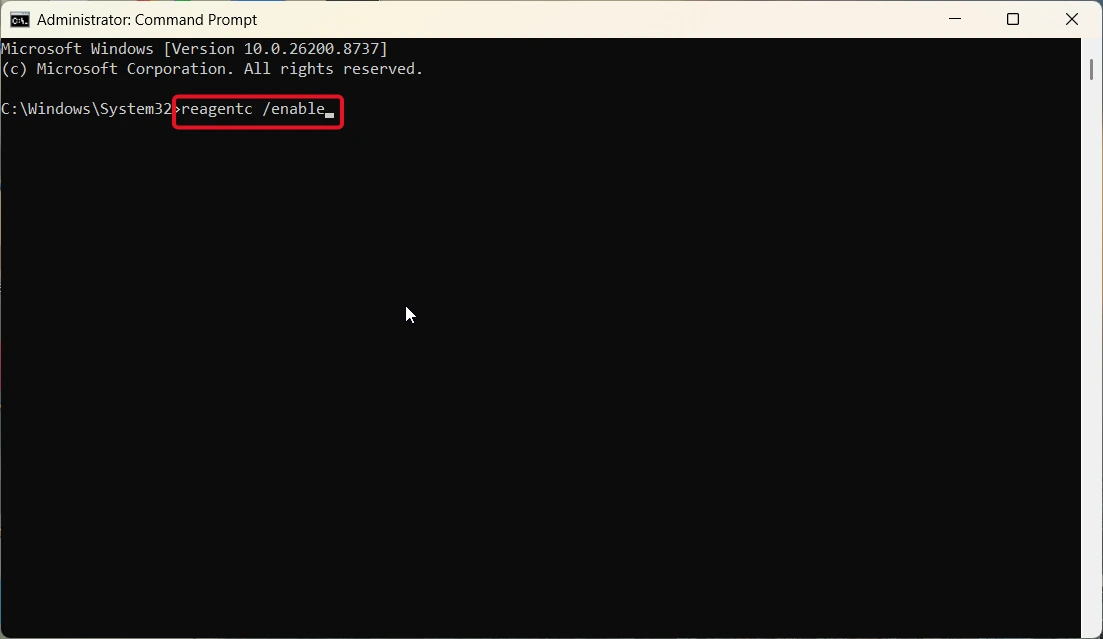
3. If the output says Windows RE status: Disabled, re-enable it by typing “reagentc /enable” and press enter.
4. If you get an error, try disabling first then re-enabling it by typing “reagentc /disable” and then typing “then: “reagentc /enable”.
5. Restart and try the reset again.
These commands works for both Windows 10 and Windows 11.
Fix 3: Use Cloud Download instead of local reinstall
Requires: Ability to boot into Windows and a stable internet connection
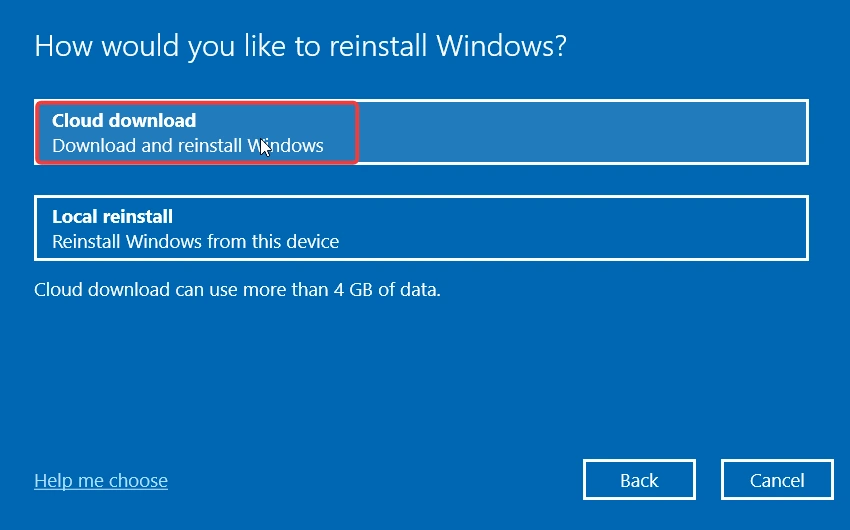
When you reset your computer, you have two ways to install windows again. First way is a local reinstall of windows. This will use all files on your computer to reinstall windows. Second way is cloud download. The cloud download option uses microsoft’s servers to download a new version of windows for you.
If your local files are corrupted, using the local reinstall option will give you an error. Using the cloud download option bypasses the local file issue completely.
To perform either method, follow these steps:
For Windows 10
1. Go to settings > update & security > recovery.
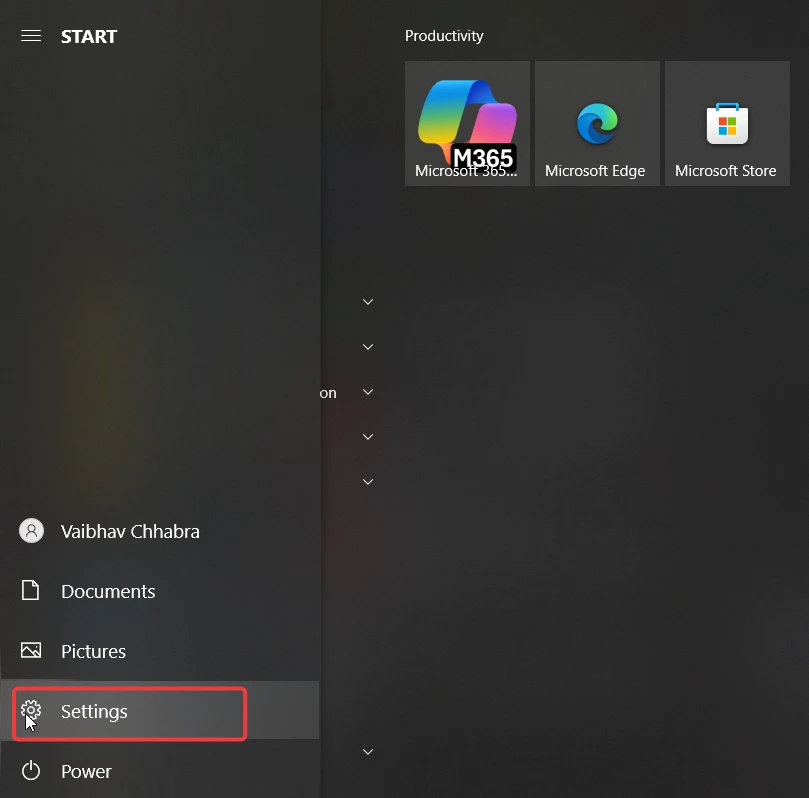

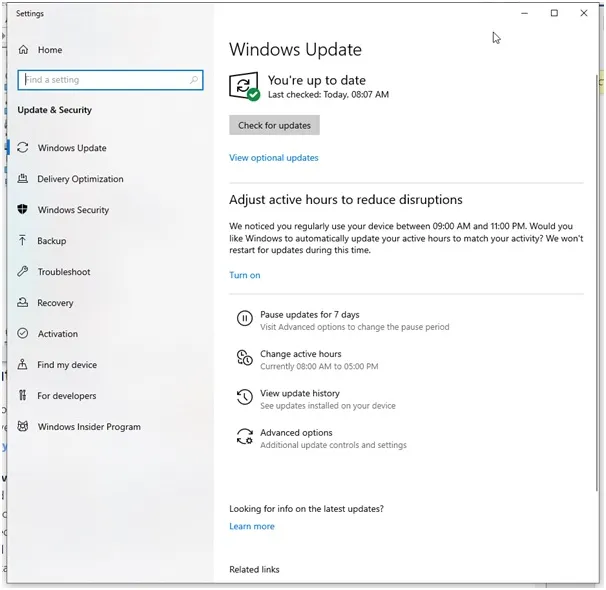
2. Click “Get started” under “Reset this PC”.

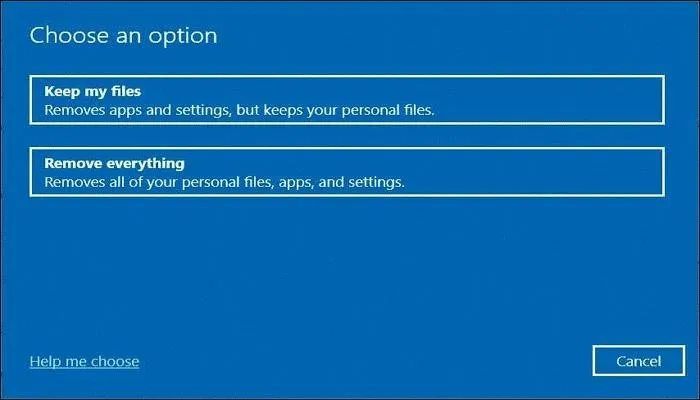
3. Choose Keep my files or Remove everything.
4. Select cloud download at the time you’re asked “how would you like to reinstall Windows?”
Windows 11:
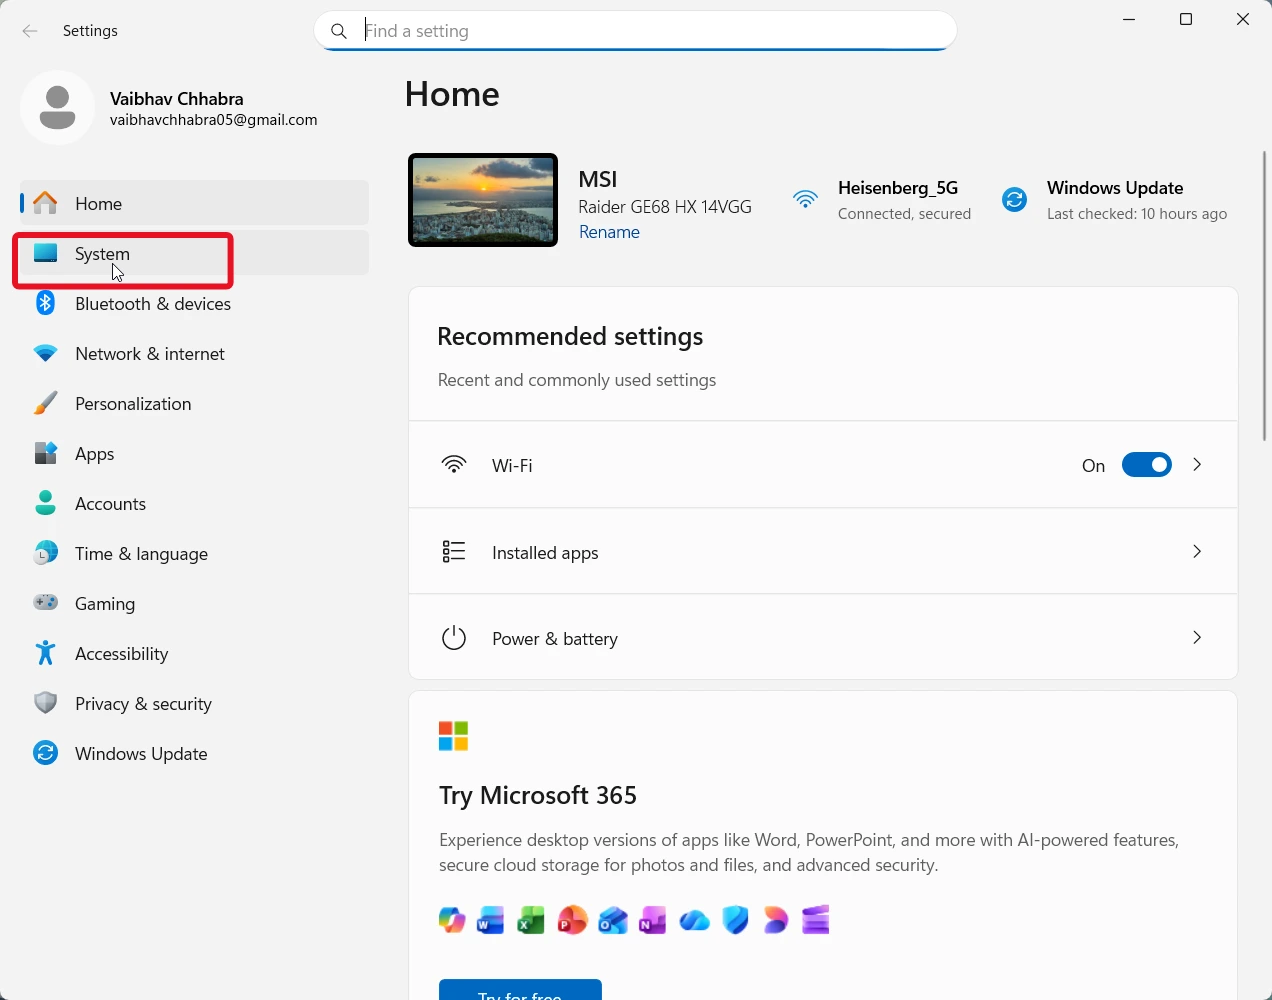
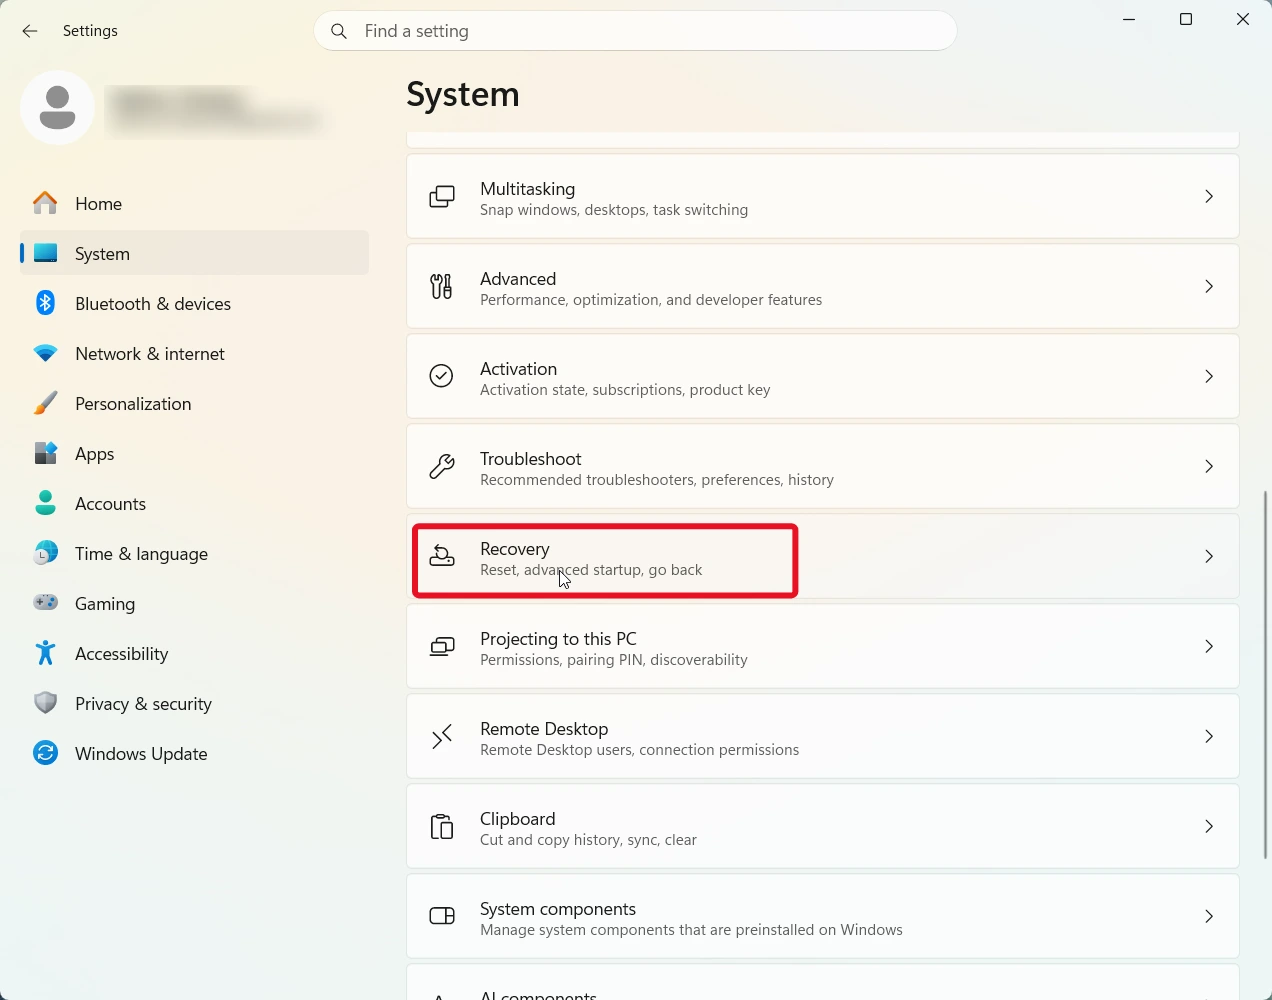
1. Go to Settings > System > Recovery.
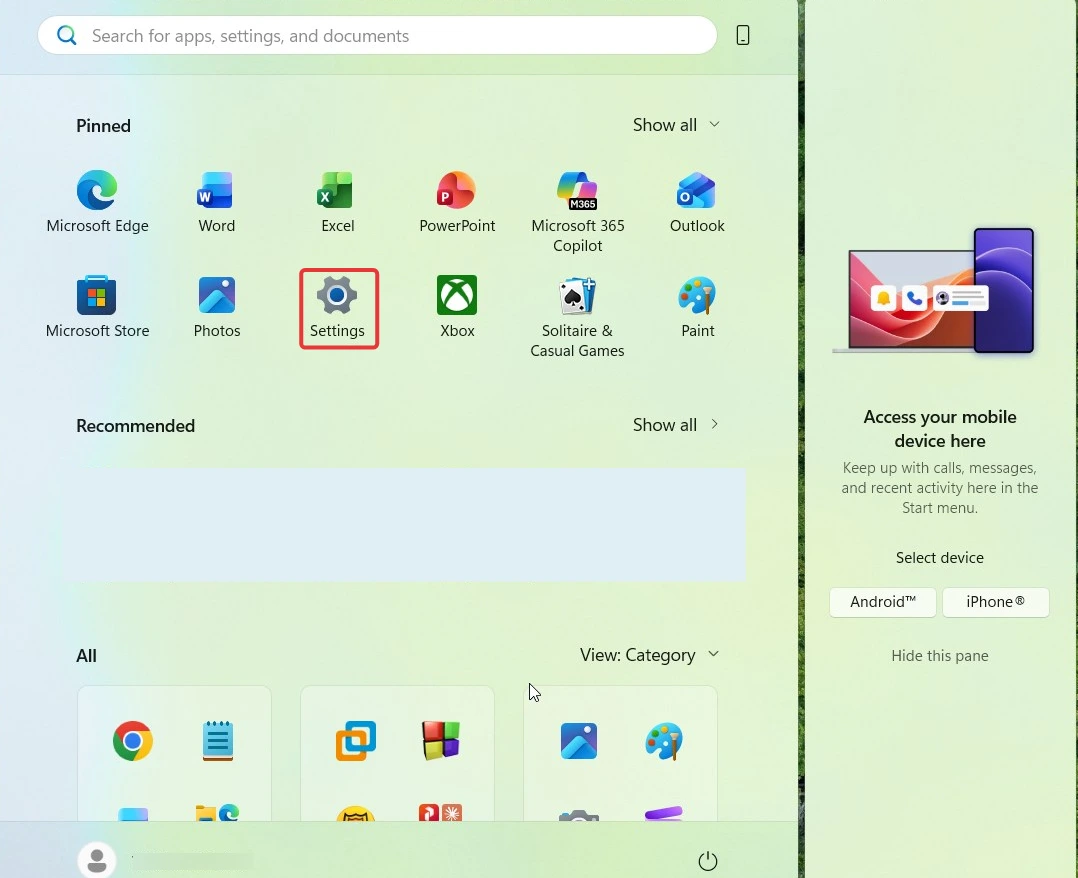
2. Click “Reset PC”.
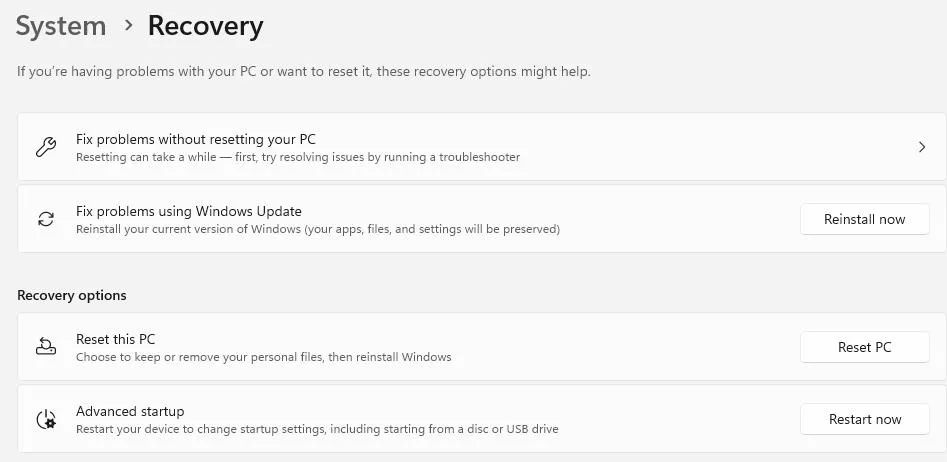
3. Choose Keep my files or Remove everything.
4. Select cloud download.
Make sure your PC is plugged in and connected to the stable internet connection.
Fix 4: Try System Restore
Requires: A previously created restore point and ability to boot into Windows.
If you got this error message right after a windows update, application installation, or driver installation, System Restore can roll your system back to a point where resets worked correctly and get things working again with all of your personal data intact.
On both Windows 10 and Windows 11:
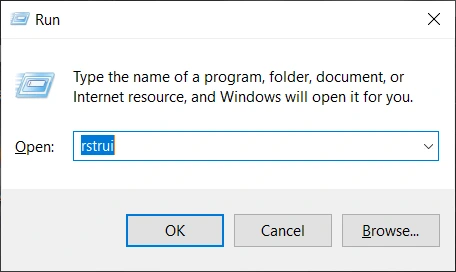
1. Press Windows key + R, type “rstrui” and press Enter.
2. Click Next on the System Restore wizard.

3. Select the earliest restore point before errors begin occurring.
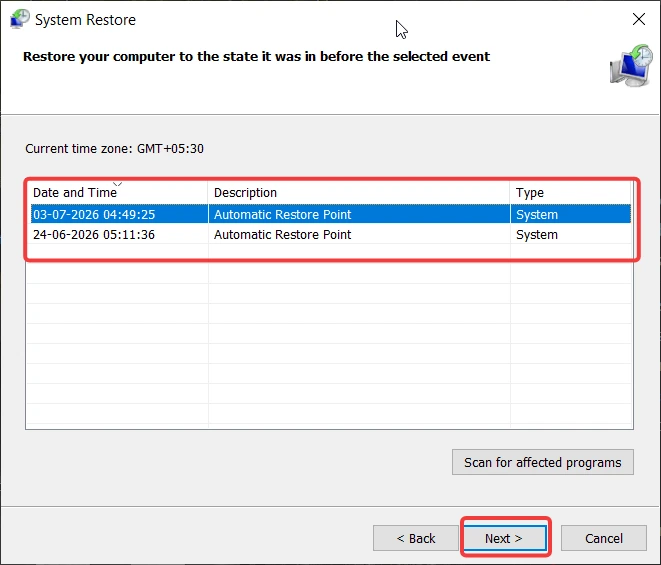
4. Click Next, then Finish.
5. Your computer will restart and roll back to the selected point.
Fix 5: Run Startup Repair from Advanced startup
It works whether you can boot or not
Startup repair is used for fixing problems with Windows boot and recovery components.
If you can boot into Windows:
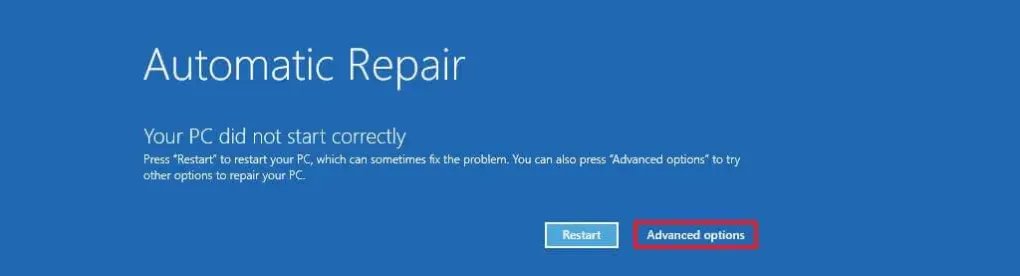
Hold the Shift key and click the Power icon in the Start menu, then select Restart. Your PC will boot into the Advanced startup menu.
If you are unable to boot into windows:
Force restart your PC three times in a row by pressing the Power button to interrupt each boot before Windows loads. Windows will open the recovery screen automatically on the third attempt.
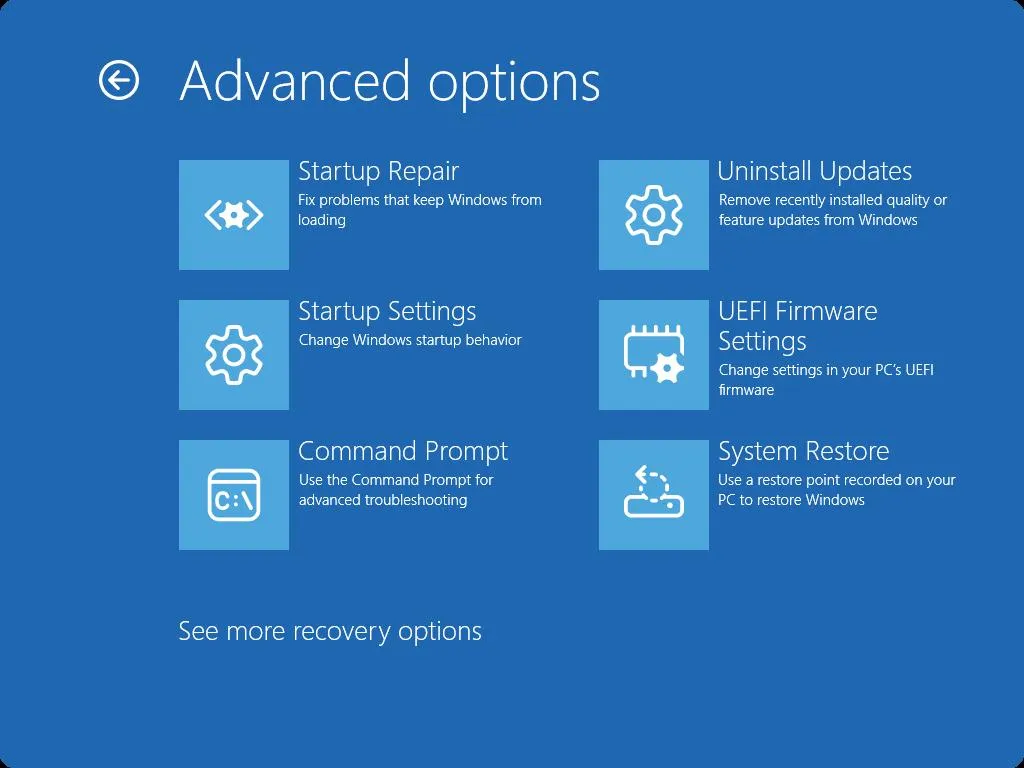
Advanced startup options (Same on Windows 10 Windows 11) :
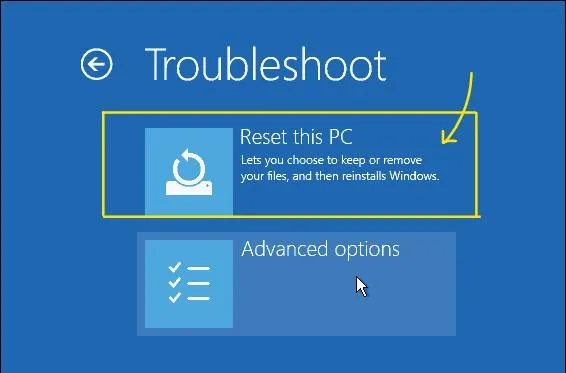
1. From the advanced startup menu go to troubleshoot > advanced options > startup repair.
2. If prompted, select your user name and type in your password.
3. Press continue and allow Startup Repair to finish its process.
4. Once finished, restart your computer and test the reset again
Fix 6: Reset Directly From the Windows Recovery Environment
Works whether you can boot or not .
Triggering the reset from inside WinRE rather than from Settings sometimes succeeds when the Settings route fails.
To access WinRE:
1. If you can boot: Hold Shift and click Restart from the Start menu.
2. If you cannot boot: Interrupt startup three times to reach the recovery screen automatically.
From the recovery menu (same on Windows 10 and Windows 11):
1. Go to Troubleshoot > Reset this PC
2. Choose which type of Reset that you want to do (Keep My Files OR Remove Everything).
3. When prompted, choose Cloud Download in order to download the necessary files .
4. Follow all Prompts.
Fix 7: Use Windows Installation Media – Last Resort
Works whether you can boot or not.
If you’ve tried all of the fixes and they didn’t work for you, then your Windows installation is likely beyond repair via its own repair mechanism. The best course of action is to perform a clean installation of windows by using Microsoft’s Media Creation Tool which will rebuild windows completely. Make sure to backup all of your personal files to an external hard drive prior to proceeding as this method will remove everything on your computer.
Step 1. Prepare the Bootable Installation Disk (from another working pc).
For Windows 11: Go to microsoft.com/en-us/software-download/windows11 and download the Media Creation Tool.
For Windows 10: Go to microsoft.com/en-us/software-download/windows10 and download the Media Creation Tool.
Run the tool and select “Create installation media for another PC”.Use a USB drive with at least 8 GB of space.
Step 2: Boot using the USB on the affected computer.
1. Insert the usb drive and reboot the computer.
2. Press the boot menu key (usually F12, F2, Esc, or Delete — check your PC brand for the exact key) and select the USB drive.
3. Select “Install Now.” If asked for a product key, click “I Don’t Have A Product Key” – windows should be able to auto-activate if your PC has been previously activated.
4. Select Home or Professional based upon which version of windows you previously used.
5. You can either select “Custom” install to completely wipe all existing programs, files and settings, OR attempt to use the repair option in order to fix whatever issues you were having without losing everything.
Frequently Asked Questions
The bottom line
On both Windows 10 & Windows 11 you should start with “Fix 1” (SFC+DISM). As SFC+DISM checks for Corrupted System Files which is one of the most common causes of this error. If SFC+DISM does not resolve your issue, then move straight away to “Fix 2” (REAgentC Check), as ReagentC Check will identify if WinRE has been Disabled. Since Disabled WinRE is the specific technical reason why you are seeing this error message. A disabled WinRE is a targeted two-minute fix and most guides do not include this fix. If local files are the problem, then moving directly to the “Cloud Download” option in Fix 3 will eliminate local files from being an Issue. Only move to “Fix 7” if all other fixes have been attempted and they failed.